This guide includes the following main sections:
This overview includes “What FX Builder Does,” “How to Use It: A Visual Overview,” and “Help Conventions.”
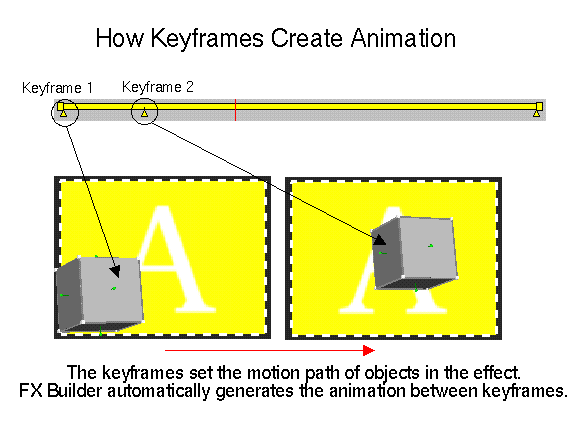
FX Builder is plug-in tool that you can use to edit and build 3D filters and transitions for desktop movie production (see also “Filters and Transitions Explained”). The effects you create or edit can be saved as your own custom transitions or filters or immediately applied to the movie you are currently working on. To create these filters or transitions you can animate 3D objects, and also texture them with movies or images.
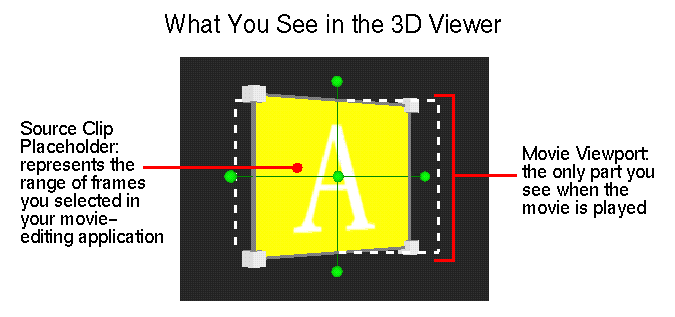
Filters are effects that can be applied to a single video clip. A spinning logo in the corner a screen is an example of a filter. To create a filter with the FX Builder plug-in, you work with one or more of the source “A” clip placeholders, shown in Figure 1-1.
Transitions are effects for progressing from one scene to another. By default, FX Builder displays a basic “cut” transition, but you can alter this transition and add 3D animation. To create a transition with FX Builder, you work with one or more of each clip placeholder (source “A” and source “B”).
| Note: Movie Maker does not, as of this writing, support transitions. It does support filters. |
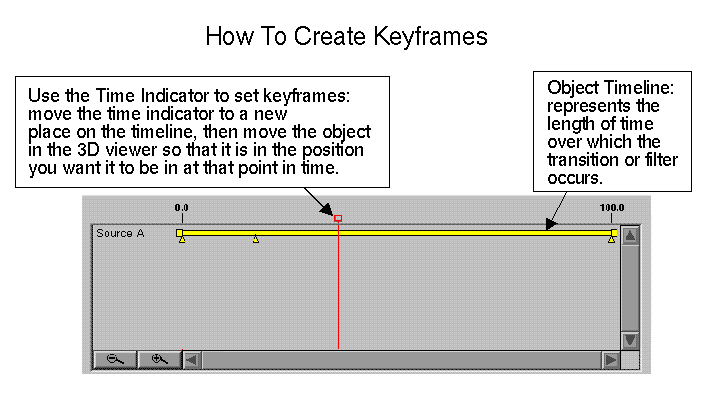
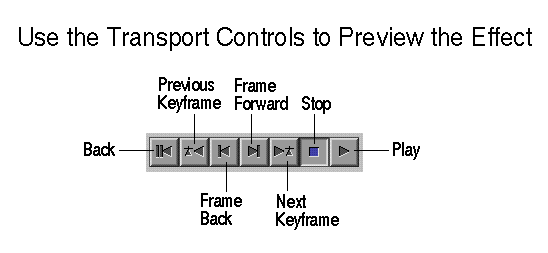
The following four images offer a visual overview for the impatient. Click any image to display an enlarged view of the image in a separate window.
This document follows these conventions:
Click underlined words to bring up the definition of the term. For example, click: frame rate.
Red words indicate “launch links,” meaning that if you click them, they launch the tool that they name, for example: Movie Maker.
The symbol “>” between a menu names menu items indicates a path to a menu choice. For example, “File > Open” means “Open the File menu and choose Open”; “Network > Control > Stop” means “Open the Network menu, select Control and then choose Stop from the Control rollover menu.”


