The following sections detail all xfsm dialogs except the Create File System dialog, which is described in “Create File System Dialog”. The following dialogs are covered:
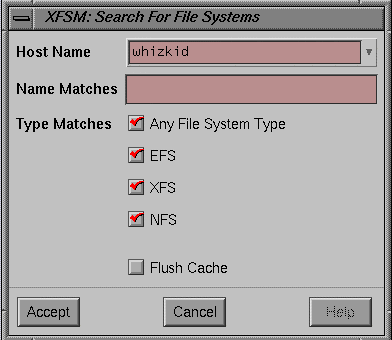
The Search For File Systems dialog allows you to select the host system for the display area and the types of filesystems that are displayed. The filesystems of the types selected on the host you select are displayed in the display area. The dialog is similar to that shown in Figure 3-10:
There is a pulldown menu called the Host List that is activated by clicking the arrow button to the right of the Host Name field. By default, the Host List section of the window lists all hosts in the /etc/hosts database of the system that launched this instance of xfsm. You can select an alternate host list by setting the X11 resource hostsFile to point to an alternate file that contains entries of the same format as the /etc/hosts file. An alternate host list is a useful feature if you have a long /etc/hosts file and only a few systems running the XFS Manager software. You can set this resource with any of the following actions:
Specify the resource on the command line. For example:
xfsm -xrm “*hostsFile: /usr/tmp/my_hosts_file”
Place the following entry in your ~/.Xdefaults file:
Xfsm*hostsFile: /usr/tmp/my_hosts_file
Create a personal resource file in your home directory. For xfsm, the file should be called Xfsm, and it should contain the line:
*hostsFile: /usr/tmp/my_hosts_file
When you see the host list in the dialog window, you can use the slider on the right to scroll through the list. The Selection field allows you to enter the name of the desired host, or you can fill the field by clicking on a host name from the Host List.
At the bottom of the window are three buttons:
| OK | This button selects the host in the Selection field. | |
| Cancel | This button dismisses the window without selecting a new host. | |
| Help | This button displays this help topic. |
The following fields and buttons are used:
| Host Name | This is a text entry field for you to enter the selected hostname, and a button with a down arrow immediately to the right of the text entry field. If you click the down-arrow button, you see a list that contains an entry for each host found in the /etc/hosts file on the system on which the xfsm application was launched. To select a host, you may either click on an item from the host list or directly type in the name of a host. | |
| Name Matches |
| |
| Type Matches | This is a group of toggle buttons allowing you to specify which type(s) of objects are to be displayed in the main window icon panel.
| |
| Flush Cache | When a search for filesystems is executed on a given host, all filesystems are retrieved and placed in a cache. Subsequent searches on that host use the cache rather than requesting a new list of objects from the host. If this toggle button is selected, the cache is emptied and a new list is retrieved from the host. |
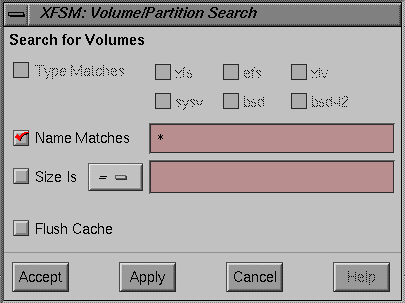
The Volume/Partition Search dialog allows you to search for partitions or logical volumes on the selected host. You may specialize your search through a glob regular expression. For more information on glob expressions, see the glob reference page. The Volume/Partition Search Dialog is shown in Figure 3-11:
At the bottom of the dialog are four buttons:
| Accept | Collects the search criteria from the dialog, executes the search, and dismisses the dialog. | |
| Apply | Collects the search criteria from the dialog and executes the search, leaving the dialog on-screen. | |
| Cancel | Dismisses the dialog without conducting any search. All information in the dialog is discarded. | |
| Help | Displays this help topic. |
The following fields are used. If no criteria are selected, the Accept and Apply buttons are greyed-out and not usable:
| Type Matches | This group of toggle buttons is available only during a partition search. These buttons allow you to specify which type(s) of partitions are to be returned from the search. If the Type Matches toggle button is not selected, all partition types are matched. | |
| Name Matches | This field is a toggle button and text field in which to enter a glob expression to use as a search pattern for logical volumes or partitions. Only those volume or partition names matching the pattern are returned from the search. If the Name Matches toggle button is not selected, all volume or partition names are matched. For more information on glob expressions, see the glob reference page. | |
| Size is | This button allows you to limit the volumes or partitions returned from the search by using the size of the volume or partition as a search factor. The size is always interpreted in megabytes. The following options are available from the selection button to the right of the Size is button:
Enter the size, in megabytes, of the partitions or volumes you wish to search for in the text field to the right of this button. | |
| Flush Cache | When a search is executed on a given host, all volumes or partitions on the host are retrieved and placed in a cache. Subsequent searches on that host use the cache rather than requesting a new list of volumes or partitions from that host. If this toggle button is selected, the cache is discarded and a new list is retrieved from the host. |
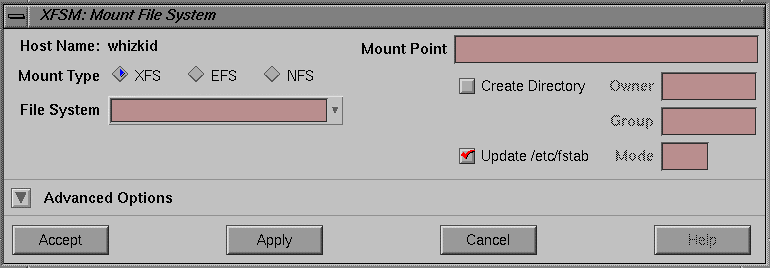
The Mount dialog appears when you select the “ Mount” option from the Selected menu. This dialog is used to set up mount instructions to place a filesystem in your directory hierarchy. The Mount dialog is shown in Figure 3-12:
At the bottom of the dialog are four buttons:
| Accept | Collects the parameters from the dialog, executes the mount operation, then dismisses the dialog. | |
| Apply | Collects the parameters from the dialog and executes the mount operation, leaving the dialog on-screen. | |
| Cancel | Dismisses the dialog without taking any action. All information in the dialog is discarded. | |
| Help | Displays this help topic. |
The following fields and buttons are used:
| Host Name | This label displays the name of the current host. | |
| Mount Type | This field is a set of three radio buttons that indicate the type of filesystem being mounted. The options are:
| |
| File System | This is a text field in which you enter the name of the filesystem to be mounted. If you click the down-arrow button on the right of the field, you see a list of unmounted filesystems. Clicking a name from this list places the filesystem name in the text field. Each item in the list has two fields. The first field indicates the filesystem name. The second field, which is in parentheses, is the mount point for that filesystem. If the mount point cannot be determined the field displays a dash (-). When a filesystem is chosen from this list, the Mount Point field is automatically filled in. | |
| Remote Host | If the NFS type of filesystem has been selected in the Mount Type field, a text field is added to specify the remote host from which the filesystem is mounted. If you click the button at the right of the text field, you see a list of known hosts. Clicking a host name in this list places the hostname in the text field. When a hostname is selected from the list, the application retrieves the list of exported filesystems from that host and puts them in the File System field. This field is visible only when the Mount Type is set to NFS. | |
| Mount Point | This is a text field in which to enter the mount point directory pathname and some buttons and text fields to specify mounting instructions for the new filesystem. See “Mount Point and Mount Information” for complete information on these buttons and fields. | |
| Update /etc/fstab |
|
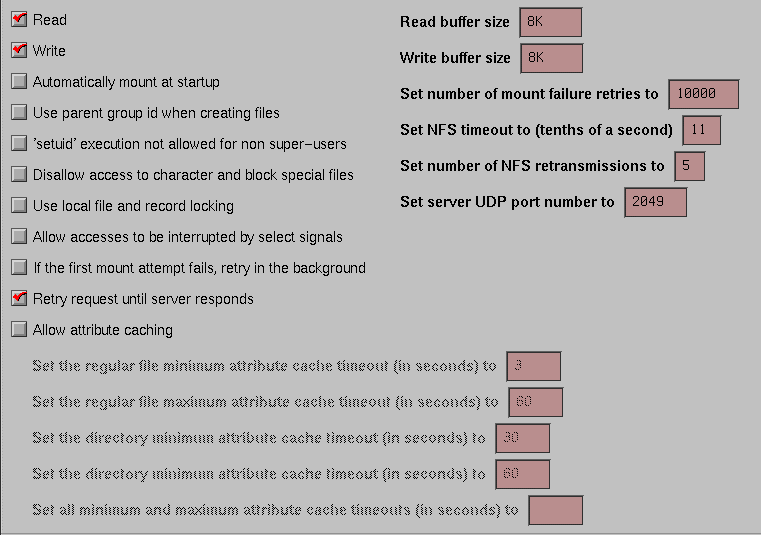
These options are the same as those found in the Desktop “NFS Mount Manager.” When you click the Advanced Options button of the Mount dialog, the following options are displayed, as shown in Figure 3-13:
The Mount dialog advanced options are:
| Read | This button indicates the filesystem is readable. | |
| Write | This button indicates the filesystem is writable. | |
| Automatically mount at startup |
| |
| Use parent group id when creating files |
| |
| 'setuid' execution not allowed for non super-users |
| |
| Disallow access to character and block special files |
| |
| Use local file and record locking |
| |
| Allow accesses to be interrupted by select signals |
| |
| If the first mount attempt fails, retry in the background |
| |
| Retry request until server responds |
| |
| Allow attribute caching |
| |
| Read Buffer Size |
| |
| Write Buffer Size |
| |
| Set number of mount fail retries to |
| |
| Set NFS timeout to (tenths of a second) |
| |
| Set number of NFS retransmissions to |
| |
| Set server UDP port number to |
|
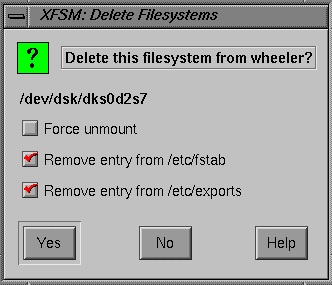
This dialog appears when you select the “ Remove” option from the Selected Menu. It allows you to remove filesystems from the current host. The dialog is shown in Figure 3-14:
The following buttons are used with the Delete Filesystems Dialog:
| Yes | Deletes the selected filesystems and dismisses the dialog. | |
| No | No action is taken and the dialog is dismissed. | |
| Help | Displays this help topic. |
The following fields are used:
| Filesystem name |
| |
| Force unmount |
| |
| Remove entry from /etc/fstab |
| |
| Remove entry from /etc/exports |
|
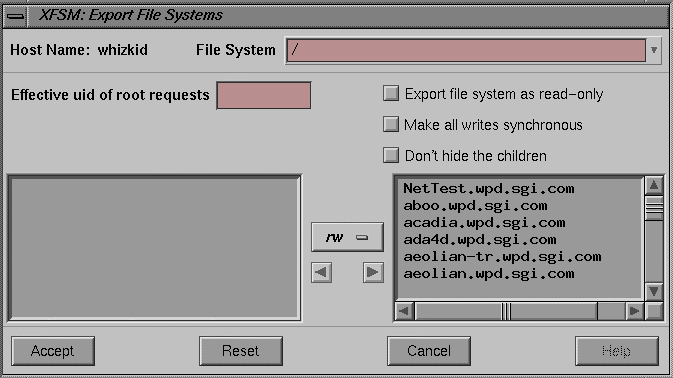
The Export Filesystems dialog appears when you select the “ Export” option from the Selected menu. It allows you to set the export options for a filesystem and then export the filesystem. The dialog window is shown in Figure 3-15:
The following buttons are used:
| Accept | Collects the information from the dialog, exports the filesystem, and dismisses the dialog. | |
| Reset | Restores the values in the dialog to the last committed values for the given filesystem. | |
| Cancel | No action is taken and the dialog is dismissed. | |
| Help | Displays this help topic. |
This dialog includes all the fields in the Advanced Options: Export panel of the Create File System dialog. For a discussion of those fields, see “Export Advanced Options” (page 45). This dialog has the following additional fields:
| Host Name | This is a label that displays the name of the currently selected host. | |
| File System | This is a text field in which you enter the name of the filesystem to be exported. If you click on the button on the right of the field, you see a list of unexported filesystems. Clicking a name from this list places the filesystem name in the text field. |
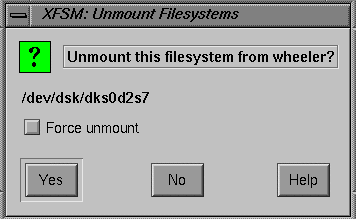
The Unmount Filesystems dialog appears when you select the “ Unmount” option from the Selected menu. It allows you to unmount a selected filesystem from the host system's directory hierarchy. The Unmount Filesystems dialog is shown in Figure 3-16:
The following buttons are provided at the bottom of the dialog for basic operations.
| Yes | Unmounts the selected filesystem or systems and dismisses the dialog. | |
| No | No action is taken and the dialog is dismissed. | |
| Help | Displays this help topic. |
The following fields are used:
| Filesystem name |
| |
| Force unmount |
|
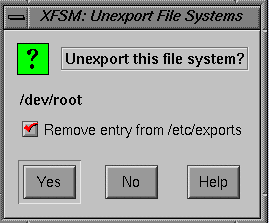
The Unexport Filesystems dialog appears when you select the “ Unexport” option from the Selected menu. This dialog appears in two different formats, depending on the state of the icon panel. The standard version of the dialog appears if one or more filesystems are selected in the icon panel. If no filesystems are selected in the icon panel, the alternate dialog appears. The reason for the difference is that directories can be exported as well as whole filesystems, but exported directories have no icon that you can select in the icon panel. This dialog allows you to unexport directories as well as filesystems.
If you have a filesystem or systems selected in the xfsm icon panel and you choose the “ Unexport” option from the Selected menu, you see the dialog shown in Figure 3-17:
The following buttons are provided along the bottom of the dialog for basic operations:
| Yes | Unexports the selected filesystem or systems and dismisses the dialog. | |
| No | No action is taken and the dialog is dismissed. | |
| Help | Displays this help topic. |
The following fields are used:
| Filesystem name |
| |
| Remove entry from /etc/exports |
|
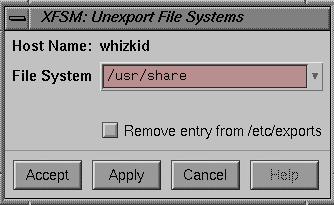
If you have no filesystem selected in the xfsm icon panel and you choose the “ Unexport” option from the Selected menu, you see the dialog shown in Figure 3-18:
The following buttons are provided along the bottom of the dialog for basic operations.
| Accept | Collects the information from the dialog, executes the unexport, and dismisses the dialog. | |
| Apply | Collects the information from the dialog and executes the unexport, leaving the dialog window on-screen. | |
| Cancel | Dismisses the dialog. No action is taken. | |
| Help | Displays this help topic |
The following fields are used:
| Host Name | This label displays the name of the current host. | |
| Filesystem | This is a text field in which you enter the pathname of the directory on the current host to be unexported. If you click on the button on the right of the field, you see a list of exported directories and filesystems. Clicking a name from this list places the name in the text field. | |
| Remove entry from /etc/exports |
|
The File System Information dialog appears when you select the “ Get Info” option from the Selected menu. This dialog displays pertinent information about the selected filesystem or systems. A sample dialog is shown in Figure 3-19:
The following items are displayed:
| Mount Point | The directory where the filesystem is mounted | |
| File System | The pathname of the filesystem device special file. | |
| Type | The type of filesystem. | |
| Mount Options |
| |
| Fsck Pass | The pass number used during parallel fsck(1M) execution. | |
| Dump Freq The dump frequency (in days) for backup purposes. |
