This chapter describes the covers, doors, and other cosmetic features of the Origin200 server:
The Origin200 provides two mechanisms to physically lock the system:
Both of these mechanisms are designed to provide enough security for your system that, if it is locked, the only way to remove components from the server, or to move it, is to destroy some part of the server.
| Note: This applies only to CPU modules. The door of the GIGAchannel expansion cabinet does not open. |
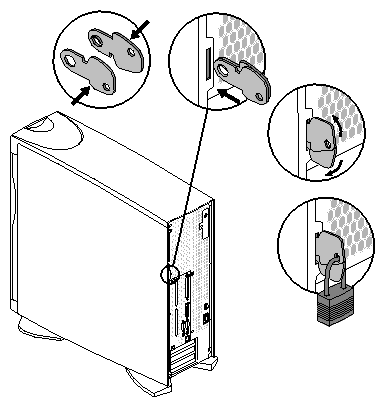
To lock the front door, follow these steps:
Insert one of the keys (provided with the system) into the lock on the front door.
Turn it a quarter turn (9 -degrees) to the right (clockwise).
Remove the key.
To lock the chassis, use the two metal tabs that are provided with the system. Figure 5-1 provides an overview of the process.
Follow these steps to lock the chassis (refer to Figure 5-1).
Place the two locking tabs together, flat, so that the pivot points join.
Insert the two tabs into the tab slot at the rear of the chassis.
Spread tabs apart in a scissor-like fashion so that the two exposed holes in the tabs align.
Insert a lock, cable, or other device through the holes in the tabs.
Both the front and rear feet on an Origin200 server and GIGAchannel expansion chassis in a tower configuration can be swiveled in or out. See Figure 5-2.
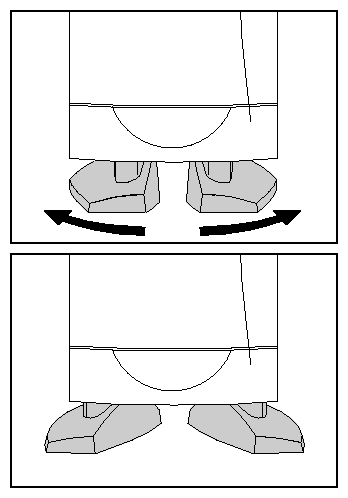
To adjust the feet:
Raise the system slightly, or tilt it to one side.
Rotate the feet inward or outward, as desired.
The front of the GIGAchannel expansion chassis has a grill that resembles the Origin200 CPU module door for cosmetic purposes. This grill does not open, nor should you attempt to force it open because that would break the plastic bezel. See Figure 5-3.
The front door of an Origin200 CPU module has several features:
In a tower configuration, the door is designed to release from its hinges if it is struck while open or otherwise forced too far open.
In a rackmount configuration, an additional spring-steel catch, called the door assist tab, holds the door in place when it is open.
In both rackmount and tower configurations, the door can be removed and reattached easily without tools.
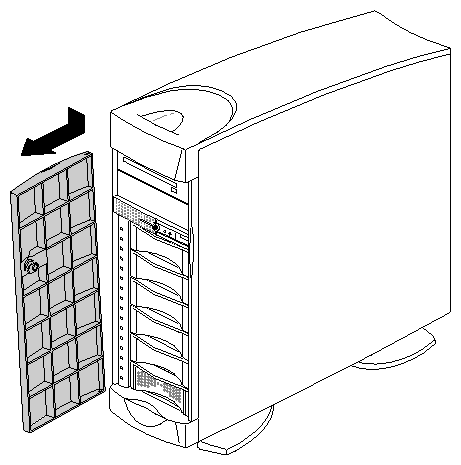
To remove the front door in a tower configuration, press down on the top of the door and pull outward, as shown in Figure 5-4.
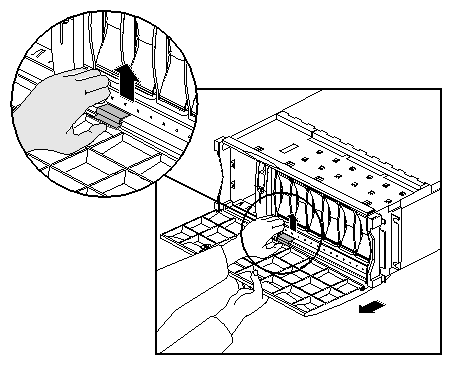
To remove the front door in a rackmount configuration, follow these steps:
Lift the door assist tab (catch), as shown in Figure 5-5.
Pull one side of the door off its hinge.
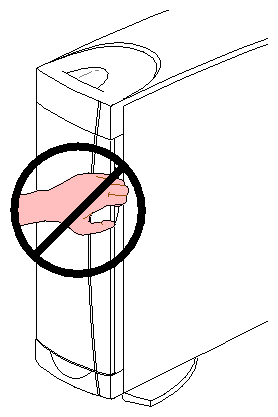
| Caution: Because of the weight of an Origin200 system, two people are required to lift and move the chassis. |
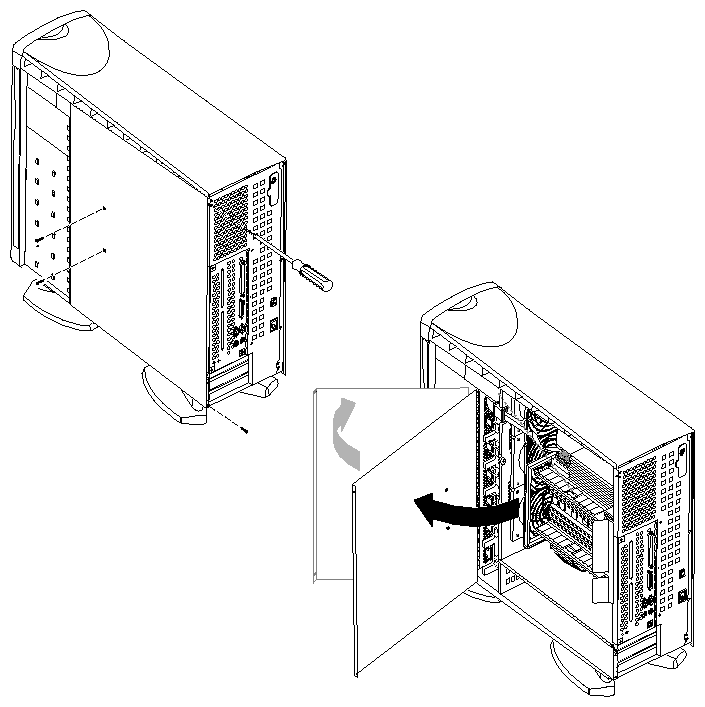
To remove the system cover and chassis access panel of an Origin200 CPU module or GIGAchannel expansion cabinet, follow these steps:
Power off the system. See “Turning Off the System”.
Remove the system cover, as shown in Figure 5-6.
Open the chassis access door, as shown in Figure 5-7.
Using a #2 Phillips screwdriver, remove the four screws that secure the door to the chassis (two at the rear of the door and two near the door hinge).
Swing the door out, away from the chassis.
Optional: You can remove the door by lifting it up slightly and away from the chassis. In some cases, it may be easier to service the Origin200 if you remove the chassis access door.

If desired, you can remove the feet, system cover, side panel, and most of the exterior plastic parts from an Origin200 server in a tower configuration. With the addition of rackmounting ears, you can then mount the server in a standard, 19-inch equipment rack.
A kit is available from SGI (P-S-RM-KIT) that converts a tower configuration to a rackmount configuration. This kit provides rackmounting ears, a rackmounting shelf, a door-assist tab, mounting screws, and cosmetic end-caps to cover the mounting screws. Contact SGI or your local service provider to obtain this kit.
The following sections describe how to remove various exterior parts of an Origin200 server in a tower configuration:
Before you remove exterior components, follow these steps:
Remove the front door; see “Removing the Front Door of an Origin200 CPU Module”.
Remove all drives from the system to make it easier to move and lift; see Chapter 6, “Installing and Configuring Peripherals.”
Remove the system cover and side panel. The side panel is removed in the same way as the system cover; see “Removing the System Cover and Chassis Access Door”. (Do not remove the chassis access door.)
Follow these steps to remove the feet, top cap, and lower bezel:
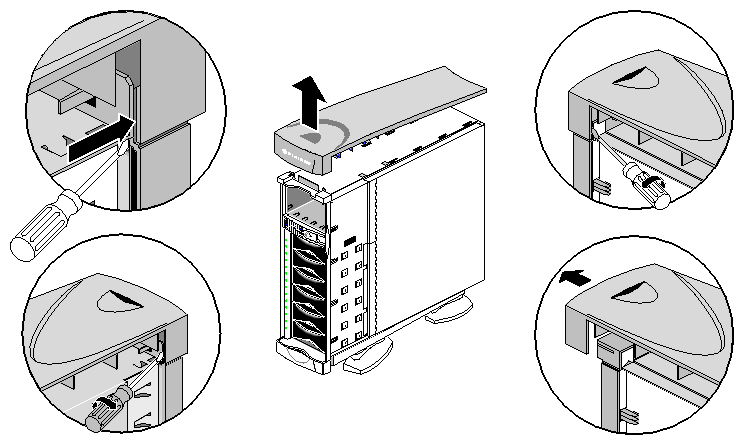
Remove the top cap, as shown in Figure 5-8.
Insert a flat-blade screwdriver between the top cap and sheet metal, as shown in Figure 5-8.
Twist the screwdriver while pulling the top cap forward. The top cap should move forward slightly as one side disengages from the sheet metal.
Repeat this step on the opposite side of the top cap, as shown in Figure 5-8.
When the second side of the top cap disengages from the sheet metal, pull the top cap forward, then lift it up and off of the chassis.
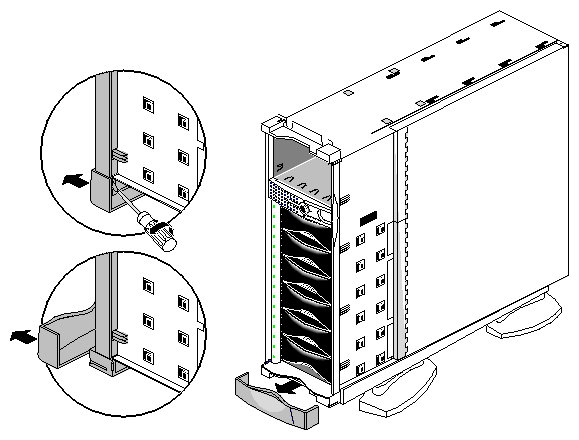
Remove the lower bezel.
Insert a flat-blade screwdriver between one side of the lower bezel and the sheet metal, as shown in Figure 5-9.
Twist the screwdriver to disengage the lower bezel from the sheet metal.
Pull off the lower bezel.
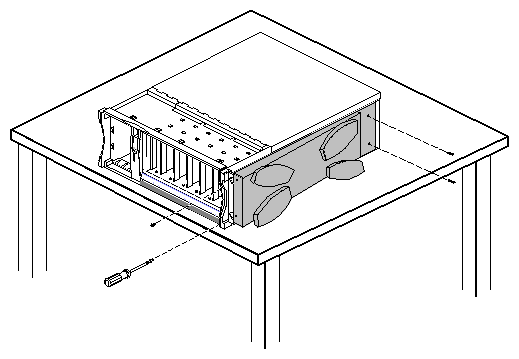
Remove the pedestal assembly (to which the feet are attached). See Figure 5-10.
Place the system on its side on a sturdy work surface capable of supporting at least 40 pounds (18 kg) and up to 75 pounds (34 kg). Be careful not to scratch or damage the front bezel.
Using a #2 Phillips screwdriver, remove the four screws that hold the pedestal assembly to the chassis and remove the pedestal assembly.