This chapter describes how to install PCI option boards in Origin200 and Origin200 GIGAchannel servers, and how to install XIO boards in an Origin200 GIGAchannel server. It also describes how to remove option boards from the respective chassis. This chapter contains the following sections:
“Installing a PCI Option Board in an Origin200 and Origin200 GIGAchannel CPU Module”
“Installing a PCI Option Board in a GIGAchannel Expansion Cabinet”
“Removing a PCI Option Board From an Origin200 or Origin200 GIGAchannel CPU Module”
“Removing a PCI Option Board From a GIGAchannel Expansion Cabinet”
“Installing an XIO Board in an Origin200 GIGAchannel Expansion Cabinet”
“Removing an XIO Board From a GIGAchannel Expansion Cabinet”
Option boards are sensitive to electrostatic discharge (ESD). Observe the following precautions when installing and removing memory:
Handle the boards by their edges only and do not touch the gold edge-connectors and components on the board.
Handle boards with care. Do not toss them roughly onto hard surfaces, such as tables or other equipment. Many boards have fragile, surface-mount components on their undersides; these components can break off with rough handling.
Do not leave the option boards loose inside the chassis while you work.
When you are not handling them for installation or removal, always keep the option boards in ESD containers, such as conductive bags or foam.
Save the ESD bags and containers in which the PCI option was shipped in case you need to remove the board from the system.
The following steps describe how to install a PCI option board in an Origin200 server. To install a PCI option in a GIGAchannel expansion cabinet, see “Installing a PCI Option Board in a GIGAchannel Expansion Cabinet”.
Prepare the system for servicing as described in Chapter 1, “Preparing the System for Servicing.”
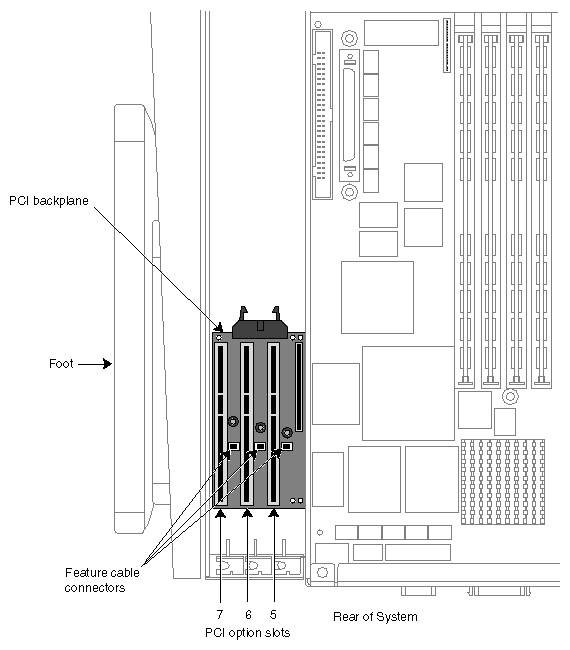
Locate an available PCI option slot. See Figure 2-1.
Although you can install a PCI board in any open slot, you may observe better I/O performance if you install boards starting in order with slot 5, particularly if the PCI board you are installing can perform prefetching.
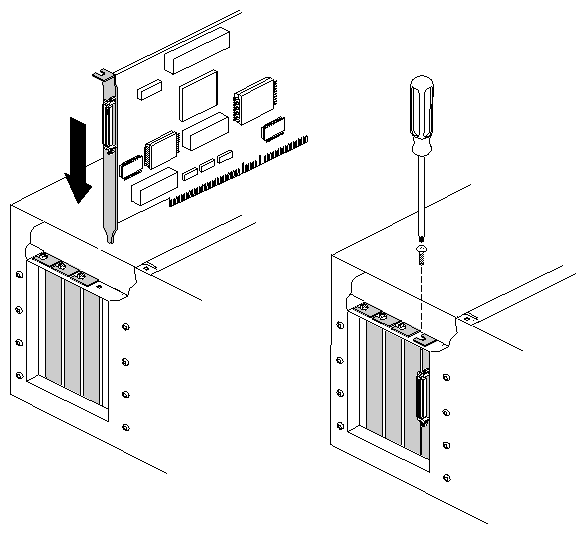
Remove the blanking plate from the slot.
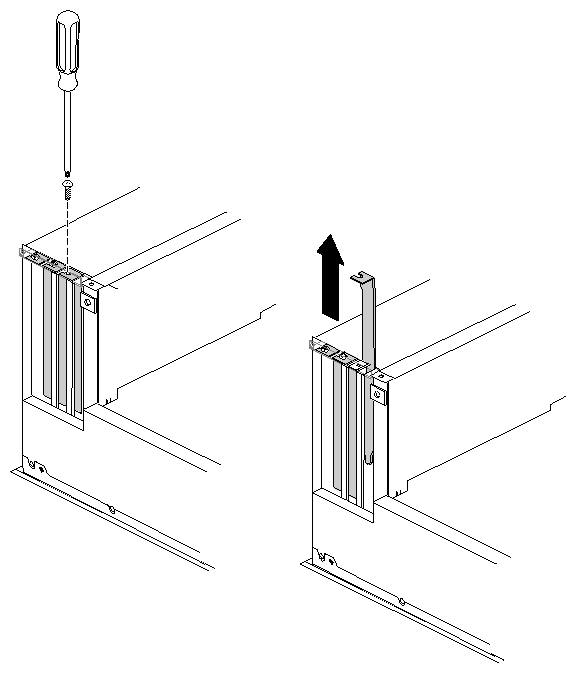
Using a #2 Phillips screwdriver, remove the single screw that secures the blanking plate to the chassis. See Figure 2-2.
Remove the blanking plate by lifting it straight up, as shown in Figure 2-2. Save the blanking plate it in case you have to remove this option in the future.
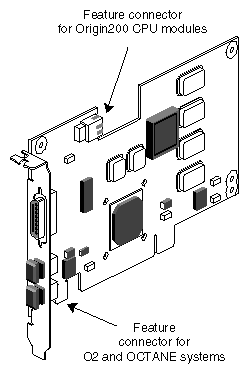
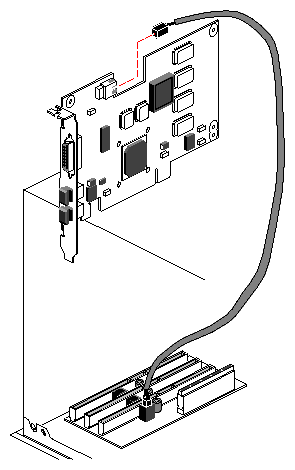
For PCI boards with feature connectors only. Some PCI boards from SGI provide an extra connector for additional signals used for multimedia applications. To install such a board in an Origin200 server, you must install a cable from a connector on the board to the feature connector on the PCI backplane. If you are not sure if the PCI board you are installing uses a feature connector, refer to Figure 2-3.
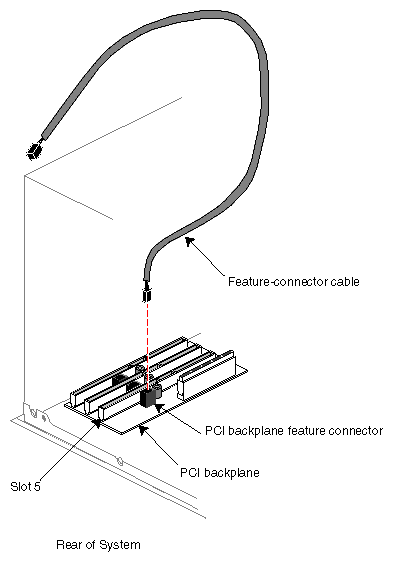
Locate the feature-connector cable in the PCI board shipment. See Figure 2-4.
Attach either end of the feature-connector cable to the connector next to the desired PCI slot on the Origin200 PCI backplane, as shown in Figure 2-4.
Connect the other end of the cable to the Origin200 PCI board feature connector, as shown in Figure 2-5.
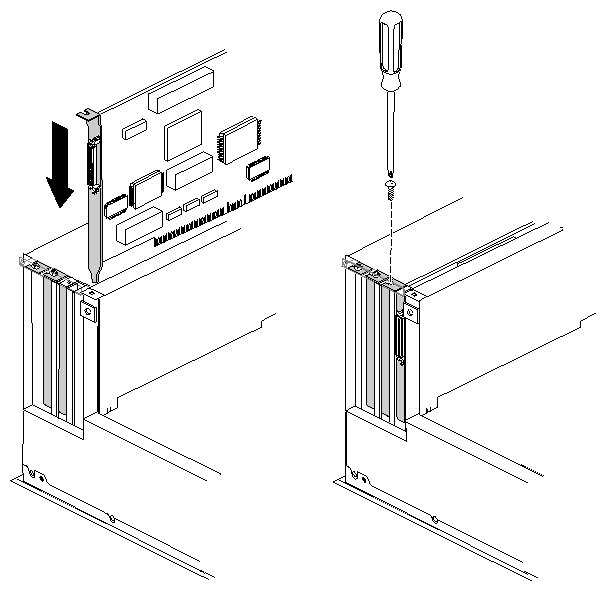
Install the PCI option board in the PCI slot.
Align the connector on the base of the PCI board with the PCI slot, as shown in Figure 2-6.
Press the board down into the slot until it engages.
Be sure the tab at the bottom of the PCI board plate slides into the slot on the rear chassis wall.
Press firmly until the board is seated. You may find that a slight front-to-back rocking motion helps seat the board more easily.
Be careful not to kink or damage the flexible EMI gasket that surrounds the inside of the rear chassis wall.
If the PCI board uses the feature connector cable, tuck the cable between the board and the adjacent one.
Attach the screw that secures the PCI option board to the chassis, as shown in Figure 2-6.
Remove your wrist strap and reassemble the system.
Replace the chassis access cover and side panel (the reverse of removing them).
Reattach the cables to the back of the system.
| Note: Do not discard the blanking plate that you removed from the Origin200 chassis. If you ever decide to remove the PCI option board, you must replace this blanking plate to ensure proper airflow through the Origin200 chassis. |
For information about how the board is recognized (detected) by the system and configured, see the Origin200 and Origin200 GIGAchannel Owner's Guide and whatever documentation is provided with your option board.
Follow these steps to install a PCI option board in a GIGAchannel expansion cabinet.
Prepare the system for servicing as described in Chapter 1, “Preparing the System for Servicing.”
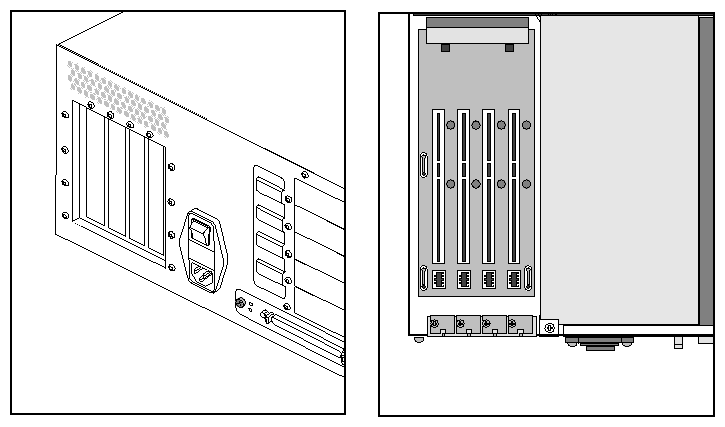
Choose an available PCI slot. See Figure 2-7.

Note: The slot nearest to the power switch can hold only a half-length PCI board. The other slots can hold full-length boards.
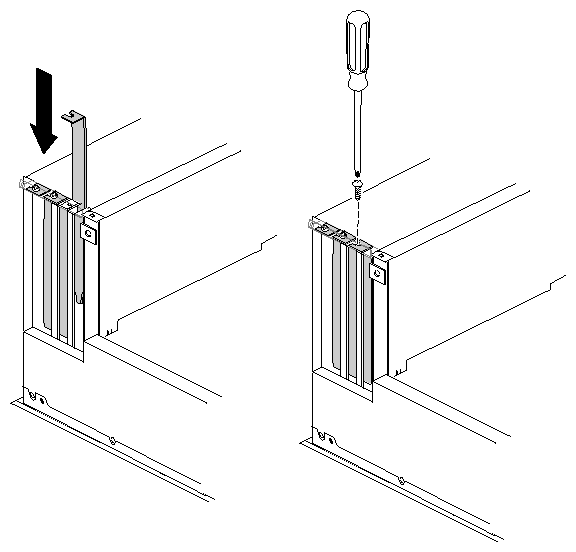
Remove the blanking plate from the slot you have chosen, as shown in Figure 2-8.
Install the PCI option board in the slot, as shown in Figure 2-9.
Align the board's edge connector with the PCI slot.
Lower the board into place. Be sure to align the back edge of the board with the alignment slots on the fan wall.
Be careful not to damage the foil gasket between the board and the back wall of the chassis.
Press the board firmly into the PCI slot connector until it engages.
Remove your wrist strap and reassemble the system.
Replace the chassis access door and system cover (the reverse of removing them).
Reattach the cables to the back of the system.
| Note: Do not discard the blanking plate that you removed from the GIGAchannel chassis. If you ever decide to remove the PCI option board, you must replace the blanking plate to ensure proper airflow through the GIGAchannel chassis. |
For information about how the board is recognized (detected) by the system and configured, see the Origin200 and Origin200 GIGAchannel Owner's Guide and the documentation provided with your option board.
The following steps describe how to remove a PCI option board from an Origin200 module.
Prepare the system for servicing, as described in Chapter 1, “Preparing the System for Servicing.”
Locate the PCI option board you wish to remove and remove it:
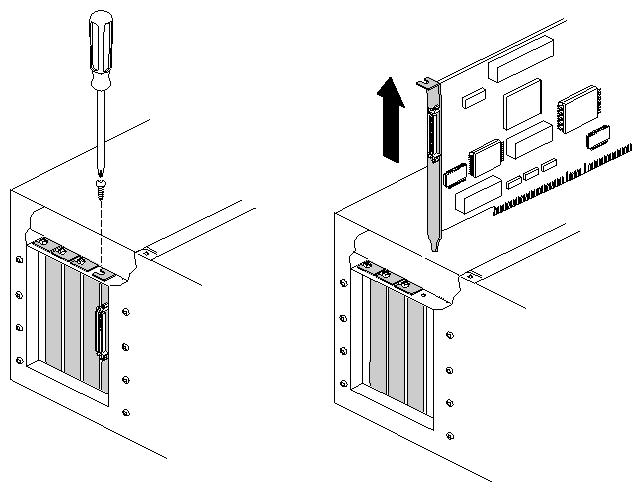
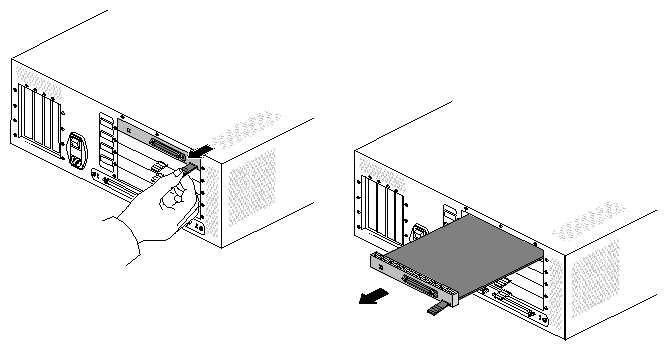
Using a #2 Phillips screwdriver, remove the screw that secures the PCI option board to the Origin200 chassis, as shown in Figure 2-10.Grasp the PCI option board at the front and rear of the board and pull it straight up and out of the system, as shown in Figure 2-10.
Be careful not to kink or damage the flexible EMI gasket that surrounds the inside of the rear chassis wall.
If the board uses a feature connector cable, disconnect the cable from the board and the server. See Figure 2-3, Figure 2-4, and Figure 2-5.
Place the PCI option board in an antistatic bag, preferably the bag in which the board was originally packaged.
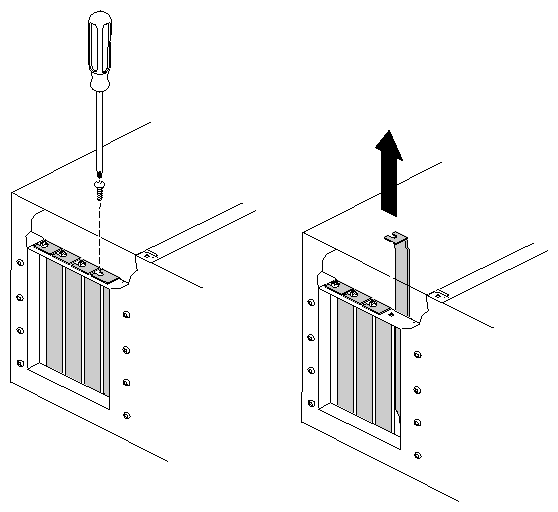
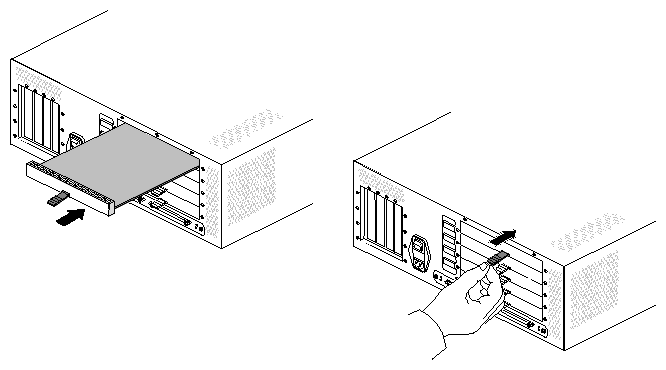
Replace the blanking plate.
Align the blanking plate and slide it in place, as shown in Figure 2-11.
Attach the screw that secures the blanking plate to the Origin200 chassis, as shown in Figure 2-11.

Caution: You must replace the PCI blanking plate to ensure the proper flow of cooling air in the chassis. After you have replaced the blanking plate, remove your wrist strap and reassemble the system.
Replace the chassis access door and side panel (the reverse of removing them).
Reattach the cables to the back of the system.

| Caution: You must replace the blanking plate to cover the gap in the rear of the Origin200 chassis in order to ensure proper airflow through the chassis. |
Follow these steps to remove a PCI option board from a GIGAchannel expansion cabinet:
Prepare the chassis for servicing, as described in Chapter 1, “Preparing the System for Servicing.”
Select the board you wish to remove and remove it.
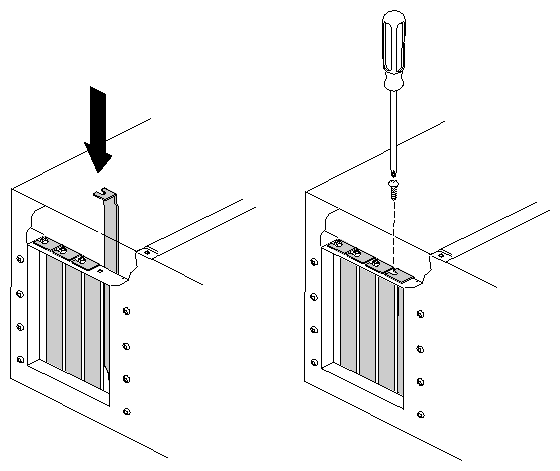
Using a #2 Phillips screwdriver, remove the screw that secures the PCI option board to the GIGAchannel chassis, as shown in Figure 2-12.
Be careful not to kink or damage the flexible EMI gasket that surrounds the inside of the rear chassis wall.
Place the PCI option board in an antistatic bag, preferably the bag in which the board was originally packaged.
Replace the blanking plate.
Align the blanking plate and slide it in place, as shown in Figure 2-13.
Attach the screw that secures the blanking plate to the GIGAchannel chassis, as shown in Figure 2-13.
After you have replaced the blanking plate, remove your wrist strap and reassemble the system.
Replace the chassis access door and side panel (the reverse of removing them).
Reattach the cables to the back of the system.
| Note: You must replace the blanking plate to cover the gap in the rear of the GIGAchannel chassis in order to ensure proper airflow through the chassis. |
Follow these steps to install an XIO board in a GIGAchannel expansion cabinet:
Turn off the system and unplug the power cords from the CPU module and the GIGAchannel expansion cabinet.
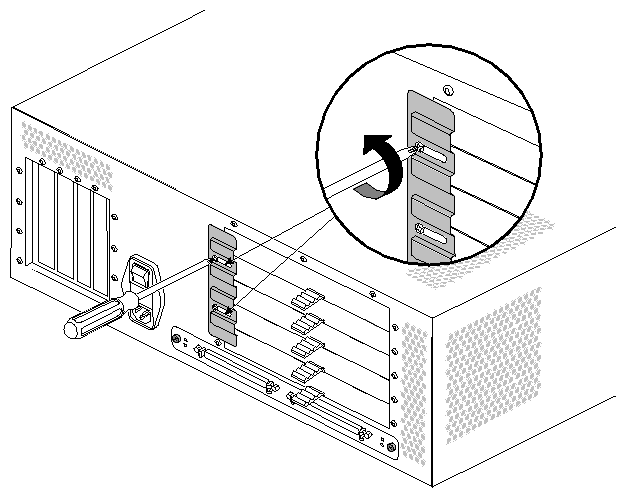
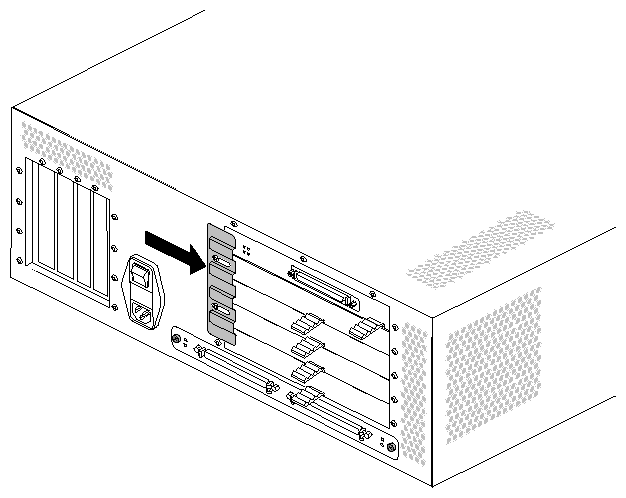
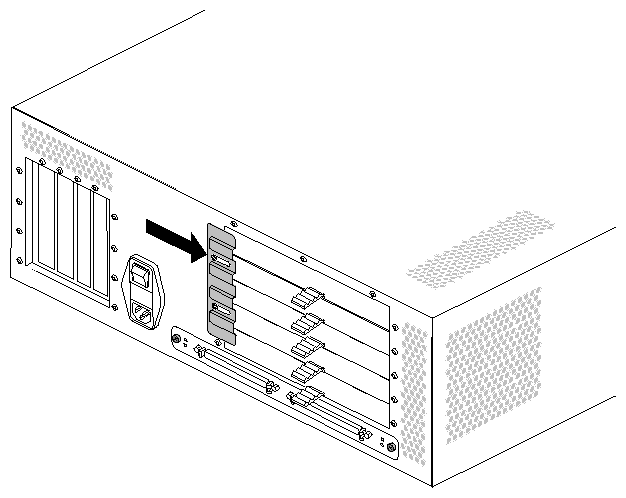
Loosen the XIO board retaining plate.
Use a #2 Phillips screwdriver to loosen the screws at each end of the plate, as shown in Figure 2-14.
Give each screw one and a half counterclockwise turns.
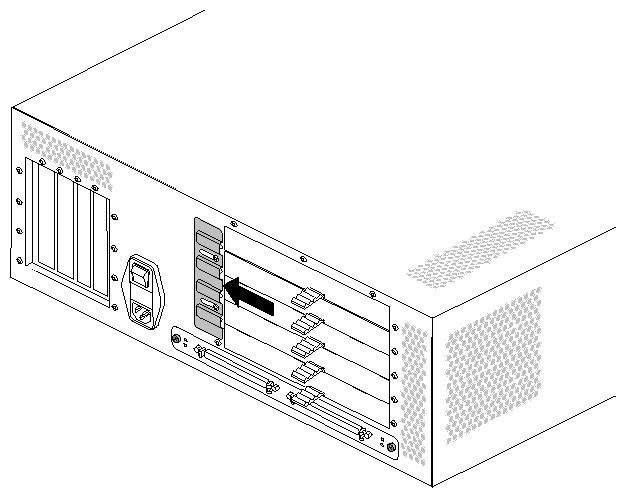
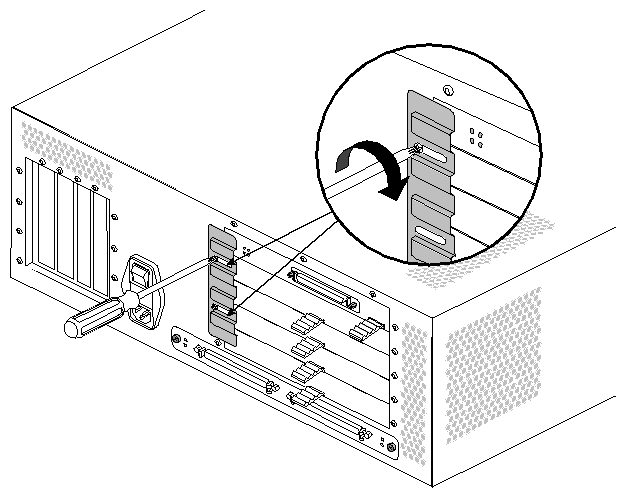
Slide the retaining plate towards the power switch so that it no longer overlaps the XIO slots, as shown in Figure 2-15.
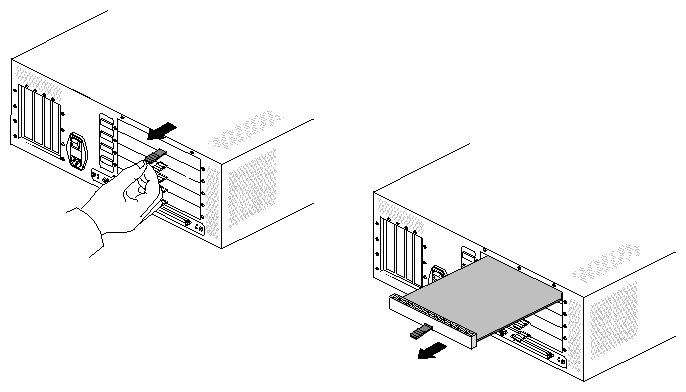
Remove the blanking card from the desired XIO slot.
Pull the tab on the blanking card and slide the card out of the XIO slot, as shown in Figure 2-16.
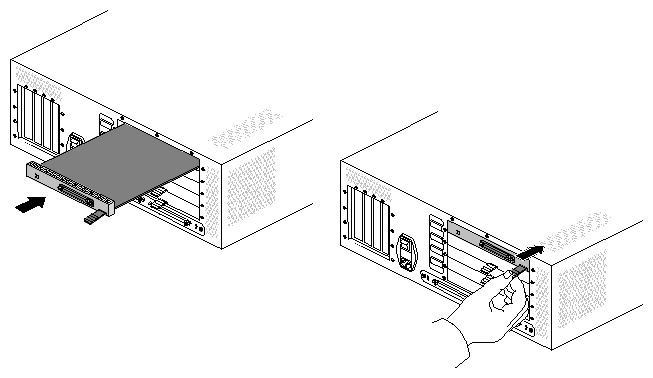
Note: Save the blanking card in case you remove the XIO board in the future. The blanking card is required for proper airflow and to prevent electromagnetic interference (EMI). Install the XIO board, as shown in Figure 2-17.
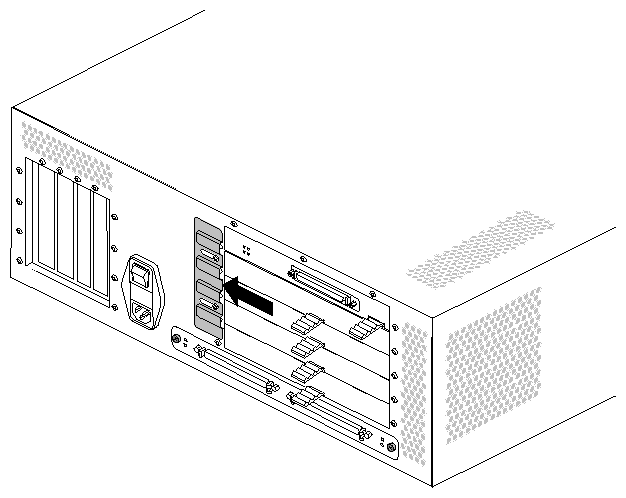
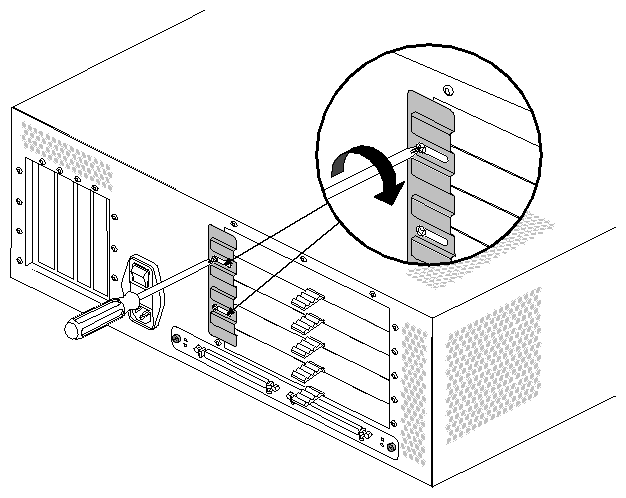
Slide the retaining plate away from the power switch so that it overlaps the XIO slots, as shown in Figure 2-18.
Tighten the screws on the XIO board retaining plate, as shown in Figure 2-19.
You are finished installing the XIO board. You may replace the power cords and boot the system.
For information about how the board is recognized (detected) by the system and configured, see the Origin200 and Origin200 GIGAchannel Owner's Guide and the documentation provided with your option board.
Follow these steps to remove an XIO board from a GIGAchannel expansion cabinet.
Prepare the chassis for servicing, as described in Chapter 1, “Preparing the System for Servicing.”
Loosen the XIO board retaining plate.
Use a #2 Phillips screwdriver to loosen the screws at each end of the plate, as shown in Figure 2-20.
Give each screw one and a half counterclockwise turns.
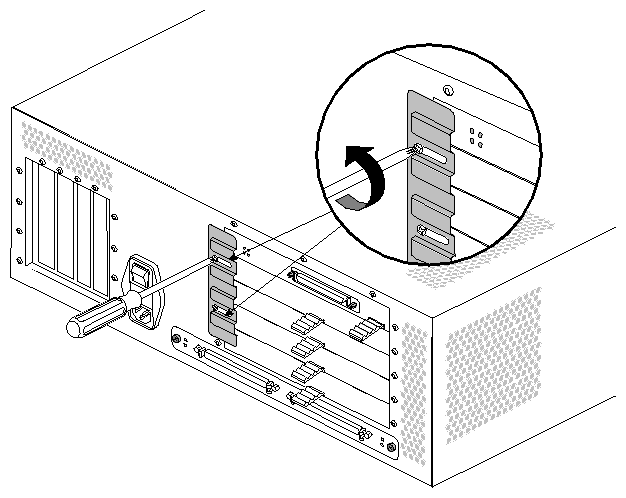
Slide the retaining plate towards the power switch so that it no longer overlaps the XIO slots, as shown in Figure 2-21.
Remove the desired XIO board.
Pull the tab on the board and slide the board out of the XIO slot, as shown in Figure 2-22.
Install an XIO blanking card, as shown in Figure 2-23.
Slide the blanking card into the empty slot.
Push the tab forward until it stops.
Note: A blanking card is required for proper airflow and to prevent electromagnetic interference (EMI). Slide the retaining plate away from the power switch so that it overlaps the XIO slots, as shown in Figure 2-24.
Tighten the screws on the XIO board retaining plate, as shown in Figure 2-25.
You are finished removing the XIO board.