You rarely need to remove and install a power supply. Because the power supply is located at the bottom of the Octane workstation and you do not have to open the chassis, it is easily removed. This chapter provides information on installing or removing a power supply.
The following topics are covered
Before removing the power supply, you must power off the Octane workstation.
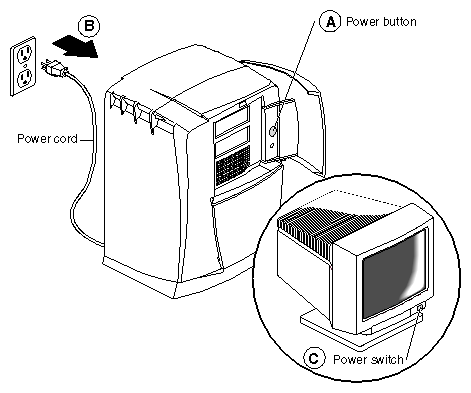
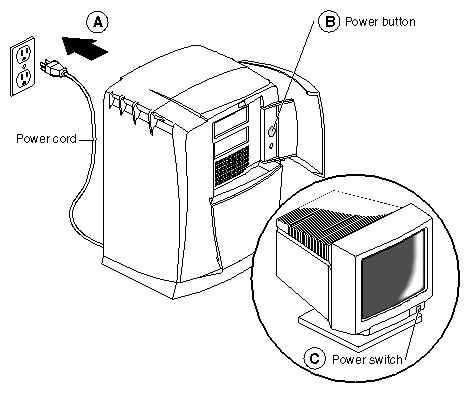
Open the cover and push the power button to power off the Octane workstation. (Step A)
Unplug the power cable from the electrical socket. (Step B)
Press the monitor power switch to power off the monitor. (Step C)
Face the back of the workstation.
If you do not have a PCI module installed, go to the next section.
If you have a PCI module installed, you need to remove it before removing the power supply. Go to Chapter 4, “Removing the PCI Module” for instructions on removing the PCI module. Then return here and follow the instructions below to remove the power supply.
If you have not already done so, power off the Octane workstation and remove the power cable from the electrical outlet. If it is installed, remove the PCI module as well. See “Preparing the Workstation to Remove or Install the Power Supply” and follow the directions for powering off the workstation (and removing the PCI module) if you have not already done so.
You do not need to use the wriststrap when removing the power supply.
| Caution: Do not remove the power cable from the power supply until the power supply is out of the chassis. |
| Warning: Be sure you have removed the power cable from the electrical socket before beginning this procedure. |
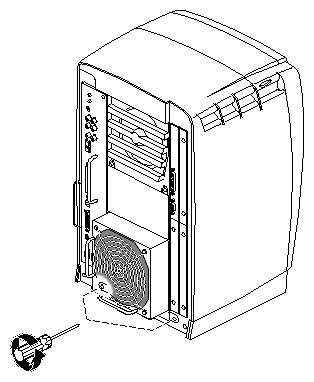
Locate the two captive screws near the bottom of the power supply that secure it to the chassis.
Using a Phillips screwdriver, loosen the captive screws until they release from the chassis.
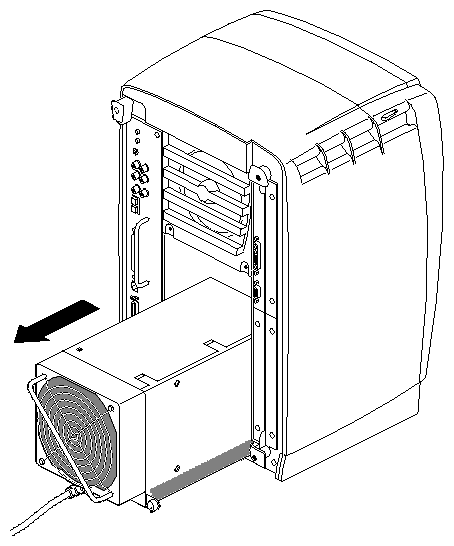
Grasp the handle and pull the power supply from the chassis.
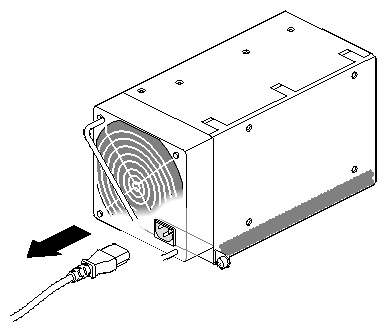
Tilt the power supply up, and unplug the power cable.
Follow the steps below to install the power supply.
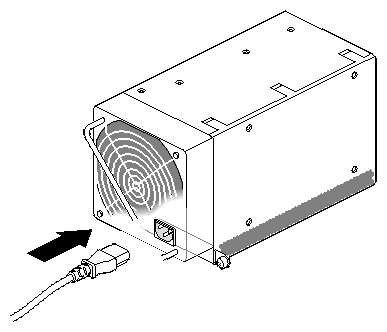
Tilt the power supply upward and plug the power cable in the power supply.
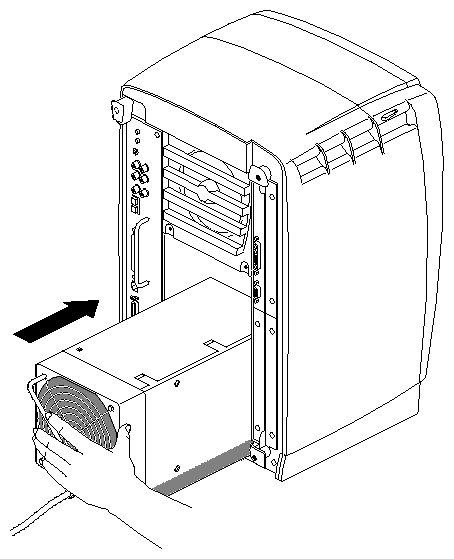
Slide in the new power supply.
Push on the power supply to firmly connect it to the frontplane.

Note: Be sure the tabs (holding the screws) on the power supply are flush with the chassis.
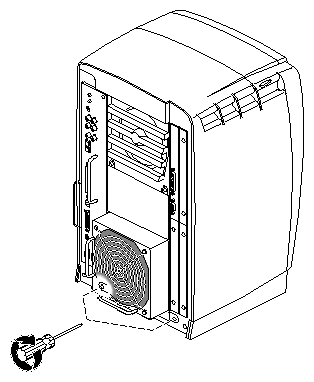
Tighten the screws that attach the power supply to the workstation.
You have finished installing the power supply.
To reinstall the PCI module, turn to Chapter 4, “Installing the PCI Module” and follow the instructions through powering on the Octane workstation.
If you are not installing a PCI module, you are ready to power on the Octane workstation. Go to the next section.
