This chapter describes the command (PROM) monitor programs, which control the boot environment for all SGI workstations and servers. With the command monitor, you can boot and operate the CPU under controlled conditions, run the CPU in command monitor mode, and load programs (for example, the operating system kernel, /unix, or special debugging and execution versions of the kernel).
Refer to the prom(1M) man page for detailed information on the PROM monitor.
This chapter contains information on the following topics:
Basic instruction on entering the command monitor. See “Entering the Command (PROM) Monitor”.
A summary of the commands available through the general command monitor. See “Summary of Command Monitor Commands”.
How to get help while using the command monitor. See “Getting Help in the Command Monitor”.
Instructions for convenient use of the command monitor. See “Using Command Monitor Commands” and “Running the Command Monitor”.
Instructions for manipulating the command monitor environment. See “Command Monitor Environment Variables”.
Instructions for booting programs from the command monitor. See “Booting a Program from the Command Monitor”.
PROM stands for Programmable Read-Only Memory. Most PROM chips are placed in your computer at the factory with software programmed into them that allows the CPU to boot and allows you to perform system administration and software installations. The PROM chips are not part of your disk or your operating system; they are the lowest level of access available for your system. You cannot erase them or bypass them.
Since PROM chips are not normally changed after the manufacture of the system, some features may not be present on older systems. Some systems have PROM firmware that responds to new programming when the operating system is updated. See your hardware owner's guide and release notes for information specific to your system.
Newer systems use a PROM called the ARCS PROM. ARCS stands for Advanced RISC Computing Standard. This PROM provides a graphical interface and allows mouse control of booting and execution. ARCS systems also support the use of the keyboard, and the older key syntaxes have been retained for compatibility. SGI systems that use the ARCS PROM include some models of Indigo, Indy, Indigo2, Challenge, Onyx, some Crimson systems, as well as the Origin systems.
To get into the command (PROM) monitor on most systems, follow the steps in Procedure 9-1:
Procedure 9-1. Using the Command Monitor
Reboot the system using the reboot command, or if the system is already off, turn it on.
On server systems without graphics capability, you see the following prompt:
Starting up the system....
To perform system maintenance instead, press <Esc>
On systems with graphics, you see similar messages, displayed on your screen as shown in Figure 9-1.
The procedures are substantially the same for graphical or text usage, except that you do not need to press the Esc key on graphics systems. Instead you can use your mouse cursor to click a button labeled Stop for Maintenance.
Press Esc or click the button. You see the following menu, or a similar menu:
System Maintenance Menu
1   Start System
2   Install System Software
3   Run Diagnostics
4   Recover System
5   Enter Command Monitor
6   Select Keyboard Layout

Note: Menu selection 6 is not available on Origin systems. The menu items have the following effects:
Start System This option starts the default operating system.
Install System Software This option brings up the standalone version of inst(1M). See IRIX Admin: Software Installation and Licensing for further information on this option. If your system has the ARCS PROM, it allows you to interactively select the type of device you will use to perform the installation (for example, tape drive, network connection, or CD-ROM drive) and then select the specific device from those of the specified type.
Run Diagnostics This option runs a diagnostic program on your system hardware. See your system owner's guide for further information on this option.
Recover System This option allows you to read a previously made system backup onto the system disk. See IRIX Admin: Backup, Security, and Accounting for further information on this option. If your system has the ARCS PROM, it allows you to interactively select the type of device you will use to perform the recovery (for example, tape drive, network connection, or CD-ROM drive) and then select the specific device from those of the specified type.
Enter Command Monitor This option allows you to enter the command monitor program, described in this chapter.
Select Keyboard Layout This option allows you to select from several different keyboard layouts for common languages.
Enter the numeral 5 and press Enter or click on the appropriate button. You see the command monitor prompt:
>>
You have entered the command monitor.
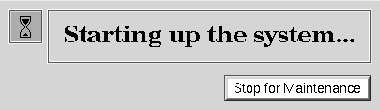
Table 9-1 summarizes the command monitor commands and gives each command's syntax. Note that not all commands work on all systems.
Table 9-1. Command Monitor Command Summary
Command | Description | Syntax |
|---|---|---|
arcshinv | Displays hardware inventory. | arcshinv [-v] [-m] [-mvvv] [-g PATH] |
auto | Boots default operating system (no arguments). This has the same effect as choosing Start System from the PROM Monitor initial menu. | auto |
boot | Boots the named file with the given arguments. | boot [-f ][-n] pathname |
date | Displays or sets the date and time. (It is not available on Origin systems.) | date [mmddhhmm [ccyy|yy] [.ss]] |
disable | Disables hardware. | disable -m MODID [-cpu [abcd]] [-mem [01234567]] [-s SLOTID -pci [01234567]] |
eaddr | Prints the Ethernet address of the built-in Ethernet controller on this system. (It is not available on Origin systems.) | eaddr |
enable | Enables hardware. | enable -m MODID [-cpu [abcd]] [-mem [01234567]] [-s SLOTID -pci [01234567]] |
enableall | Enables all disabled components. | enable [-y] [-list] |
exit | Leaves the command monitor and returns to the PROM menu. | exit |
help | Prints a command monitor command summary. | help [command] |
hinv | Prints an inventory of known hardware on the system. Some optional boards may not be known to the PROM monitor. | hinv |
init | Partially restarts the command monitor, noting changed environment variables. | init |
ls | Lists files on a specified device. | ls devicename |
modnum | Lists the current modules in the system. | modnum |
off | Turns off power to the system. (Is supported only on a subset of systems with software power control.) | off |
passwd | Sets the PROM password. | passwd |
pathname | Given a valid file pathname, the system attempts to find and execute any program found in that path. | pathname |
ping | Specifies ping server at IPADDR. | ping [-f] [-i sec] [-c #] IPADDR |
printenv | Displays the current environment variables. | printenv [env_var_list] |
reset | Resets the machine. | reset |
resetenv | Resets all environment variables to default. | resetenv |
resetpw | Resets the PROM password to null (no password required). | resetpw |
rtc | Gets or sets the real time clock frequency. | rtc [KHz] |
setenv | Sets environment variables. Using the -p flag makes the variable setting persistent, that is, the setting remains through reboot cycles. | setenv [-p] variable value |
setpart | Makes partitions. | setpart |
single | Boots the system into single-user mode. | single |
unsetenv | Unsets an environment variable. | unsetenv variable |
update | Updates the stored hardware inventory information. | update |
version | Displays the command monitor version. | version |
The question mark ( ?) command displays a short description of a specified command. If you do not specify a command, the ? command displays a summary of all command monitor commands. To get help, type either help or a question mark (?).
help [command] ? [command] |
The following sections cover these subjects:
The command syntax notation that this chapter uses
The function of the commands listed in Table 9-1
You can edit on the command line by using the commands in Table 9-2.
Table 9-2. Command Monitor Command Line Editor
Command | Description |
|---|---|
Ctrl+h , Delete | Deletes previous character |
Ctrl+u | Deletes entire line; question mark (?) prompts for corrected line |
Ctrl+c | If a command is executing, kills current command |
!! | Repeats the last command |
The command monitor command syntax is designed to resemble the syntax of commands used with the IRIX operating system. This chapter uses IRIX notation for command descriptions:
Fixed-space font denotes literal items such as commands, files, routines, path names, signals, messages, and programming language structures. Type them as they are shown.
Square brackets ([]) surrounding an argument means that the argument is optional.
Vertical lines (|) separating arguments mean that you can specify only one optional argument within a set of brackets.
file means that you must specify a filename. A filename includes a device specification, as described in “Command Monitor Filename Syntax”.
When you specify filenames for command monitor commands, use this syntax:
device([cntrlr,[unit[,partition]]])file |
device specifies a device driver name known to the PROM.
cntrlr specifies a controller number for devices that may have multiple controllers.
unit specifies a unit number on the specified controller.
partition specifies a partition number within a unit.
file specifies a pathname for the file to be accessed.
If you do not specify cntrlr, unit, and partition, they default to zero. The notation shows that you can specify only a cntrlr, a cntrlr and unit, or all three variables. The commas are significant as place markers. For example, the root partition (partition 0) on a single SCSI disk system is shown as:
dksc(0,1,0) |
dksc indicates the SCSI driver.
The first 0 indicates SCSI controller 0.
The 1 indicates drive number 1 on SCSI controller 0.
The final 0 indicates partition 0 (root partition) on drive 1 on SCSI controller 0.
The /usr partition (partition 3) on the same disk would be written as:
dksc(0,1,3) |
The command monitor defines the devices in Table 9-3.
Table 9-3. Device Names for Command Monitor Commands
Device Name | Description |
|---|---|
dksc | SCSI disk controller (dks in the IRIX system) |
tpsc | SCSI tape controller (tps in the IRIX system) |
tty | CPU board duart |
tty(0) | Local console |
tty(1) | Remote console |
gfx | Graphics console |
console | Pseudo console, which may be one of gfx(0), tty(0), or tty(1). |
bootp | Ethernet controller using bootp and TFTP protocols |
tpqic | Quarter-inch QIC02 tape drive |
The PROM device notation is different from IRIX device notation. Certain environment variables (such as root and swap) are passed to higher level programs, and often require IRIX notation for the /dev device name. For example, in PROM notation, a SCSI disk partition most commonly used for swap is written:
dksc(0,0,1) |
In IRIX notation, the same disk is:
dks0d0s1 |
Systems that use the ARCS PROM (including Indy, Indigo2, some models of Indigo, Challenge, and Onyx systems) use a slightly different syntax for specifying pathnames and disk partitions.
ARCS pathnames use the same syntax as the hardware inventory. The pathnames are written as a series of type(unit) components that parallel the hardware inventory format.
Old-style pathnames are automatically converted to new-style pathnames; the old names can still be used. The PROM matches the first device described by the pathname; so full pathnames are not always required. Some examples of common pathnames are in Table 9-4.
ARCS Naming Convention | Pathname or Device |
|---|---|
scsi(0)disk(1)partition(1) | dksc(0,1,1) |
disk(1)part(1) | dksc(0,1,1) |
scsi(0)cdrom(5)partition(7) | dksc(0,5,7) |
network(0)bootp()host:file | bootp()host:file |
serial(0) | First serial port |
keyboard() | Graphics keyboard |
video() | Graphics display |
This section describes the commands that you use to run the command monitor. It accepts the commands listed in Table 9-1.
The init command reinitializes the processor from PROM memory, and returns you to the monitor program.
Your system has a facility that allows you to require a password from users who attempt to gain access to the command monitor. To set the PROM password, perform the steps in Procedure 9-2.
Procedure 9-2. Setting the PROM Password
Select option 5 from the System Maintenance Menu to enter the command monitor. You see the command monitor prompt:
Command Monitor. Type "exit" to return to the menu.
>>
Enter the command:
help
Issue the passwd command:
passwd
You see the prompt:
Enter new password:
Enter the password you want for your system and press Enter. You see the prompt:
Confirm new password:
Enter the password again, exactly as you typed it before. If you typed the password the same as the first time, you next see the command monitor prompt again. If you made a mistake, the system prints an error message and you must begin again. If you see no error message, your password is now set. Whenever you access the command monitor, you will be required to enter this password.
It is very important that you choose and enter your password carefully, because if it is entered incorrectly or forgotten, you may have to remove a jumper on the CPU board of your system. This procedure is different for each system type, and is described in your owner's guide. Some systems, though, allow you to reset the PROM password from the IRIX operating system by logging in as root and issuing the following command:
nvram passwd_key "" |
The quotation marks with no characters or space between them are essential to remove the PROM password. You must be logged in as root to perform this operation.
The resetpw command within the command monitor also resets the PROM password.
The command monitor maintains an environment, which is a list of variable names and corresponding values (the values are actually text strings). These environment variables contain information that the command monitor either uses itself or passes to booted programs. The system stores some environment variables—those that are important and unlikely to change frequently—in nonvolatile RAM (nvram). If you turn off power to the machine or press the reset button, the system remembers these variables. When you change the setting of these variables using the setenv command, the PROM code automatically stores the new values in nonvolatile RAM.
You can also use the /etc/nvram command to set or print the values of nonvolatile RAM variables on your system. For complete information on the nvram command, see the nvram(1) man page.
Table 9-5 shows a list of the environment variables that the system stores in nonvolatile RAM.
Table 9-5. Environment Variables Stored in Nonvolatile RAM
Variable | Description |
|---|---|
netaddr | Specifies the local network address for booting across the Ethernet. See the bootp protocol. |
dbgtty | Specifies the interactive debugger tty for the IRIX operating system. |
root | Specifies filesystem information that is passed on to the IRIX system. |
dbaud | Specifies the diagnostics console baud rate. You can change it by setting this variable (acceptable rates include 75, 110, 134, 150, 300, 600, 1200, 2400, 4800, 9600, and 19200), or by pressing the Break key. IRIS uses the dbaud rate for the diagnostics console during the entire system startup. Pressing the Break key changes the baud rate only temporarily; the baud rate reverts to the value specified in dbaud or rbaud when you press the reset switch or issue an init command. |
rbaud | Specifies the remote console baud rate. The list of acceptable baud rates is the same as for dbaud, above. |
bootfile | Specifies the name of the file to use for autobooting, normally a standalone shell (sash). This variable is valid for pre-ARCS PROMs only. ARCS PROMs store this information in the OSLoader variable. |
bootmode | Specifies the type of boot in pre-ARCS PROMs. ARCS PROMs store this information in the AutoLoad variable. The options have these meanings: c performs a complete cold autoboot, using the file pointed to by the bootfile variable to boot the kernel; boots sash, then boots kernel; and runs power-on diagnostics. m (default) goes straight to the command monitor, clears memory, and runs power-on diagnostics. d goes straight to the command monitor, does not clear memory and does not run power-on diagnostics. |
boottune | Selects the boot music string. A value of 0 randomizes the selection each time. 1 is the default value. (It is supported only on Power Indigo2 and Octane systems.) |
autopower | Allows systems with software power control to automatically reset after a power failure if set to y. (It is supported only on Power Indigo2 and Octane systems.) |
console | Specifies which console to use. The options have these meanings: G specifies a graphics console with the SGI logo in the upper left corner. g (default) specifies a graphics console without the SGI logo. d specifies the terminal is not available. |
keybd | Specifies the type of keyboard used. The default is df. Available settings depend on the exact PROM revision, but may include some or all of the following settings: USA, DEU, FRA, ITA, DNK, ESP, CHE-D, SWE, FIN, GBR, BEL, NOR, PRT, CHE-F. Or on systems with the keyboard layout selector, the settings may include: US, DE, FR, IT, DK, ES, deCH, SE, FI, GB, BE, NO, PT, frCH On some systems, JP is also acceptable to specify a Japanese keyboard. |
dbgname | Specifies where to obtain symmon, the debugger. |
diskless | Specifies that the system is diskless and must be booted over the network. On ARCS systems, diskless system environment parameters should be set as follows: diskless=1 SystemPartition=bootp()host:/path OSLoader=kernelname |
monitor | Specifies the monitor resolution on Indy systems when an unrecognized brand of monitor is used. Set this variable to h or H to specify a high-resolution monitor, the default is a low-resolution monitor. |
nogfxkbd | Specifies that the keyboard is not required to be connected if set to 1. |
notape | Specifies that no tape drive is attached to the system. If a tape drive is attached to the system, this variable must be set to 1 (true) in order to access a tape drive on another system on the network. |
volume | Specifies the system speaker volume numerically. |
pagecolor | Specifies the background color of the textport using a set of 6 hexadecimal RGB values. |
ProbeAllScsi | Specifics that all devices on the SCSI bus are automatically examined for disks. |
prompoweroff | On Indy systems only, this variable specifies that the system should return to the PROM monitor before powering off on shutdown if set to y. |
rebound | Specifies that the system should automatically reboot after a kernel panic if set to y. This variable interacts with the AutoLoad variable and the reboot_on_panic kernel tunable parameter. |
RestorePartEnv | Specifies whether partition information is restored. (Supported only on SGI 3000 Series systems.) |
sgilogo | Specifies that the SGI logo and related information is displayed on the PROM monitor graphical screen if set to y. |
diagmode | Specifies the mode of power-on diagnostics. If set to v, then diagnostics are verbose and extensive. |
Table 9-6 lists command monitor environment variables that directly affect the IRIX operating system. These are not stored in nonvolatile RAM, but they do affect the operation of the PROM and of the IRIX system and are discarded if the system is powered off.
Table 9-6. Environment Variables That Affect the IRIX Operating System
Variable | Description |
|---|---|
showconfig | Prints extra information as IRIX boots. If set through setenv, its value must be istrue. |
initstate | Passed to the IRIX system, where it overrides the initdefault line in /etc/inittab. Permitted values are s and the numbers 0-6. See the init(1M) man page. |
swap | Specifies in IRIX notation the swap partition to use. If not set, it defaults to the partition configured into the operating system, which is normally partition 1 on the drive specified by the root environment variable. |
path | Specifies a list of device prefixes that tell the command monitor where to look for a file, if no device is specified. |
verbose | Tells the system to display detailed error messages. |
When you boot a program from the command monitor, it passes the current settings of all the environment variables to the booted program.
The ARCS PROM defines some environment variables that are not found in older PROM, and these are listed in Table 9-7.
Table 9-7. ARCS PROM Environment Variables
Variable | Description |
|---|---|
ConsoleIn/ConsoleOut | These variables are set automatically at system startup. |
OSLoadPartition | The disk partition where the operating system kernel is located. This is also used as the default root partition and is set automatically at system startup. |
OSLoader | The operating system loading program. By default, this is sash (the stand-alone shell). This is set automatically at system startup. |
SystemPartition | The disk partition where the operating system loading program is found. This is set automatically at system startup. |
OSLoadFilename | The filename of the operating system kernel. By default, this is /unix. This variable is automatically set at system startup. |
OSLoadOptions | This variable specifies options to the boot command used to load the operating system. For more information on boot options, see “Booting a Program from the Command Monitor”
|
AutoLoad | This variable specifies whether the operating system will boot automatically after a reset or power cycle. This variable supersedes bootmode and can be set to Yes or No. This variable interacts with the rebound variable and the reboot_on_panic kernel tunable parameter. |
The printenv command displays the command monitor's current environment variables.
printenv [env_var_list] |
To change (reset) the variables, see the next section.
The setenv command changes the values of existing environment variables or creates new ones.
setenv env_var string |
env_var is the variable you are setting, and string is the value you assign to that variable. To see the current monitor settings, use printenv.
When you use setenv to change the value of one of the stored environment variables in Table 9-5, the system automatically saves the new value in nonvolatile RAM. You do not need to reenter the change the next time the system is turned off and then on again.
If the keybd variable is set to anything but the default df, the appropriate keyboard translation table is loaded from the volume header of the hard disk. If the table is missing or unable to load, then the default table stored in the PROMs is used. The keybd variable can be set to any value, but the keyboard translation table should be loaded from the volume header on the hard disk. This variable overrides the normal system mechanism for determining the kind of keyboard installed in the system. Do not change this variable unless you are performing keyboard diagnostics. Table 9-8 lists keybd variables suggested for international keyboards:
Table 9-8. keybd Variables for International Keyboards
Variable | Description |
|---|---|
BEL or BE | Belgian |
DNK or DK | Danish |
DEU or DE | German |
DF | The default |
FRA or FR | French |
FIN or FI | Finnish |
ITA or IT | Italian |
JP | Japanese |
NOR or NO | Norwegian |
PRT or PT | Portuguese |
CHE-F or freCH | Swiss-French |
CHE-D or deCH | Swiss-German |
ESP or ES | Spanish |
SE or SWE | Swedish |
GB or GBR | United Kingdom (Great Britain) |
US or USA | United States (available on all models) |
The unsetenv command removes the definition of an environment variable.
unsetenv env_var |
env_var is the environment variable whose definition you are removing (see the setenv discussion in “Changing Command Monitor Environment Variables”). Note that variables stored in nonvolatile RAM cannot be unset.
This section describes each command monitor boot command and shows you how to use it. When you reboot or press the Reset button, you start up the command monitor. Do not press the Reset button under normal circumstances, that is, when the workstation is running the IRIX operating system.
The auto command reboots the operating system. It uses the default boot file as though you were powering on the CPU. At the command monitor prompt (>>), type:
auto |
The PROM's environment variable bootfile specifies the default boot file. In addition, you must set the environment variable root to the disk partition that the IRIX operating system uses as its root filesystem. The auto command assumes that the desired image of the IRIX system resides on the partition specified by root of the drive specified in the environment variable bootfile.
The bootfile name can contain no more than 14 characters. To select a different boot file, see “Changing Command Monitor Environment Variables”.
The boot command starts the system when you want to use a specific boot program and give optional arguments to that program. The syntax of the boot command is:
boot[-f program][-n][args] |
-f specifies the program you want to boot. The program name must contain fewer than 20 characters. If you do not specify this option, the environment variable bootfile specifies the default program. boot normally loads sash.
When you specify a program, you can include a device specification. If you do not, the command monitor uses the device specifications in the environment variable path. The command monitor tries in turn each device that you specify in path, until it finds the program you request, or until it has tried all the devices listed in path.
-n means no go: it loads the specified program, but does not transfer control to it. Instead, -n returns you to the command monitor command environment.
args are variables that the command monitor passes to the program you are booting. For an arg that starts with a hyphen (-), you must prepend an additional hyphen so that the command monitor does not think that the argument is intended for itself. The command monitor removes the extra hyphen before it passes the argument to the booted program. For more information, see “Standalone Shell (sash)”.
For example, to boot the disk formatter/exerciser program (fx) from the cartridge tape drive, use this command:
boot -f SCSI(0)tape(7)partition(0)fx |
Without any arguments, boot loads the program specified in bootfile.
The command monitor has been designed to keep it independent of operating systems and as small as possible. Therefore, the command monitor cannot directly boot files residing in IRIX or other operating system file trees. However, the command monitor provides a two-level boot mechanism that lets it load an intermediary program that understands filesystems; this program can then find and load the desired boot file. The program is called the standalone shell, and is referred to as sash. sash is a reconfigured and expanded version of the command monitor program, and includes the modules needed to handle operating system file structures. It also has enhanced knowledge about devices.
After the system software is installed, a copy of sash is located in the volume header of the first disk. The header contains a very simple file structure that the command monitor understands. You can also boot sash from tape or across the network.
To boot sash from your disk, follow the steps in Procedure 9-3:
Procedure 9-3. Booting Using sash
Shut down the system
When you see the message:
Starting up the system...
To perform system maintenance instead, press Esc
Press the Esc key. You may have to enter your system's command monitor password, if your system has one. You see a menu similar to the following:
System Maintenance Menu
   (1) Start System
   (2) Install System Software
   (3) Run Diagnostics
   (4) Recover System
   (5) Enter Command Monitor
Select option 5, Enter Command Monitor from the System Maintenance Menu. You see the following message and prompt:
Command Monitor. Type "exit" to return to the menu.
>>
-
boot -f sash
sash operates in interactive command mode. You see the sash prompt:
sash:
To use the multilevel boot feature, set the PROM environment variable bootfile to refer to a specific copy of sash. In normal configurations, setting bootfile to dksc(0,0,8)sash tells the command monitor to load sash from the SCSI disk controller 0, disk unit 0, partition 8 (the volume header) as follows:
setenv bootfile "dksc(0)disk(1)partition(8)sash"
Then issue a boot command, as in this example for a SCSI drive:
boot dksc()unix initstate=s |
The following actions take place:
boot loads dksc(0)disk(0)partition(8)sash, as specified by bootfile, since the boot command does not contain a -f argument. (A -f argument overrides the default specified by bootfile.)
sash gets two arguments: dksc()unix and initstate=s, which brings the system up in single-user mode. (Note that the command monitor removes the leading hyphen [-] from any argument, so if you use the next layer of software, and need an argument with a leading hyphen, put two hyphens in front of it.)
sash loads the file specified by the first argument (dksc()unix) and passes the next argument to that file.
Do not issue the auto command from sash with the bootfile set as shown above. If you do, the system tries to boot sash over itself and exits with an error.
To be able to use the auto command from sash, set bootfile to refer to the kernel, for example, dksc()unix. Even better, return to the PROM level to use the auto command.
At the heart of the operation of diskless workstations is the bootp protocol. The bootp protocol is a DARPA standard protocol supported on all SGI servers and workstations. One of the devices that the command monitor can use for booting is the network. SGI provides a TCP/IP boot protocol that lets you boot files that reside on another host in the network, if the other host supports the booting protocol. The network booting protocol is the bootp protocol. It is a datagram protocol that uses the User Datagram Protocol (UDP) of TCP/IP to transfer files across the Ethernet network.
Booting across the Network with bootp
To boot across the network, follow the steps in Procedure 9-4:
Procedure 9-4. Booting Using bootp
Determine the Internet address of the machine you want to boot.
The Internet address is a number assigned by the network administrator of the network to which the system is attached. The format of the number is four decimal numbers between 0 and 255, separated by periods; for example:
194.45.54.4
Use the setenv command to set the netaddr environment variable to this address; for example:
setenv netaddr 194.45.54.4
Once you have set the netaddr environment variable, you can use bootp to refer to a remote file by using a filename of the form:
bootp()[hostname:] path
hostname is the name of the host where the file resides. The specified host must run the bootp server daemon, bootp. If you omit hostname, bootp broadcasts to get the file from any of the hosts on the same network as the system making the request. The first host that answers fills the request. Only hosts that support bootp can respond to the request. It is safe to omit the hostname only when you know that the path is unique to a particular host, or when you know that all the copies of the file are interchangeable.
hostname can be the name of a host on a different Ethernet network from the machine that you are booting, if a gateway on the local Ethernet network provides a route to the remote host. The gateway must be running a bootp server that you have configured to do cross-network forwarding.
For more information about booting through gateways, see the bootp(1M) man page. For more information about the /etc/inetd.conf configuration file, see the inetd(1M) man page.
path is the pathname of a file on the remote host. For example, this c ommand boots the file /usr/local/boot/unix from the remote host wheeler:
boot -f bootp()wheeler:/usr/local/boot/unix
The following command boots the file /usr/alice/help from any host on the network responding to the bootp broadcast request that has a file of that name:
boot -f bootp()/usr/alice/help
To configure the gateway to permit cross-network forwarding, follow the steps in Procedure 9-5:
Procedure 9-5. Configuring a Gateway
Log in as root or become the superuser by issuing the su command.
Edit the file /etc/inetd.conf on the gateway system. This file configures the bootp server, which is started by the inetd(1M) daemon.
Change the bootp description so that inetd invokes bootp with the -f flag. Find this line:
bootp dgram udp wait root /usr/etc/bootp bootp
Add the -f flag to the final bootp on the line:
bootp dgram udp wait root /usr/etc/bootp bootp -f
Change the tftp configuration line in one of the following ways:
Remove the -s flag from the argument list for tftpd:
tftp dgram udp wait guest /usr/etc/tftpd tftpd -s
This allows tftpd access to all publicly readable directories. If you are concerned about a possible security compromise, you can instead explicitly list the directories to which tftpd needs access. In this case, you need to add /usr/etc:
tftp dgram udp wait guest /usr/etc/tftpd tftpd -s /usr/etc
See the tftpd(1M) and tftp(1C) man pages for more information.
Signal inetd to reread its configuration file.
killall -1 inetd
If you have access to a larger network, and the bootable file you need is sufficiently remote on the network that the tftp and bootp timeouts and network delays are keeping you from booting successfully, it is possible to use an intermediary host as a bootp server.
As an example, consider the following situation. You have a host named local_host that needs to boot a kernel found on the remote system far_host. But the network is heavily used, resulting in bootp and tftp timing out before the boot operation can take place. However, a third host, near_host, has the optional NFS software and has automount running, allowing access to the files on far_host. To boot through this method, perform the steps in Procedure 9-6:
Procedure 9-6. Booting Using automount
On near_host, the system acting as intermediary, log in as root and open the file /etc/inetd.conf. This file configures the bootp server, which is started by the inetd(1M) daemon.
Change the bootp description in the /etc/inetd.conf file so that inetd invokes bootp with the -f flag. Find this line:
bootp dgram udp wait root /usr/etc/bootp bootp
Add the -f flag to the final bootp on the line:
bootp dgram udp wait root /usr/etc/bootp bootp -f
Change the tftp configuration line in the /etc/inetd.conf file in one of the following two ways:
Remove the -s /usr/local/boot string from the argument list for tftpd, so that the entry matches the following:
tftp dgram udp wait guest /usr/etc/tftpd tftpd
This allows tftpd access to all publicly readable directories.
If you are concerned about a possible security compromise, you can instead explicitly list the directories to which tftpd needs access. In this case, you need to add /hosts:
tftp dgram udp wait guest /usr/etc/tftpd tftpd -s /hosts
See the tftpd(1M) and tftp(1C) man pages for more information.
Signal inetd to reread its configuration file.
killall -1 inetd
On far_host, the system on the distant subnetwork, use NFS to export the directory containing the needed bootable kernel (in this case, the file is /usr/local/boot/unix). If you need help exporting a directory, see the export(1M) man page.
On local_host, the system you are trying to boot, give the command:
boot -f bootp()near_host:/hosts/far_host/usr/local/boot/unix
If bootp times out, try the command again, as automount may require a bit of time to retrieve the files from the remote system.
To tell the command monitor to load standalone commands from various resources (such as a disk or CD-ROM device), set the path environment variable. (See “Changing Command Monitor Environment Variables”.) Set the path variable as follows:
setenv path "device_name alternate_path" |
For example, issue the following command:
setenv path "dksc(0)disk(0)partition(8)bootp()/altdir/altbootfile" |
This causes the command monitor to boot the file dksc(0)disk(0)partition(8)/altdir/altbootfile. If that file fails, the command monitor boots bootp()/altdir/altbootfile. If that file also fails, the command monitor prints the message command not found. Note that pathnames are separated with spaces. If the device specification is contained within a command or by bootfile, the command monitor ignores path. Only bootp or volume headers are understood by the PROM.