This chapter describes features of the IRIX operating system that are useful to system administrators. These features are documented elsewhere, but are brought together here as highlights that might otherwise be overlooked. Administrators coming to a UNIX-based system from different environments will find this chapter valuable in reducing the amount of time necessary to perform some tasks. Others may find hints and features that they did not previously know.
Some of the main sections include:
The IRIX shells provide the command line interface to the system. The following features are provided as part of the IRIX command shells.
Shortcuts for referencing large numbers of files or directories in your commands are known as regular expressions. Regular expressions are made up of a combination of alphanumeric characters and a series of punctuation characters that have special meaning to the IRIX shells. These punctuation characters are called metacharacters when they are used for their special meanings with shell commands.
These shortcuts are useful because they minimize keystrokes. While minimizing keystrokes may seem to be a minor concern at first glance, an administrator who issues lengthy and complex command lines repeatedly may find these shortcuts a handy and necessary time-saving feature.
Table 2-1 lists the IRIX metacharacters:
Table 2-1. IRIX Metacharacters
Metacharacter | Meaning |
|---|---|
* | Wildcard |
? | Single-character wildcard |
[] | Set definition marks |
The asterisk (*) metacharacter is a universal wildcard. This means that the shell interprets the character to mean any and all files. For example, the following command tells the shell to concatenate all the files in a directory, in alphabetical order by filename:
cat * |
The following command tells the shell to remove everything in the directory (so be careful with this one!).
rm * |
Only files are removed. A different command, rmdir(1), is used to remove directories. Note that the asterisk character does not always have to refer to whole files. It can be used to denote parts of files as well. For example, the following command removes all files with the suffix .old on their names.
rm *.old |
The single-character wildcard is a question mark (?). This metacharacter denotes a single character. For example, suppose your directory contains the following files:
file1 file2 file3 file.different |
If you want to remove file1, file2, and file3, but not file.different, you could use the command:
rm file? |
If you used an asterisk in place of the question mark, all your files would be removed, but since the question mark is a wildcard for a single character, file.different is not removed.
Square brackets denote members of a set. For example, consider the list of files used in the example of the single-character wildcard. If you want to remove file1 and file2, but not file3 or file.different, use the following command:
rm file[12] |
This command tells the shell to remove any files with names starting with file and with the character 1 or 2 following, and no other characters in the name. Each character in the brackets is taken separately. Thus, if the example directory had included a file named file12, it would not have been removed by the above command.
You can also use a dash (-) to indicate a span of characters. For example, to remove file1, file2, and file3, use the following command:
rm file[1-3] |
Alphabet characters can be spanned as well, in alphabetical order. The shell distinguishes between uppercase and lowercase letters; so to select all alphabet characters within square brackets, use the following syntax:
[a-z,A-Z] |
You can use the square brackets with other metacharacters as well. For example, the following command removes any files with names ending with a 2 or 3, but not file1 or file.different.
rm *[23] |
The IRIX C shell (/sbin/csh) provides several features that can be used to minimize keystrokes for routine tasks. Complete information about these and many other features of the C shell is available in the csh(1) man page. Among the features provided are:
The /usr/bin/tcsh program is an improved version of the C shell. In addition to the C shell features, this shell offers many other features, which are covered in the tcsh(1) man page. A few of the most useful to system administrators are:
Better command line editing using emacs and vi key commands
Improved history mechanisms, including time stamps for each command
Built-in mechanisms for listing directory contents and for executing commands at specific times or intervals.
The Bourne shell (/sbin/bsh) provides fewer features than the C shell, but in its place offers a level of access to the shell that contains far fewer restrictions and intervening layers of interface. For example, you can write shell script programs directly from the shell prompt with Bourne shell. Input and output redirection and command aliasing are supported, but no command history, job control, or filename completions are available. For a complete discussion of the Bourne shell and its features, see the sh(1) man page.
The Korn shell was developed to provide the best features of both the C shell and the Bourne shell. The /sbin/sh program provides the ease of shell programming found in the Bourne shell, along with the job control, history mechanism, filename completion, and other features found in the C shell. This shell has changed many of the ways these features are implemented, and also provides improved command line editing facilities. See the ksh(1) man page for complete information on this shell. Useful features include:
You can invoke a graphical utility or application on a remote networked workstation and direct the window and all input and output to your own workstation. This is convenient when you perform maintenance on remote workstations from your own desk. The program you invoke runs on the remote workstation, and the window is displayed on the specified display workstation.
You must allow the remote system access to your display. To do this, you can use the xhost command on the display workstation:
xhost +remote_workstation |
Next, use rsh(1), rlogin(1), or telnet(1) to log in to the remote workstation with whatever privilege level is required to perform the maintenance on that system. This may be as simple as the guest account, or you may have your own user account on the system, or you may require root permission. Choose the level of access appropriate to your task. Then, for csh and tcsh users, issue the command:
setenv DISPLAY local_workstation:0 |
Or, bsh and ksh users enter:
DISPLAY=local_workstation:0 ; export DISPLAY |
The name of the workstation where the window is to be displayed is substituted for local_workstation. The name of the local workstation must be found in the /etc/hosts file of the remote system, where the program is actually running.
Now, when you invoke the desired utility or application on the remote system the window displays on the local workstation. All input and output is handled through the local workstation. Remember that due to restrictions of network carrying capacity, response time in the program may be slower (in some cases, much slower) than usual.
When you are finished, exit the display program normally and log out of the remote system.
The IRIX system allows you to create a shell window using any colors you like from the palette on a graphics workstation. You may also select any font you prefer from the font set on your system. The xwsh command creates the shell window, and the options to this command control the various fonts, colors, and other features available to you. The command shell used in the window is taken by default from the /etc/passwd file entry, or it can be specified on the command line according to the instructions in the xwsh(1) man page.
For a complete list of the features available with xwsh, see the xwsh(1) man page. The most commonly used features are described in the following examples.
To create a simple shell window with a dark gray background and yellow text, issue the following command:
xwsh -fg yellow -bg gray40 & |
The above command generates a new window and a new shell using the colors specified. The window uses the default font selection and window size, since these attributes were not specified. The command that created the shell was placed in the background, so the shell does not tie up the window where you gave the command. You can always place a command in the background by adding the ampersand character (&) to the end of the command line. For more information on placing processes in the background, see the csh(1) man page.
There are 100 shades of gray a vailable. Gray0 is the darkest, and is virtually black. Gray100 is the lightest and is virtually white. The effect of selecting foreground (text) in yellow and background in gray40 is similar to yellow chalk on a gray chalkboard. For a complete list of the available colors in your palette, use the colorview command. This brings up a window with the list of colors in a scrollable list, and a display window to show a patch of the currently selected color.
The next example changes the colors to black on a sky blue background (high contrast between the foreground and background makes reading the screen easier), and adds a specification for the size of the window:
xwsh -fg black -bg skyblue -geometry 80x40 & |
The first number in the -geometry option is 80, indicating that the new shell window should be 80 characters wide (this is the default). The second number indicates the desired number of lines on the screen, in this case 40. Once again, the xwsh command has been placed in the background by adding the ampersand character to the end of the command line.
You can make a new shell come up on your desktop as an icon by adding the -iconic flag to any xwsh command.
To select a font oth er than the default, you can use the on-screen font selection utility, xfontsel, or you can specify the font on the command line. It is a great deal easier to use the utility, as you must specify a great number of attributes for the font on the command line. Also, it frequently takes a great number of selections before you settle on a font, a weight (regular or bold, condensed or normal), and a font size that appeal to you. Using the on-screen font utility, you can preview what each selection will look like on your windows.
Once you have made your selections, you can copy and paste the font selection information and the rest of your xwsh command into a shell script file for convenient future use. For example, here is an xwsh command line that specifies the IRIS-specific font haebfix in a medium weight with normal spacing, 15 pixels tall. The remaining information is generated by the font selection utility for the shell.
xwsh -iconic -fg yellow -bg grey40 -geometry 80x40 -fn \ -sgi-haebfix-medium-r-normal--15-150-72-72-m-90-iso8859-1 & |
Remember, you may want to create an alias for this or any other IRIX command that you use a lot. See “C Shell Shortcuts” or your shell documentation for more information.
Note that in the shell script, the above command appears all on one line. Due to formatting constraints, the command is broken across two lines in this example.
For complete information on using the font selection utility, see the xwsh(1G) and xfontsel(1) man pages.
The IRIX system provides several tools for manipulating large numbers of files quickly. Some of the most common are described below:
Use the find command to find files and possibly execute commands on the files found. The command starts at a given directory and searches all directories below the starting directory for the specified files. A basic find command line looks like this:
find . -name filename -print |
This command searches the current directory and all subdirectories downward from the current directory until it finds all filenames that match filename and then displays their locations on your screen. The -name option indicates that the next argument is the name of the file you are looking for, and the -print option tells find to display the filename of the file when the file is located.
You can also use regular expressions (see “Using Regular Expressions and Metacharacters”) in your searches.
The following command line searches for files that have been changed after the time /tmp/file was last modified. If you use the touch command (see touch(1)) to create /tmp/file with an old date, this command can help you find all files changed after that date.
find / -local -newer /tmp/file -print |
This example shows how to locate a file, called missingfile, in a user's directory:
find /usr/people/trixie -name missingfile -print |
You can use find to locate files and then to run another command on the found files. The next example shows how to change the permissions on all the files in the current directory and in all subdirectories:
find . -name '*' -local -exec chmod 644 {} \;
|
The option immediately following the find command is a period (.). This indicates to find that the search is to begin in the current directory and include all directories below the current one. The next flag, -name, indicates the name of the files that are being found. In this case, all files in the directory structure are selected through the use of the asterisk metacharacter (*). See “Using Regular Expressions and Metacharacters” for more information on metacharacters and regular expressions.
The -local option indicates to find that the search is limited to files that physically reside in the directory structure. This eliminates files and directories that are mounted via the Network File System (NFS). The -exec option causes find to execute the next argument as a command, in this case chmod 644. The braces, { }, refer to the current file that find is examining.
The last two characters in the command line are part of the chmod command that will be executed (with the -exec option) on all files that match the search parameters. The backslash (\) is necessary to keep the shell from interpreting the semicolon (;). The semicolon must be passed along to the chmod process. The semicolon indicates a carriage return in the chmod command.
The find command has many other useful options:
The find and cpio commands can be used to easily and safely copy a directory or a directory hierarchy as long as the user has permission to access the directory. To copy a directory with all its files, or an entire hierarchy of directories and their files, use commands like the following:
mkdir new_directory_name cd the_directory_you_want_to_copy find . -print | cpio -pdlmv full_path_including_new_directory_name |
This command sequence preserves the symbolic links in the new directory as well as transparently crossing filesystem boundaries.
For complete information, refer to the find(1) man page.
You can use sed, the Stream Editor, to automate file editing. The sed command follows an editing script that defines changes to be made to text in a file. The sed command takes a file (or files), performs the changes as defined in the editing script, and sends the modified file to the standard output. This command is fully described in the sed(1) man page, as well as standard UNIX documentation.
Recursive commands can save you a lot of time. For example, to change the ownership of all the files and directories in a directory recursively, and all of the files and directories in all of the subdirectories below that, you can use the recursive option with chown(1):
chown -R username directory |
Some of the other commands in the IRIX system that have recursive options are:
ls -R rm -r chgrp -R |
If you want to use a particular command recursively, but it does not have a recursive option, you can run the command using find. See “Locating Files with the find Command ”.
Note that using recursive options to commands can be very dangerous in that the command automatically makes changes to your files and filesystem without prompting you in each case. The chgrp command can also recursively operate up the filesystem tree as well as down. Unless you are sure that each and every case where the recursive command will perform an action is desired, it is better to perform the actions individually. Similarly, it is good practice to avoid the use of metacharacters (described in “Using Regular Expressions and Metacharacters”) in combination with recursive commands. Note that with the rm command, you can use the -i option to interactively prompt you for confirmation before removing any file.
You can use the at, batch, and cron utilities to automate many of your usual tasks, both as an administrator and as a user (unless user cron and at permissions have been disabled—see crontab(1)). These utilities perform similar functions. All execute commands at a later time. The difference between the commands is that at executes the given command at one specific time; cron sets up a schedule and executes the command or commands as often as scheduled; and batch executes the commands when system load levels permit. The following sections provide some examples of the use of these utilities. For complete information, refer to the at(1), batch(1), and cron(1M) man pages.
If you have a task to process once at a later point in time, use at. For example, if you wish to close down permissions on a public directory at midnight of the current day, but you do not need to be present when this occurs, use the command string:
at 2400
Ctrl+D
It is required that the at command itself and the date and time of the command be placed alone on a line. When you press Enter, you do not see a prompt; at is waiting for input. Enter the command to be executed just as you would type it at a shell prompt. After entering the command, press Enter again and enter Ctrl+D to tell at that no more commands are forthcoming. You can use a single at command to execute several commands at the appointed time. For example, if you want to close the public directory at noon on July 14th and change the message of the day to reflect this closure, you can create the new message of the day in the file /tmp/newmesg, and then issue the following command string:
at 1200 July 14
chmod 000 /usr/public
mv /tmp/newmesg /etc/motd
Ctrl+D
By default, any output of commands executed using at is mailed to the executing user through the system e-mail. You can specify a different location for the output by using the standard output redirects, such as pipes (|) and file redirects (>). See your command shell documentation for a complete description of redirecting the standard output.
For complete information on the at command, see the at(1) man page.
The batch command works just like the at command, except that you do not specify a time for the command or commands to be executed. The system determines when the overall load is low enough to execute the commands, and then does so. As with all other cron subsystem commands, the output of the commands is mailed to you unless you specify otherwise. batch is useful for large CPU-intensive jobs that slow down the system or cripple it during peak periods. If the job can wait until a non-peak time, you can place it on the batch queue until the system executes it. For complete information on the batch command, see the batch(1) man page.
If you want a command to execute regularly on schedule, the cron command and subsystem provide a precise mechanism for scheduled jobs. The at and batch commands are technically part of the cron subsystem and use cron to accomplish their tasks. The cron command itself, though, is the most configurable command of the subsystem.
You use cron by setting up a crontab file, where you list the commands you would like to have executed and the schedule for their execution. Complete information on setting up your crontab file is available in the cron(1M) and crontab(1) man pages.
The cron facility is useful for scheduling network backups, checking the integrity of the password file, and any other regular tasks that do not require interaction between you and the system. By default, cron mails the results or output of the command to the user who submitted the crontabs file, so if you use cron to schedule something like a pwck(1M), the results of the test are mailed to you, and you can interpret them at your convenience.
Note that you must restart cron after each change to a crontabs file, whether made through the cron utility or the at command, for the changes to take effect.
As administrator, you can control access to the at and batch commands by using the cron.allow, cron.deny, at.allow, and at.deny files in /etc/cron.d. Specific users or all users can be denied use of the commands. Refer to the at(1) and crontab(1) man pages forfor more information.
The /etc/nologin file prevents any user from logging in. This feature of the login(1) program is designed to allow the system administrator to have the system running in full multiuser mode, but with no users logged in. This is useful when you want to perform complete backups of the system or when you want to do some testing that may cause the operating system to halt unexpectedly. Of course, it is always best to do this sort of work during non-peak system usage hours.
To disable logins, simply create a file called nologin in the /etc directory. (You must be logged in as root to create files in /etc.) In addition to disallowing logins, the login program displays the contents of /etc/nologin when it denies access to the user. (Note that /etc/nologin does not apply to the console window.)
A suggested format for the message in /etc/nologin is:
The system is unavailable for a few moments while we perform some routine maintenance. We will be done shortly and regret any inconvenience this may cause you. -Norton |
To allow logins again, simply remove the /etc/nologin file. If the system crashes, root can still log in on the system console, on a tty line, or on a pseudo tty attached to the console (but not over the network) to remove /etc/nologin.
The system hardware for graphical workstations (and some X-terminals) can provide you with shortcuts. These may not be available to server administrators who rely solely on character-based terminals for their administration. Using the graphics console of your system, you can cut and paste between windows without using pulldown or pop-up menus of any sort. Using the pop-up menu, you can manipulate windows completely.
You can customize the action of your mouse buttons. All examples in this section assume the default mouse button meanings are used. If you have modified your mouse action, you must allow for that modification before you use these techniques.
For complete information on using the pop-up windows, see the online Desktop User's Guide .
Procedure 2-1 describes how you can use the most common mouse shortcut. It outlines how you cut or copy and paste between windows on your screen.
To cut or copy and paste text between windows, follow these steps:
Find the cursor controlled by your mouse on your screen. It should appear as a small arrow when it is positioned in the working area of one of your windows, or as some other figure when it is positioned on the frame of a window or in the working area of an application's window. If you cannot locate the cursor immediately, move the mouse around a bit and look for motion on your screen. You should find the cursor easily.
Place the cursor at the beginning of the text you wish to paste between windows and press the leftmost key on the top of the mouse. Now, keeping the mouse button pressed, move the cursor to the end of the text you wish to paste. The text highlights to show it is selected. If you are selecting a large section of text, it is not necessary to move the cursor over every space. You may move the cursor directly to the end point and all intervening text is selected. It is not possible to select “columns” of text or several disconnected pieces of text at once. When you have moved the cursor to the desired end point, release the mouse button. The text remains highlighted.
Now move the cursor to the window you want to paste the text into and make certain the window is ready to receive the pasted text. For example, if you are pasting a long command line, make certain that there is a shell prompt waiting with no other command already typed in. If the pasted matter is text into a file, make certain that the receiving file has been opened with an editor and that the editor is in a mode where text can be inserted.
To paste the text, place the cursor in the receiving window and press the middle mouse button once quickly. Each time you press the middle button, the selected text is pasted into the receiving window. Sometimes it takes a moment for the text to appear, so be patient. If you press the button several times before the text appears, you will paste several copies of your text.
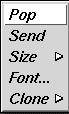
You can also paste your selected text in the bottom of a window (including the window from which you selected the text). Press the rightmost mouse button while the cursor is in that window and choose the Send option from the pop-up menu that appears.
The text you originally selected remains selected until you select new text somewhere else or until you place the cursor back in the original window and click once on the leftmost mouse button.
Procedure 2-2 describes how you can use the mouse to create a new shell window.
To create a new shell window, follow these steps:
With the cursor in a shell window, press and hold the rightmost button on your mouse. A pop-up menu appears as shown in Figure 2-1:
While keeping the button on the mouse pressed, move the mouse down until the Clone option is highlighted and the submenu pops up, showing various shell window cloning options. These options create another shell window functionally identical to the one in use. This is why the option is called cloning. The text and background colors of the current window are carried forward to the cloned window, and the selections in the sub-menu specify the number of lines in the new window. You can choose to have the same number of lines in the cloned window as in the current window, or to have 24, 40, or 60 lines as shown in Figure 2-2.
Choose the size you want by moving the mouse down the options and releasing the mouse button when the option you desire is highlighted. The new window appears on your screen. You may repeat this process as often as you like on any shell window.

Man pages are online IRIX command descriptions. A full set of man pages for the programs, utilities, and files in the standard IRIX distribution is provided online, and these pages are available through the man(1) command. In addition, you can create your own custom man pages using the following procedure. Any time you create a script, utility, program, or application for your users, you should also create a man page. This provides a convenient way for your users to learn to use your new tools, and also makes future maintenance easier.
Not all sites have the optional Documenter's Workbench software product installed, but you can create a facsimile of a man page using only the text editor of your choice. See the following section for details.
To create a pure-text man page without Documenter's Workbench (no embedded nroff commands that would format the text) simply use the vi editor (or the editor of your choice) and document your script or program according to the style found in the standard man pages. Name your man page file after the script or program it documents with the suffix .l to designate the page as a local man page.
| Note: Use the letter “l” as your suffix, not the numeral one “1.” |
When you have completed your man page, you must place it in the /usr/man directory structure for the man command to be able to display the new page. Place the man pages in a local directory, such as /usr/man/manl. (Again, use the l to designate local man pages.) If the directory does not already exist, create it with this command (you must be logged in as root):
mkdir /usr/man/manl |
Long man pages should be packed to save disk space. Use the pack command to pack the text file into a more compact form. For example, to pack the man page you made for a user script called program, enter:
pack program.l mv program.l.z /usr/man/manl/program.l.z |
| Note: The man program automatically unpacks the pages for reading. |
Test your man page with the command:
man l program |
The command should display the man page specified (this assumes that /usr/man is in your $MANPATH environment variable.) For more information, refer to the man(1) man page.
The IRIX system provides a set of detailed programs to assist you in debugging potential system problems. This software is briefly described here. Complete documentation is available in the relevant man pages and through the help system files and release notes distributed with the software. The savecore, icrash, fru, and sysmon software work together to provide a picture of what happens to your system in an error condition that results in an operating system crash.
Your system may or may not automatically save the image of system memory (if possible) at the time of a crash depending on the chkconfig setting for savecore. Here is what happens depending upon the two possible settings to savecore:
| savecore on | The system attempts to automatically save the image of system memory at a system crash. The image is stored in /var/adm/crash/vmcore.N, where N is a sequential number assigned to the most recent core file. A successful dump may then be studied with the icrash utility described below. | |
| savecore off | A core dump is not saved by the system The icrash utility may still be run on /unix and /dev/swap in order to get a report of what happened when the system crashed. In this case, systems do not have to use the disk space on a core dump in order to get a report. |
To determine the current status of the savecore option, enter:
chkconfig | grep savecore |
The default setting is savecore on.
Refer to savecore(1M) man page and the discussion of icrash in “icrash System Crash Analysis Utility” for more information.
The icrash(1M) utility interactively generates detailed kernel information in an easy-to-read format. The icrash command can also generate reports about system crash dumps created by savecore.
Two report files are created when icrash runs, with N being the bounds number for the core dump:
| analysis.N | An analysis of the core dump is created containing items of interest, such as the putbuf dump, fru information, stack traces, and so on. This is a verbose description of what happened when the system crashed, and it is meant to be used to perform a preliminary analysis of the system before any hardware or software changes are made. See the icrash(1M) man page for more information. | |
| summary.N | The summary report contains the panic string, the crash time, and the fru information in one file for availmon. See the availmon(1M) man page for more information. |
Depending on the type of system crash dump, icrash can create a unique report that contains information about what happened when the system crashed. The icrash command can be run on both live systems or with any namelist file and core file specified on the command line. The namelist file must contain symbol table information needed for symbolic access to the system memory image being examined.
Each version of icrash is specific to the operating system release that it came from, and does not work on any other operating system release. Do not copy icrash to any other IRIX system unless the operating system versions are identical (including patch levels). Running icrash on a live system can sometimes generate random results, as the information being viewed is volatile at the time it is displayed. A brief list of some of the functionality that icrash offers:
System crash reports created on system panics
Field replacement unit (FRU) information provided with each crash on eligible hardware
Direct access to a broad list of kernel structures
Disassembly of kernel functions
Documented set of commands (see the help system within icrash)
Command line editing and history
The fru (Field Replacement Unit) command (described fully in the fru(1M) man page) displays field replacement unit analysis on Challenge L and XL, Onyx L and XL, and Power Challenge and Power Onyx systems only. The program considers the hardware state during an error situation and attempts to determine if the error results from faulty hardware. The analysis is based on the hardware error state created in the kernel crash dump. If no hardware error state is dumped, no fru analysis is displayed.
Each board is analyzed separately based on the hardware error state. After the analysis is completed, the board (or boards) with the highest confidence levels is displayed. Currently the boards analyzed include the IO4, MC3, IP19, and IP21. Note that you should also check the version of fru output from release to release because later versions may report a different analysis.
When a confidence level is displayed, it is based on the amount of confidence that the fru analyzer has in the board listed as being the problem. Note that there are only a few levels of confidence, and it is important to recognize what the percentages mean:
| 10% | The board was witnessed in the hardware error state only. | |
| 30% | The board has a possible error, with a low likelihood. | |
| 40% | The board has a possible error, with a medium likelihood. | |
| 70% | The board has a probable error, with a high likelihood. | |
| 90% | The board is a definite problem. | |
| 95% | The board is a definite problem, an exact error match. |
There is a possibility of multiple boards being reported, so the field engineer must be cautious when deciding to replace boards. For example, if two boards are reported at 10%, that is not enough confidence that the boards listed are bad. If there is one board at 70% or better, there is a good likelihood that the board listed is a problem, and should be replaced. Boards at 30% to 40% are questionable, and should be reviewed based on the frequency of the failure of the specific board (in the same slot) between system crashes.
The objective of fru is to uncover real hardware problems, rather than to replace boards at random. Each icrash report for each kernel core dump on an eligible system has a fru analysis in it, which should be reviewed by field engineers before any boards are replaced.
In Example 2-1, each fru command output comes from a unique core dump. Your output is likely to vary significantly.
>> fru FRU ANALYZER (2.0.1): ++ PROCESSOR BOARD ++ IP21 board in slot 2: 40% confidence. ++ END OF ANALYSIS >> fru FRU ANALYZER (1.6.5): ++ MEMORY BOARD ++ MC3 board in slot 1: 70% confidence. ++ END OF ANALYSIS >> fru FRU ANALYZER (1.6.5): ++ CPU slice 3 (CC CHIP) ++ and/or Integral component (A CHIP) ++ on the IP19 board in slot 5: 40% confidence. ++ CPU slice 3 (CC CHIP) ++ and/or Integral component (A CHIP) ++ on the IP19 board in slot 7: 40% confidence. ++ CPU slice 2 (CC CHIP) ++ and/or Integral component (A CHIP) ++ on the IP19 board in slot 9: 40% confidence. ++ CPU slice 3 (CC CHIP) ++ and/or Integral component (A CHIP) ++ on the IP19 board in slot 11: 40% confidence. ++ END OF ANALYSIS >> fru FRU ANALYZER (2.0.1): No errors found. |
The sysmon utility allows a user to browse the system log file (/var/adm/SYSLOG). The 8 SYSLOG priorities (see the syslog(3B) man page) are simplified into 4 priority levels.
The sysmon utility is part of the Desktop System Monitor. It can be launched from the System menu by choosing View System Log. You see a window similar to that shown in Figure 2-3:
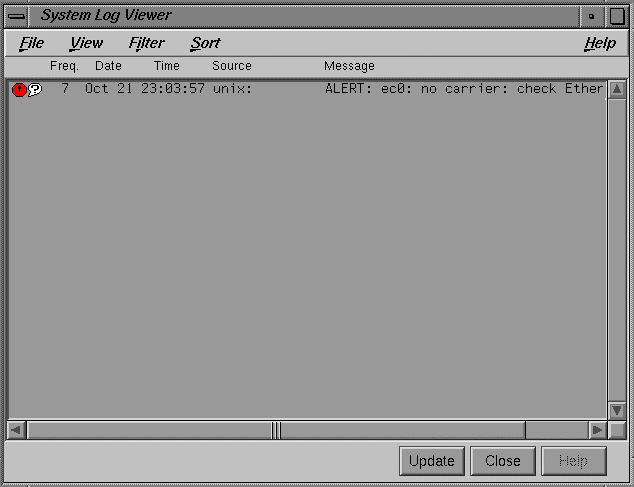
You can choose View, Filter and Sort options through the pulldown menus on this window. Your selections are saved in your $HOME/.sysmonrc file. For additional information on these options, consult the online help available through this window or the sysmon release notes.
Table 2-2 shows how SYSLOG priorities map into the sysmon simplified priority scheme:
Table 2-2. sysmon Priority Table
sysmon Priority | SYSLOG Priority | Numerical Priority |
|---|---|---|
CRITICAL | LOG_EMERG | 0 |
CRITICAL | LOG_ALERT | 1 |
ERROR | LOG_CRIT | 2 |
ERROR | LOG_ERR | 3 |
WARNING | LOG_WARNING | 4 |
WARNING | LOG_NOTICE | 5 |
INFO | LOG_INFO | 6 |
INFO | LOG_DEBUG | 7 |
The availability monitor (described completely in the availmon(5) man page) is a software package that together with icrash and the FRU analyzer provides a technology platform for system availability and diagnostic data gathering and distribution.
The availmon system collects system availability information and crash diagnosis information. The availability information can be used to evaluate system reliability and availability. The crash diagnosis information is an automated aid to debugging.
The availmon software is embedded in the system boot and shutdown processes. The software is capable of differentiating controlled shutdowns, system panics, system hangs, power cycles, and power failures. Your system's uptime is estimated by a daemon process, and diagnostic information is collected from icrash(1M), /usr/adm/SYSLOG, and sysmon(1M), hinv(1M), versions(1M), and gfxinfo(1G). All aspects of availmon operation are fully configurable.
The availmon software on your distribution may not work with some older IRIX releases.
You can choose to participate in a system availability database that assists SGI support in providing reliable service. All availability and diagnostic data for cooperating systems will be maintained in a SGI database that provides overall reliability data and specific histories for individual participating systems. This is the primary function of availmon.
Issue the amregister command to set up availmon configuration, turn on autoemail, and register your system with the SGI availmon database.
To register your system, log in as root and issue the command:
/usr/etc/amregister -r |
Depending on your system type, you may need to enter the serial number of your system by hand. See the amregister(1M) man page for further information.
The availmon software is enabled through the chkconfig(1M) command, described in “Checking Software Configuration Options with chkconfig” in Chapter 4. The flags are:
| availmon | Controls the activation of the entire availmon software package. By default, this option is on. |
The other configuration flags are set using the amconfig utility, which is similar to chkconfig, but uses a different record file. There are four flags:
| autoemail | Enables automatic distribution of reports. By default, this option is off, but is turned on by amregister. | |
| hinvupdate | Enables a daemon that checks for changes reported by hinv and gfxinfo. By default, this option is on for large systems and off for all others. | |
| shutdownreason | Directs the system to query the superuser for a reason for each system shutdown. By default, this option is on for large systems and off for all others. | |
| tickerd | Enables the daemon that monitors system uptime. By default, this option is on for large systems and off for all others. |
There is also an e-mail list configuration file, /var/adm/avail/config/autoemail.list, used to control the report type, e-mail format, and e-mail addresses for availmon reports. The e-mail list is edited and maintained through the amconfig command. By default, this file is configured to send diagnosis reports to SGI.
For sites with multiple systems participating, the amconfig command can be executed on one system to set up a common e-mail configuration file (/var/adm/avail/autoemail.list), and then this file can be copied onto all participating systems. Then run amregister -r on each system.
If you want a site log file for one or more systems, a pseudo e-mail alias can be created. This alias pipes availability reports to amreceive, whose output is then appended to the site log file. This procedure should be done before registering all the systems, because initial availability reports are sent out when registering.
After setting up availmon, amreport can be executed on each system to view the availability statistics and reports for that system, or it can be run with the site log file as input to view overall availability statistics for all systems, and availability reports for any system.
Procedure 2-3 shows you how to create a site log file.
To create a site log file, perform the following steps:
Create an e-mail alias on one system and pipe all availability reports to amreceive. For example, if the site log file is /disk/amrlog, add this line to the mail server system's /etc/aliases file:
amrlog: “| /var/adm/avail/amreceive >> /disk/amrlog”
Then run the newaliases command to set up this e-mail alias.
Run the amconfig command on the mail server system to configure the standard e-mail lists. For this example log file, add the entry:
availability(text): amrlog
Then, copy the resulting /var/adm/avail/config/autoemail.list on this system to the rest of the systems at your site.
Run amregister to register all your systems as described in “Registering availmon”.
Run the command:
amreport -s /disk/amrlog
It shows the overall statistics, system statistics, and individual availability reports for all participating systems.
Three examples are provided to illustrate the administration of availmon. One is for general customers who send reports out automatically; the other two are for secure sites with and without internal report sending.
If availmon is installed on a single system, reboot the system after installation. Then, run amregister without any argument to register and configure the e-mail lists. This turns on autoemail and sends registration reports to all configured addresses. If your system does not have an IP19, IP21, IP22, or IP25 processor, amregister prompts you to input your system's serial number manually.
The shutdownreason and tickerd configuration options can be turned on or off anytime. The default autoemail.list is:
availability(compressed,encrypted): availability(compressed): availability(text): diagnosis(compressed,encrypted): availmon@csd.sgi.com diagnosis(compressed): diagnosis(text): |
In addition, you may want to add the following entries:
availability(text): local_sysadmin diagnosis(compressed,encrypted): local_support |
In these optional entries, replace the strings local_sysadmin and local_support with the appropriate e-mail addresses for your system administrator and SGI support representative, respectively. If encrypted data in e-mail is prohibited by law at your site, move addresses in “(compressed,encrypted)” entries to “(compressed)” entries.
If your site is under security restrictions, use the following procedures to set up and use availmon. The setup procedure is similar to that found in “Registering availmon”, except that the addresses outside your site should be deleted.
After your system administrators receive availmon reports, they can check the latest diagnosis report, /var/adm/crash/diagreport, on the system just rebooted, delete sensitive data, and use amsend to mail the filtered report to availmon@csd.sgi.com and to any SGI support address they require. If the diagnosis report contains any icrash, syslog, hinv, versions, or gfxinfo data, use the following command to mail the report.
amsend -i -z -x availmon@csd.sgi.com ... |
If there is no such data in the report, use the command:
amsend -d -z -x availmon@csd.sgi.com ... |
If encrypted data in e-mail is prohibited by law at your site, remove -x from the command line.
If outside report mailing is not possible at your site, no special actions need to be taken to use availmon. However, for those platforms not using IP19, IP21, IP22, and IP25 processors, run amregister and then turn off autoemail so that reports generated on these systems are not sent automatically. The shutdownreason and tickerd options can also be turned on or off as you choose.
Because no external report is mailed after the system reboots, system administrators need to check whether the system has been down, and then check the report files to determine the reason. If the system crashes more than once before checking, old reports are overwritten by the new ones (core dumps and icrash reports are kept until removed explicitly). Therefore, internal report mailing is recommended for secure sites.
Diagnosis reports can be sent to SGI using amsend. See the section titled “Using availmon at Secure Sites with Internal Report Mailing”. Another method is to run amconfig to configure standard e-mail lists so that when reports need to be sent, amnotify can be used to send reports according to those lists.
There are two types of reports produced by availmon: availability and diagnosis.
Availability reports consist of system start time, stop time, stop reason, uptime, restart time, and a summary of the likely reason for any system crash (where relevant). A standard availability report is shown here:
------------------------------ whizkid ---------------------------- Report Version ......... 0.1 Internet Address ....... whizkid Reason for Shutdown .... Hang Started at ............. Mon Oct 3 16:56:08 1994 Stopped at ............. Unknown instant Uptime ................. 4304 minutes (2 days 23 hrs 44 mins) ------------------------------------------------------------------- Press <enter> to display summary ... |
When you press Enter, you see information similar to the following:
======================= SUMMARY for whizkid ========================== Controlled Shutdowns ... 0 Hangs .................. 1 Panics ................. 0 Average Uptime ......... 2189 minutes (1 day 12 hrs 29 mins) Least Uptime ........... 74 minutes (1 hr 14 mins) (*) Most Uptime ............ 4304 minutes (2 days 23 hrs 44 mins) Availability ........... 0.7870% Logging started at ..... Mon Oct 3 16:56:08 1994 System has been up for . 74 minutes (1 hr 14 mins) Last boot at ........... Tue Oct 24 23:03:44 1995 ====================================================================== |
Diagnosis reports contain the same information as availability reports. They also contain an icrash analysis report (including the FRU analyzer result), important syslog messages, and system hardware/software configuration and version information.
Availability information is permanently stored in /var/adm/avail/availlog. Files in /var/adm/avail are maintained by availmon and should not be deleted, modified, or moved. The most recent availability and diagnostic reports are stored in /var/adm/crash/availreport and /var/adm/crash/diagreport, and should be treated comparably to core dumps.
There are two ways to configure the sending of availmon reports: automatic or manual.
If you select automatic mailing, you can configure any number of recipients for each type of report. The recommended configuration is to send diagnosis reports to the SGI availmon database and to SGI support representative, and to send availability reports to your local system administration team. You can also send copies of all reports to a local log account.
If you select manual mailing, the two types of reports are created in the directory /var/adm/crash. You can then edit or filter the reports, and use the amsend command to send the approved reports.
The availmon software can be configured to compress and encode data. The receiving agent (using the amreceive command) decodes, uncompresses, and stores the data in a database at SGI. Data encryption is recommended if it is not prohibited at your site.
The amreport(1M) utility is provided to review availmon reports and to provide statistical availability information. This program can process local availability log files or received aggregate availability reports (such as a site log file) from different systems.
The amreport utility shows the statistical reports and availability reports hierarchically from overall statistics for all systems, a table of statistics for all systems (however, if the input is a local log file, information for all systems is not provided), statistics for each system, a table of all reboot instances for each system, and availability reports for each system. See the amreport(1M) man page for full information on this utility.