The whiteboard plugin features allow you to display still or dynamically updated video or screen-captured images, use arrows for annotation and to mark dimensions, and use a drag-and-drop symbol palette to expedite whiteboard communications.
Use the following whiteboard toolbar buttons to display video images on the whiteboard. (These tools can also be selected from the Plugins menu.)
 |
To insert a dynamically updated view of your system's default video input, click the insert live video button. This feature is not available in T.126 mode. |
 |
To insert a still picture of your system's default video input, click the insert still video button. |
Once the image appears on the whiteboard it is seen by others in the call. It can be selected, moved or deleted like other whiteboard objects. It can also be annotated with the drawing tools. If the image is cut and then pasted or deleted and then undeleted, the restored image will be a still image only and it will no longer be possible to update the image.
When you insert a video image, new controls appear at the bottom of the whiteboard:
 |
The start updating button makes the selected image dynamically update. This feature is not available in T.126 mode. |
 |
The update once button updates the selected image once. |
 |
The stop button stops dynamic updating of the selected image. |
 |
The preview button displays a separate window, away from the shared whiteboard, with a live view of the default video input. This is a called a preview window because it allows you to preview the video input before it is updated in the whiteboard. |
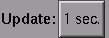 |
The update delay button lets you choose how many seconds should pass between video updates of the selected image. This feature is not available in T.126 mode. |
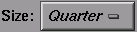 |
The size menu button lets you choose a size for the selected image. (A change in image size will take effect the next time you update the video image.) |
Note: A dynamically updating video image will temporarily freeze in the following situations:
You will see a warning dialog the first time that this happens. If the video images freezes and you cannot select it with the mouse, this is the likely cause. When the remote user deselects the video object, the updating will begin again.
When the remote user unlocks the whiteboard, the updating will begin again.
Remote users viewing a different page will see the video image freeze until the sender of the video image returns to the page containing the video object.
The default video input is the video input that your system is currently set to receive. For example, if you have a system camera, the system camera is typically the default video input. On many systems, you can connect a VCR and set it as the default video input. (For information about the video input capabilities of your system, see your system owner's guide.)
If you want to change or control something about your default video input, choose the menu item Plugins > Video Device Control Panel. A video control panel appears. The Video Panel has its own online Help.
The following whiteboard toolbar buttons let you insert screen area images. (These tools can also be selected from the Plugins menu.)
 |
To insert a dynamically updated view of a section of your screen, click the insert live screen image button. This feature is not available in T.126 mode. |
 |
To insert a still picture of a section of your screen, click the insert still screen image button |
Next, press the mouse button and draw an outline over the area of the screen you wish to capture.
After you have selected an area for capture you can change the position and size of the outline as follows:
Once the image appears on the whiteboard it is seen by others in the call. It can be selected, moved or deleted like other whiteboard objects. It can also be annotated with the drawing tools. If the image is cut and then pasted or deleted and then undeleted, the restored image will be a still image only and it will no longer be possible to update the image.
When you insert a screen image, new controls appear at the bottom of the whiteboard:
|
The start updating button makes the selected image dynamically update. This feature is not available in T.126 mode. |
|
The update once button updates the selected image once. |
|
The stop button stops updating of the selected image. |
|
The update delay button lets you choose how many seconds should pass between updates of the selected image. This feature is not available in T.126 mode. |
 |
The Screen Capture SmartClear feature allows you to automatically erase the annotations on a screen capture image when the screen image changes. To enable this feature click on the SmartClear check box. This feature is not available in T.126 mode. |
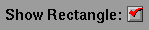 |
A screen capture outline appears on your screen when you select a still screen image on the whiteboard. If you do not want the screen capture outline to appear when you select the image on the whiteboard, deselect the Show Rectangle checkbox. When the image is dynamically updating the screen capture outline is always shown and the Show Rectangle check box is not available. |
Updating the image when the screen capture outline overlaps the main whiteboard window will cause the main whiteboard window to be lowered beneath all other windows on your desktop. This ensures that the screen area being captured is not obscured by the main whiteboard window. The sgimeeting_ext release notes describe how to turn this behavior off.
Note: A dynamically updating screen image will temporarily freeze in the following situations:
You will see a warning dialog the first time that this happens. If the screen images freezes and you cannot select it with the mouse, this is the likely cause. When the remote user deselects the screen object, the updating will begin again.
When the user unlocks the whiteboard, the updating will begin again.
Remote users viewing a different page will see the screen image freeze until the sender of the screen image returns to the page containing the screen object.
To draw arrows on the whiteboard, first select the arrow type by clicking one of the following buttons on the toolbar. (These arrows can also be selected from the Plugins menu.)
 |
arrow |
 |
double-end arrow |
 |
dimension marker |
 |
double-end dimension marker |
Draw the arrow by clicking and dragging.
You can select the arrow color and line thickness using the option buttons that appear at the bottom of the drawing area when you click an arrow button. You can also select an arrow that has already been drawn, and then choose a new color or thickness for it.
You can quickly erase all the annotations associated with a single Text or Image object using the SmartClear feature.
 |
Select a Text or Image object and click on the SmartClear tool. All annotations overlapping the selected object will be erased. |
A warning dialog will be displayed before the annotations are erased. If you do not wish to be warned every time, check the box on the dialog before hitting Ok.
The drag and drop symbol palette allows you to quickly insert image files into the whiteboard. The palette can contain images of any size, from small icons to large maps or photographs.
 |
The symbol palette button opens a standard directory view window that contains symbols you can drag and drop onto the whiteboard. (This palette can also be selected from the Plugins menu.) |
  ... ... |
For example, in a data conference meeting you might be looking at a number of proposals on the whiteboard. As you go through the list, you could mark decisions by dropping the check mark symbol onto items that participants like and the question mark onto items about which they are unsure. |
The symbol palette includes a set of predefined images. You can create your own symbol palette folder by adding a directory named SGItoolsImages under your home directory. You can use any other directory as your symbol palette by setting the environment variable SGIMEETING_IMAGE_PATH and restarting SGImeeting.
Copyright © Silicon Graphics, Inc 1998-2002; Data Connection Limited 1996-2000