This appendix lists L1 and L2 commands for the SGI Origin 3000 servers in these sections:
The following subsections describe the L1 controller command set. The commands are listed alphabetically and include examples of output where applicable.
Use the asterisk character (*) to broadcast a command. A command that is broadcast is sent to all of the bricks that are attached to the C-brick that issued the command. The broadcast option is valid only from the C-brick. Example B-1 shows sample output from the * version command.
Example B-1. * version Command Output
001c07-L1>* version 001c07: L1 0.7.27 (Image A), Built 04/28/2000 13:06:43 [P1 support] 001i21: L1 0.8.xx (Image B), Built 06/13/2000 09:54:32 [P1 support] |
The bedrock set of commands provides the status of and sets the L1 controller-to-hub-ASIC protocol setting. There are two commands in this set, which is valid only for the C–brick:
bedrock
bedrock ppp

Note: For the bedrock command set, you can use the mnemonic bdrck instead of the word bedrock.
Use the bedrock command to determine the current settings for the L1-controller-to-hub-ASIC protocol. Example B-2 shows sample output from this command, and Table B-1 lists the valid protocols. (Use the l1dbg set of commands to turn debugging on or off.)
Use bedrock ppp to set the L1 controller-to-hub protocol to PPP. Example B-3 shows sample output from this command.
The brick set of commands provides the status of and sets the brick location and type. The following are the commands in this set:
brick
brick rack <racknumber>
brick slot <slotnumber>
brick partition none
brick partition <partition>
Note: For this command set, you can use the mnemonics upos and part instead of the words slot and partition.
Use the brick command to determine the brick location and type. Example B-4 shows sample output from the brick command.
Example B-4. brick Command Output
001c07-L1>brick rack: 001 slot: 07 partition:0type: C source: EEPROM |
Use brick rack <racknumber> to set the rack number where the brick is located. Example B-5 shows sample output from the brick rack <racknumber> command.
Use brick slot <slotnumber> to set the brick unit position (slot number) in the rack. The variable <slotnumber> is a unit number from 01 to 39. Example B-6 shows sample output from the brick slot 07 command.
| Note: For the brick slot <slotnumber> command, the mnemonic upos may replace the word slot. |
Use brick partition none to clear the brick partition number. Example B-7 shows sample output from this command.
Example B-7. brick partition none Command Output
001c07-L1>brick partition none brick partition cleared. |
Use brick partition <partition> to set the brick partition number. Example B-8 shows sample output from this command.
Example B-8. brick partition <partition> Command Output
001c07-L1>brick partition 1 brick partition set to 1. |
Use the ctc <cmd> command to send a command to an attached C-brick. This command is valid only for a C-brick. Example B-9 shows sample output from the ctc version command.
Example B-9. ctc version Command Output
003c01-L1>ctc version 002c01: L1 0.7.37 (Image A), Built 05/24/2000 14:59:42 [P1 support] |
Use the ctci <cmd> command to send a command to an I/O brick (X-brick, P-brick, or I-brick) that connects to an attached C-brick. This command is valid only for a C-brick. Example B-10 shows sample output from the ctci version command.
Example B-10. ctci version Command Output
003c01-L1>ctci version 001x01: L1 0.7.37 (Image A), Built 05/24/2000 14:59:42 [P1 support] |
Use the cti <cmd> command to send a command to an attached I/O brick. This command is valid only for the C-brick. Example B-11 shows sample output from the cti version command.
Example B-11. cti version Command Output
003c01-L1>cti version 004i01: L1 0.7.37 (Image A), Built 05/24/2000 14:59:42 [P1 support] |
Use the config command to view the L1 controller configuration information. Example B-12 shows sample output from the config command.
Example B-12. config Command Output
003c01-L1>config :0 - 003c01 :1 - 004i01 :2 - 002c01 :3 - 001x01 003c01-L1> |
In the output, the first number after the colon is the L1 index number. Table B-2 lists the values of the L1 index for a C-brick and an R-brick. Only L1 index number 0 is valid for an R-brick.
Table B-2. L1 Index Values for C-brick and R-brick
L1 Index | Name | Description |
|---|---|---|
0 | Local brick | The C-brick or R-brick that contains the L1 issuing the command. |
1 (Applies to C–brick only) | Attached I/O brick | An I/O brick that connects to the local brick. |
2 or 3 (Applies to C–brick only) | Attached C-brick | A C-brick that connects to the local brick. |
3 or 4 (Applies to C–brick only) | I/O brick attached to the attached C-brick | An I/O brick that connects to a C-brick that connects to the local brick. |
Table B-3 lists the values of the L1 index for an I/O brick.
Table B-3. L1 Index Values for I/O brick
L1 Index | Name | Description |
|---|---|---|
0 | Local brick | The I/O brick that contains the L1 issuing the command. |
1 | Attached C-brick on port A | A C-brick that connects to the local brick through port A. |
2 | Attached C-brick on port B | A C-brick that connects to the local brick through port B. |
3 | Attached C–brick on port C | A C–brick that connects to the local brick through port C. |
4 | Attached C–brick on port D | A C–brick that connects to the local brick through port D. |
The number that follows the L1 index, after the dash, is the brick identification (for example, 003c01). The first three digits of the brick identification indicate the rack in which the brick resides. The fourth digit of the brick identification indicates the type of brick (see Table B-4). The last two digits of the brick identification indicate the slot position in which the brick resides.
Type | Description |
|---|---|
c | C-brick |
i | I-brick |
p | P-brick |
r | R-brick |
x | X-brick |
n | N–brick |
g | G–brick |
? | Unknown brick type |
Use the date set of commands to view and set the current date and time used by the L1 controller. There are three commands in this set:
date
date set <value>
date set tz <value>
Use the date command to view the current date and time value used by the L1 controller. Example B-13 shows sample output from the date command.
Use date set <value> command to set the date and time value used by the L1 controller. The variable <value> is a time value in the form yyyymmddHHMMSS (where yyyy is the four-digit year, mm is a two-digit month, dd is a two-digit day, HH is a two-digit hour, MM is a two-digit minute, and SS is a two-digit second).
Use date set tz <value> to set the time zone offset used by the L1 controller. The variable <value> is a maximum of +12 (for 12 hours ahead of GMT) and a minimum of -12 (for 12 hours behind GMT).
The debug set of commands provides the status of and sets the virtual debug switches. There are two commands in this set, which is valid only for C–bricks:
debug
debug <switches>
Use the debug command to determine the current settings for the virtual debug switches. Example B-14 shows sample output from the debug command.
Use debug <switches> command to set the virtual debug switches. The variable <switches> is a hexadecimal value for the switches. Example B-15 shows sample output from this command.
The display set of commands displays text on the front panel display and controls the LEDs on the front panel display. There is one command in this set:
display
Use the display command to view the front panel display status. Example B-16 shows sample output from the display command.
Use the eeprom command to view the eeprom data for a brick.
Example B-17 shows sample output from the eeprom command.
Example B-17. eeprom Command Output
001c07-L1>eeprom PWR/LOG (UNKNOWN) 43 20 01 06 00 00 00 d9 00 02 17 c2 4e 41 c2 4e 41 c1 00 00 00 00 00 84 ff ff ff ff ff ff ff ff ff ff ff ff ff ff ff ff ff ff ff ff ff ff ff ff 00 09 00 3a 52 21 c9 43 45 4c 45 53 54 49 43 41 c4 49 50 33 35 c6 4b 48 4b 35 36 35 cc 30 33 30 5f 31 36 30 34 5f 30 30 31 00 c2 5f 46 01 02 c2 30 30 04 ff ff ff ff 04 ff ff ff ff 04 ff ff ff ff c1 00 00 00 00 00 25 ff ff ff ff ff ff ff ff PIMM 0 - no hardware detected PIMM 1 - no hardware detected DIMM 0 (SPD) 80 08 07 0c 0a 02 48 00 04 a0 80 02 80 08 08 01 0e 04 04 01 02 26 00 00 00 00 00 50 3c 50 30 40 b0 b0 60 60 00 00 00 00 00 00 00 00 00 00 00 00 00 00 00 00 00 00 00 00 00 00 00 00 00 00 00 51 ce 00 00 00 00 00 00 00 01 4b 4d 4d 33 20 34 36 4c 33 33 31 33 42 20 54 2d 47 30 20 42 05 00 14 16 02 09 ff ff ff ff ff ff ff ff ff ff ff ff ff ff ff ff ff ff ff ff ff ff ff ff ff ff ff 64 ff DIMM 2 - no hardware detected DIMM 4 - no hardware detected DIMM 6 - no hardware detected DIMM 1 (SPD) 80 08 07 0c 0a 02 48 00 04 a0 80 02 80 08 08 01 0e 04 04 01 02 26 00 00 00 00 00 50 3c 50 30 40 b0 b0 60 60 00 00 00 00 00 00 00 00 00 00 00 00 00 00 00 00 00 00 00 00 00 00 00 00 00 00 00 51 ce 00 00 00 00 00 00 00 01 4b 4d 4d 33 20 34 36 4c 33 33 31 33 42 20 54 2d 47 30 20 42 05 00 14 19 02 09 ff ff ff ff ff ff ff ff ff ff ff ff ff ff ff ff ff ff ff ff ff ff ff ff ff ff ff 64 ff DIMM 3 - no hardware detected DIMM 5 - no hardware detected DIMM 7 - no hardware detected |
The env set of commands provides the status of environmental conditions in a brick and turns environmental monitoring on and off. The following are the commands in this set:
env
env altitude <high|low>
env reset
Use the env command to view the status of the voltage, fan speed, and internal temperature of a brick. The output of the env command is divided into four areas: environmental monitoring and auto start status, voltage status, fan status, and temperature status (see Example B-18).
Example B-18. env Command Output
001c07-L1>env

Environmental monitoring is disabled.  Auto start at L1 boot is disabled.

Description    State       Warning Limits       Fault Limits         Current
-------------- ----------  -------------------  -------------------  -------
          DIMM    Enabled  10%   2.250/  2.750  20%   2.000/  3.000    2.509
          2.5V    Enabled  10%   2.250/  2.750  20%   2.000/  3.000    2.522
          1.5V    Enabled  10%   1.350/  1.650  20%   1.200/  1.800    1.509
      3.3V aux    Enabled  10%   2.970/  3.630  20%   2.640/  3.960    3.337
       3.3V L1    Enabled  10%   2.970/  3.630  20%   2.640/  3.960    3.302
        5V aux    Enabled  10%   4.500/  5.500  20%   4.000/  6.000    4.992
      12V bias    Enabled  10%  10.800/ 13.200  20%   9.600/ 14.400   12.188
    PIMM0 SRAM    Enabled  10%   2.970/  3.630  20%   2.640/  3.960    3.276
     PIMM0 CPU    Enabled  10%   1.710/  2.090  20%   1.520/  2.280    1.875
    PIMM0 1.5V    Enabled  10%   1.350/  1.650  20%   1.200/  1.800    1.495
PIMM0 3.3V aux    Enabled  10%   2.970/  3.630  20%   2.640/  3.960    3.320
  PIMM0 5V aux    Enabled  10%   4.500/  5.500  20%   4.000/  6.000    4.914
PIMM0 12V bias    Enabled  10%  10.800/ 13.200  20%   9.600/ 14.400   12.125
    PIMM1 SRAM   Disabled  10%   2.970/  3.630  20%   2.640/  3.960   12.125
     PIMM1 CPU   Disabled  10%   1.710/  2.090  20%   1.520/  2.280   12.125
    PIMM1 1.5V   Disabled  10%   1.350/  1.650  20%   1.200/  1.800   12.125
PIMM1 3.3V aux   Disabled  10%   2.970/  3.630  20%   2.640/  3.960   12.125
  PIMM1 5V aux   Disabled  10%   4.500/  5.500  20%   4.000/  6.000   12.125
PIMM1 12V bias   Disabled  10%  10.800/ 13.200  20%   9.600/ 14.400   12.125

Description    State       Warning RPM  Current RPM
-------------- ----------  -----------  -----------
         FAN 0    Enabled         2160         2421
         FAN 1    Enabled         2160         2421
         FAN 2    Enabled         2160         2404

                           Advisory  Critical  Fault     Current
Description    State       Temp      Temp      Temp      Temp
-------------- ----------  --------  --------  --------  ---------
        TEMP 3    Enabled  30C/ 86F  35C/ 95F  40C/104F  26c/ 78F
        TEMP 5   Disabled  30C/ 86F  35C/ 95F  40C/104F   0c/ 32F
|
The environmental monitoring and auto start status area has two statements. The first statement describes the current state of environmental monitoring. The environmental monitoring state is one of the following:
“disabled - initialization error”
“disabled - configuration error”
“disabled - start error”
“disabled”
“disabled - unknown error (0x00)”
“running”
The second statement describes the current state of the auto start. The auto start state is “enabled” or “disabled.”
The voltage status contains five columns as follows:
The Description column provides the name of the supply voltage (2.5 V, 3.3 V, 5 V, etc.).
The State column provides the current state of the supply voltage (Enabled, Fault, Warning, Waiting, or Disabled).
The Warning Limits column provides the range of voltages that, when exceeded, causes a supply voltage to be in a Warning state.
The Fault Limits column provides the range of voltages that, when exceeded, causes a supply voltage to be in a Fault state.
The Current column provides the current value of the supply voltage.
The fan status contains four columns, as follows:
The Description column provides the name of each fan.
The State column provides the current state of the fan (Warning, Enabled, Waiting, or Disabled).
The Warning RPM column provides the lowest revolutions-per-minute allowed before a fan enters a Warning state.
The Current RPM column provides the current value of the revolutions-per-minute for the fan.
The temperature status contains six columns as follows:
The Description column provides the name of a temperature sensor.
The State column provides the current state of the temperature sensor (Fault, Warning, Enabled, or Disabled).
The Advisory Temp column provides the temperature that, when exceeded, causes a temperature advisory state.
The Critical Temp column provides the temperature that, when exceeded, causes a critical temperature state.
The Fault Temp column provides the temperature that, when exceeded, causes the temperature sensor to be in a Fault state.
The Current Temp column provides the current temperature reading from the temperature sensor.
Use env altitude <high|low> to enable a high- or low-altitude setting for the environmental monitoring. The variable <high|low> is high or low. Example B-19 shows sample output from the env altitude high command.
Use the env reset command to reset all current warnings and faults that are set. Example B-20 shows sample output from this command.
| Note: For this command, the mnemonic rst may replace the word reset. |
The fan set of commands provides the status of and sets the fan speed for a brick. There is one command in this set:
fan
Use the fan command to determine whether the fans are on or off and to read the fan speeds. In the fan command output, the number in parentheses is the counter reading for the fan. The counter reading is a value provided by the fan tachometer. The system controller converts the counter reading into a revolutions-per-minute value. Example B-21 shows sample output from the fan command.
Example B-21. fan Command Output
001c07-L1>fan fan(s) are on. fan 0 rpm 2465 (339) fan 1 rpm 2423 (352) fan 2 rpm 2430 (349) |
When the temperature of the brick is below 30 ˚C, the fans run at 2400 rpm. If a fan fails and the speed of the fan drops below 2100 rpm, the system controller increases the fan speed for the fans to 4400 rpm. If any two fans drop below 2100 rpm, the system controller shuts down the brick.
When the temperature of the brick is between 30 ˚C and 40 ˚C, the fans run at 3400 rpm. If a fan fails and the speed of the fan drops below 3100 rpm, the system controller shuts down the brick.
The flash set of commands provides the status of and updates of the firmware images stored in flash memory. The following are the commands in this set:
flash status
flash default <a|b>
flash default current
flash default new
flash default old
flash default reset
Use the flash status command to view the status of the two firmware images stored in flash memory. Example B-22 shows sample output from this command. Each image has a checksum value that indicates whether an image is valid.
Example B-22. flash status Command Output
001c07-L1>flash status Flash image A currently booted Image Status Revision Built ----- -------- ---------- ----- A default 0.7.27 04/28/2000 13:06:43 B valid 0.8.0 05/24/2000 10:50:23 |
Use flash default <a|b> to set firmware image A or firmware image B as the default image that the system controller uses when booting. The variable <a|b> is A or B. Use flash default current to set the current image as the default flash image. Use flash default new to set the new image as the default flash image. Use flash default old to set the old image as the default flash image.
Use flash default reset to set the firmware image with the latest time-stamp as the default image that the system controller uses when booting. If the selected firmware image is not valid, the flash default commands will return the following message: “cannot set default--image A (or B) is invalid!”
The help set of commands provides helpful information on the system controller commands. There are two commands in this set:
help
help <command>
Use the help command to generate a list of all of the system controller commands. Use the help <command> command to display more information on a single command. The variable <command> is the name of a command.
Use the history command to create a list of commands that have been issued. In the history command output, the first number in the history length is the number of commands stored in the history array. The second number in the history length is the maximum number of commands that can be stored in the history array. Example B-23 shows sample output from the history command.
Example B-23. history Command Output
001c07-L1>history History length: 3/20 2: fan speed 4 1: fan 0: env |
Use the l1 command to engage the L1 controller command processor. Press Ctrl+D to disengage the command processor. Example B-24 shows sample output from the l1 command.
The l1dbg set of commands displays and sets the state of communication debugging features. There are eight commands in this set:
l1dbg
l1dbg bedrock <on|off>
l1dbg irtr <on|off>
l1dbg env <on|off>
l1dbg port <on|off>
l1dbg i2c <on|off>
l1dbg uart <on|off>
l1dbg margin <on|off>
Use the l1dbg command to display the state of the communication debugging features. Example B-25 shows sample output from the l1dbg command.
Example B-25. l1dbg Command Output
001c07-L1>l1dbg L1 irouter debugging is off L1 bedrock communication debugging is off L1 environmental debugging is off L1 port interrupt debugging is off L1 i2c interrupt debugging is off L1 voltage margin debugging is off |
Use l1dbg bedrock <on|off> to turn on communication debugging for the L1 controller-to-bedrock-ASIC communication. The variable <on|off> is on or off. Example B-26 shows sample output from the l1dbg bedrock on command.
Example B-26. l1dbg bedrock on Command Output
001c07-L1>l1dbg bedrock on L1 irouter debugging is off L1 bedrock communication debugging is on L1 environmental debugging is off L1 port interrupt debugging is off L1 i2c interrupt debugging is off L1 voltage margin debugging is off |
The remaining l1dbg commands function in the same manner as the l1dbg bedrock <on|off> command. Table B-5 lists the l1dbg commands and describes the debugging features that each command controls.
Command | Description |
|---|---|
l1dbg bedrock < on|off> | Controls bedrock ASIC debugging |
l1dbg irtr < on|off> | Controls irouter debugging |
l1dbg env < on|off> | Controls environmental debugging |
l1dbg port < on|off> | Controls L1-port interrupt debugging |
l1dgb i2c < on|off> | Controls I2C interrupt debugging |
l1dbg uart < on|off> | Controls bedrock UART debugging |
l1dbg margin < on|off> | Controls voltage margin debugging |
The log set of commands displays the contents of the log, resets the log, and writes an entry into the log. There are three commands in this set:
log
log reset
log <entry>
Use the log command to view the contents of the log. Example B-27 shows sample output from the log command. If the log is empty, the output from the log command is “log is empty.”
Example B-27. log Command Output
001c07-L1>log USB: registered as remote USB-R: USB:device was reset USB: unregistered USB-R: IRouter:read failed - read error USB: registered as remote USB-R: USB:device was reset USB: unregistered USB-R: IRouter:read failed - read error USB: registered as remote SMP-R: UART:UART_NO_CONNECTION L1 booting... [L1-0] ALERT: eeprom.c line 367 ; eeprom 0 checksum error. USB: registered as remote L1 booting... [L1-0] ALERT: eeprom.c line 367 ; eeprom 0 checksum error. USB: registered as remote CTI-R: UART:UART_BREAK_RECEIVED CTI-R: IRouter:read failed - read error USB-R: USB:device was reset |
Use log reset to empty the log. Example B-28 shows sample output from this command.
Use log <entry> to write a line in the log. The variable <entry> is text to enter into the log. Example B-29 shows sample output from the log Start the Test command.
The ioport set of commands displays and sets the speeds and clock source of the I/O ports. There are three commands in this set, which is valid only for C-, I-, P-, and X–bricks:
ioport
ioport <speed>
ioport clksrc <a|b>
Note: For the ioport command set, the mnemonic ioprt may replace the word ioport.
Use the ioport command to view the speed of the I/O ports in the C-, I-, P-, or X-brick and the clock source for the universal system time (UST). The I/O port speed is 400 MHz or 600 MHz. In the command output, the word Bedrock refers to the hub ASIC in the C-brick. The word XBridge refers to the crosstown ASIC in the I-, P-, or X-brick. Example B-30 and Example B-31 show sample output from the ioport command.
Example B-30. ioport Command Output for a C-Brick
001c07-L1>ioport
Bedrock I/O port speed: 600 MHz - current, attached I/O is detected
                        400 MHz - default, when no attached I/O detected
|
Example B-31. ioport Command Output for an X-Brick
001i21-L1>ioport
XBridge port A speed: 400 MHz - current, no attached C detected
XBridge port B speed: 600 MHz - current, from attached C
                      400 MHz - default, when no attached C detected
XBridge UST clock source: port A
|
Use ioport <speed> to set the speed of all of the I/O ports in the C-, I-, P-, or X-brick. The variable <speed> is 400 or 600 (400 MHz or 600 MHz). Example B-32 shows sample output from the ioport 600 command.
Example B-32. ioport 600 Command Output
001x004-L1>ioport 600 nvram parameter changed, reset required to affect change. |
Use ioport clksrc <a|b> to set the universal system time clock source in the I-, P-, or X–brick to port A or port B. The variable <a|b> is A or B. Example B-33 shows sample output from the ioport clksrc a command. These commands are valid only for the I-, P-, and X–bricks.
Example B-33. ioport clksrc a Command Output
001x004-L1>ioport clksrc a nvram parameter changed, reset required to affect change. |
Use the istat set of commands to view the status of the memory, queues, tasks, and memory allocation. There are four commands in this set:
istat memory
istat queues
istat tasks
istat pmalloc
Use istat memory to view the status of the memory. Example B-34 shows sample output from this command.
Example B-34. istat memory Command Output
001c07-L1>istat memory SYSMEM [0x30005cf8] Size: 41656 Avail: 26792 SMLPOOL [0x30005cbc] Size: 8704/ 272 Avail: 28 BIGPOOL [0x30005c80] Size: 16640/1040 Avail: 15 |
Use istat queues to view the status of the queues. Example B-35 shows sample output from this command.
Example B-35. istat queues Command Output
001c07-L1>istat queues CMD_REQQ [0x30008a54] Size: 10 Avail: 10 Msgs: 0 CMD_RSPQ [0x30008a9c] Size: 10 Avail: 10 Msgs: 0 SMP_RQUE [0x3000c8a0] Size: 10 Avail: 10 Msgs: 0 SMP_WQUE [0x3000c8e8] Size: 10 Avail: 10 Msgs: 0 SMP_IQUE [0x3000c930] Size: 10 Avail: 10 Msgs: 0 CTI_WQUE [0x3000f38c] Size: 10 Avail: 10 Msgs: 0 USB_WQUE [0x3000ee7c] Size: 10 Avail: 10 Msgs: 0 SCAN_QUE [0x30002440] Size: 20 Avail: 20 Msgs: 0 FLASH_Q [0x30009c64] Size: 5 Avail: 5 Msgs: 0 BDR_WQUE [0x3000a0c8] Size: 10 Avail: 10 Msgs: 0 |
Use istat tasks to view the status of the tasks. Example B-36 shows sample output from this command.
Example B-36. istat tasks Command Output
001c07-L1>istat tasks MAIN_TSK [0x300019f8] (SLEEP ) STACK: 2048 @ 0x300011f8 ( 904 used, 1144 free) USB_CNTL [0x30007f38] (DRV_SUSP ) STACK: 1536 @ 0x30007fe0 ( 288 used, 1248 free) CMD_ITSK [0x300096e4] (READY ) STACK: 3072 @ 0x30008ae4 (1936 used, 1136 free) SMP_RTSK [0x3000e1c8] (EVT_SUSP ) STACK: 2048 @ 0x3000c9c8 ( 800 used, 1248 free) SMP_ITSK [0x3000e318] (QUEUE_SUSP) STACK: 2048 @ 0x3000d9c8 ( 768 used, 1280 free) SMP_WTSK [0x3000e270] (QUEUE_SUSP) STACK: 2048 @ 0x3000d1c8 ( 416 used, 1632 free) ENV_PITK [0x3000a9ec] (SEM_SUSP ) STACK: 1024 @ 0x3000addc ( 276 used, 748 free) ENV_FITK [0x3000aa94] (SEM_SUSP ) STACK: 1024 @ 0x3000b1dc ( 260 used, 764 free) ENV_TITK [0x3000ab3c] (SEM_SUSP ) STACK: 1024 @ 0x3000b5dc ( 264 used, 760 free) ENV_PMTK [0x3000abe4] (SEM_SUSP ) STACK: 1024 @ 0x3000b9dc ( 260 used, 764 free) ENV_FMTK [0x3000ac8c] (SEM_SUSP ) STACK: 1024 @ 0x3000bddc ( 268 used, 756 free) ENV_TMTK [0x3000ad34] (SEM_SUSP ) STACK: 1024 @ 0x3000c1dc ( 324 used, 700 free) BDR_RTSK [0x30009f30] (DRV_SUSP ) STACK: 2048 @ 0x30016524 (1204 used, 844 free) BDR_WTSK [0x3000a020] (QUEUE_SUSP) STACK: 1024 @ 0x30016d34 ( 532 used, 492 free) CTI_RTSK [0x3000f23c] (DRV_SUSP ) STACK: 2048 @ 0x3001717c ( 892 used, 1156 free) CTI_WTSK [0x3000f2e4] (QUEUE_SUSP) STACK: 2048 @ 0x3001798c ( 572 used, 1476 free) USB_RTSK [0x3000edd4] (READY ) STACK: 1800 @ 0x300181d4 ( 732 used, 1068 free) USB_WTSK [0x3000eeec] (QUEUE_SUSP) STACK: 1500 @ 0x300188ec ( 480 used, 1020 free) SCAN_TSK [0x30002398] (QUEUE_SUSP) STACK: 2048 @ 0x30001b98 ( 600 used, 1448 free) I2C_HIGH [0x30007154] (SEM_SUSP ) STACK: 1500 @ 0x300071fc ( 248 used, 1252 free) I2C_LOW [0x30006a2c] (SEM_SUSP ) STACK: 1500 @ 0x30006ad4 ( 396 used, 1104 free) FLASH_T [0x30009bbc] (QUEUE_SUSP) STACK: 1024 @ 0x300097bc ( 316 used, 708 free) |
Use istat pmalloc to view the status of the memory allocation. Example B-37 shows sample output from this command.
Example B-37. istat pmalloc Command Output
001c07-L1>istat pmalloc small pool size: 272 small pool avail: 28 small pool used: 3 small pool max: 25 big pool size: 1040 big pool avail: 15 big pool used: 0 big pool max: 3 pmalloc calls: 0 prealloc calls: 3 history: |
Use the leds command to read the value of the group 0 and group 1 status LEDs in the C-brick. The leds command is valid only for the C-brick. These LEDs connect to I/O expanders that monitor group 0 status LEDs 0 through 15 and group 1 status LEDs 0 through 15. In the output of the leds command, the CPUs correspond to the status LEDs as follows:
CPU A corresponds to I/O expander A_0100001x - group 0 status LEDs 0 through 7.
CPU B corresponds to I/O expander A_0100010x - group 0 status LEDs 8 through 15.
CPU C corresponds to I/O expander A_0100011x - group 1 status LEDs 0 through 7.
CPU D corresponds to I/O expander A_0100100x - group 1 status LEDs 8 through 15.
The number next to the CPU letter is a hexadecimal value that represents the value of the status LEDs that connect to the I/O expander (a bit set to 1 indicates the LED is on, a bit set to 0 indicates the LED is off). Example B-38 shows sample output from the leds command.
Example B-38. leds Command Output
001c07-L1>leds CPU A: 0x02 CPU B: 0x02 CPU C: 0x0f CPU D: 0x0f |
Table B-6. LED Message Explanations
Message on LED | Meaning | Message on LED | Meaning |
|---|---|---|---|
0x00 | PLED_RESET. Slave loop (0x00/0x45=okay, solid 0x00=possibly hung. |
|
|
0x01 | PLED_INITCPU. Init the processor, FP, and C0P0 registers |
|
|
0x02 | PLED_TESTCP1. Test processor C0P1 registers. |
|
|
0x03 | PLED_RUNTLB. Switch to mapped mode. |
|
|
0x04 | PLED_TESTICACHE. Test processor instruction cache. |
|
|
0x05 | PLED_TESTDCACHE. Test processor primary data cache. |
|
|
0x06 | PLED_TESTSCACHE. Test secondary cache. |
|
|
0x07 | PLED_FLUSHCACHES. Flush all caches. |
|
|
0x08 | PLED_CHUBLOCAL. } |
|
|
0x09 | PLED_CKHUBCONFIG. } |
|
|
0x0A | PLED_INVICACHE. Invalidate processor primary I–cache. |
|
|
|
|
|
|
The margin set of commands displays and sets the state of the supply margins. There are three commands in this set:
margin
margin default
margin <low|norm|high>
Note: For the margin command set, the mnemonic mgn may replace the word margin.
Use the margin command to view the current state of the margin values for the supplies in a brick. Example B-39 shows sample output from the margin command.
Example B-39. margin Command Output
001c07-L1>margin
Supply          State Voltage    Margin  Value
--------------  ----- ---------  ------- -----
          DIMM     on    2.509V  default   132
          2.5V     on    2.522V  default   120
          1.5V     on    1.509V  default   110
    PIMM0 SRAM     on    3.276V  default   125
     PIMM0 CPU     on    1.875V  default   142
    PIMM0 1.5V     NC    1.495V  default     3
    PIMM1 SRAM     <not present>
     PIMM1 CPU     <not present>
    PIMM1 1.5V     <not present>
|
Use margin default to set the margin values for the supplies to their default values. Use the margin <low|norm|high> command to set the margin values for the supplies to the low-margin, normal-margin, or high-margin values. Example B-40 shows sample output from the margin default command.
Use margin <voltage> default to set the margin value for a specific supply to its default value.
The network set of commands displays and sets the mode of the network communication interface. There are five commands in this set, which is valid only for C–bricks:
network
network usb
network 422
network autodetect|auto on
network autodetect|auto off
Use the network command to view the current mode of the network communication interface. Example B-41 shows sample output from the network command.
Use network usb to set the network communication interface mode to Universal Serial Bus (USB). Use the network 422 command to set the network communication interface mode to RS-422 protocol. Example B-42 shows sample output from the network usb command.
Example B-42. network usb Command Output
001c003-L1>network usb nvram parameter changed, reset required to affect change. |
Use network autodetect|auto on to turn on the autodetection. Use network autodetect|auto off to turn off the autodetection.
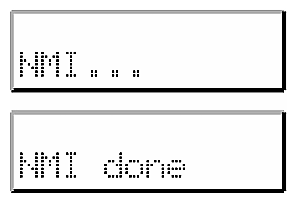
Use the nmi command to issue a non-maskable interrupt (NMI) in a C-brick. The nmi command is valid only for the C-brick.
After the system controller receives an nmi command, it displays “NMI...” on the front panel display and asserts the NMI signal in I/O expander B_0100001x. If no errors occur while the system controller issues the NMI, it displays “NMI done” on the front panel display (see Example B-43 and Figure B-1). If an error occurs, the system controller displays “NMI Fail” on the front panel display.
The pci set of commands displays the status of the PCI cards in an I/O brick, and powers up, powers down, and resets a PCI card. There are six commands in this set, which is valid only for I- and P–bricks:
pci, pci <u|d>
pci reset
pci <bus> <u|d>
pci <bus> reset
pci <bus> <slot> <u|d>
pci <bus> <slot> reset
Note: For this command set, the mnemonic rst may replace the word reset.
Use the pci command to view the value of the status register for each PCI card in an I- or P–brick. The output of the pci command contains eight columns, as follows:
The Bus column lists the number of the bus for each PCI card.
The Slot column lists the slot value for each PCI card.
The Stat column lists the hexadecimal value of the status register for each PCI card.
The Card Type column lists the card type (7.5 W, 15 W, 25 W, or none) for each slot.
The Power column lists the value (error & off, error & on, okay & off, or okay & on) of the power OK and power on bits.
The Attn LED column lists the value (off or on) of the attention LED for the PCI card.
The Enable column lists the value (off or on) of the bus enable bit for the PCI card.
The Reset column lists the value (off or on) of the reset bit for the PCI card.
Example B-44 shows sample output from the pci command.
Example B-44. pci Command Output
001i21-L1>pci Bus Slot Stat Card Type Power Attn LED Enable Reset --- ---- ---- --------- ----------- -------- ------ ----- 1 1 0x91 15W okay & on off on off 1 2 0x57 none okay & off off off on 1 3 0x91 15W okay & on off on off 1 4 0xff on board N/A & N/A N/A N/A off 2 1 0x57 none okay & off off off on 2 2 0x57 none okay & off off off on |
Use pci <u|d> to power up (u) or power down (d) all of the PCI cards in an I- or P–brick. Example B-45 shows sample output from the pci d command.
Use pci reset to reset all of the PCI cards in an I- or P–brick. Example B-46 shows sample output from the pci reset command.
Use pci <bus> <u|d> to power up (u) or power down (d) all of the PCI cards on a bus in an I- or P–brick. The variable <bus> is the bus number. Example B-47 shows sample output from the pci 1 u command.
Use pci <bus> reset to reset all of the PCI cards on a bus in an I- or P–brick. The variable <bus> is the bus number. Example B-48 shows sample output from the pci 1 reset command.
Use pci <bus> <slot> <u|d> to power up (u) or power down (d) an individual PCI card in an I- or P–brick. The variable <bus> is the bus number and the variable <slot> is the slot number. Example B-49 shows sample output from the pci 1 2 u command.
Use pci <bus> <slot> reset to reset an individual PCI card in an I- or P–brick. The variable <bus> is the bus number and the variable <slot> is the slot number. Example B-50 shows sample output from the pci 1 2 reset command.
The pimm set of commands displays the state of and sets the processor inline memory module (PIMM) clock source and clock mode. There are three commands in this set, which is valid only for C–bricks:
pimm
pimm clksrc <external|internal>
pimm clkmode <async|sync>
Note: For the pimm command set, you can use the mnemonics int and ext instead of the words internal and external.
Use the pimm command to determine the PIMM clock source (internal or external) and the clock mode (synchronous or asynchronous). Example B-51 shows sample output from the pimm command.
Example B-51. pimm Command Output
001c07-L1>pimm PIMM clock source is external PIMM mode is asynchronous |
Use the pimm clksrc <external|internal> command to set the PIMM clock source to external or internal. Example B-52 shows sample output from the pimm clksrc internal command.
Example B-52. pimm clksrc internal Command Output
001c07-L1>pimm clksrc internal nvram parameter changed, reset required to affect change. |
Use pimm clkmode <async|sync> to set the PIMM clock mode to asynchronous (async) or synchronous (sync). Example B-53 shows sample output from the pimm clkmode sync command.
Example B-53. pimm clkmode sync Command Output
001c07-L1>pimm clkmode sync nvram parameter changed, reset required to affect change. |
Use the port command to view the value of the status register for each port in the brick. As shown in Example B-54 and Example B-55, the output of the port command contains six columns, as follows:
The Port column lists the name of each port.
The Stat column lists the hexadecimal value of the status register for each port.
The Remote Pwr column lists the value, “okay” or “none,” of the remote power OK bit (bit 0) for each port.
The Local Pwr column lists the value, “okay” or “none,” of the local power OK bit (bit 1) for each port.
The Link LED column lists the value, “on” or “off,” of the link LED bit (bit 2) for each port.
The SW LED column lists the value, “on” or “off,” of the software LED bit (bit 3) for each port.
Note: For this command, the mnemonic prt may replace the word port. Example B-54. port Command Output for an R–brick
001r19-L1>port
Port Stat Remote Pwr Local Pwr  Link LED SW LED
---- ---- ---------- ---------- -------- --------
   A 0x02       none       okay      off      off
   B 0x0f       okay       okay       on       on
   C 0x0f       okay       okay       on       on
   D 0x02       none       okay      off      off
   E 0x02       none       okay      off      off
   F 0x0b       okay       okay      off       on
   G 0x0b       okay       okay      off       on
   H 0x02       none       okay      off      off
Example B-55. port Command Output for a C–brick
001c07-L1>port
Port Stat Remote Pwr Local Pwr  Link LED SW LED
---- ---- ---------- ---------- -------- --------
   A 0x0f       okay       okay       on       on
   B 0x0f       okay       okay       on       on
The power set of commands displays the status of the supplies, and powers up and powers down the supplies. There are three commands in this set:
power
power check
power <up|down>
Note: For the power command set, the mnemonics pwr, u, and d may replace the words power, up, and down.
Use the power command to view the detailed current state of the power and margin values for the supplies in a brick. Example B-56 shows sample output from the power command.
Example B-56. power Command Output
001c07-L1>power
Supply          State Voltage    Margin  Value
--------------  ----- ---------  ------- -----
           48V     on       N/A      N/A
          DIMM     on    2.509V  default   132
          2.5V     on    2.522V  default   120
          1.5V     on    1.509V  default   110
      3.3V aux     NC    3.337V      N/A
       3.3V L1     NC    3.302V      N/A
        5V aux     NC    4.992V      N/A
      12V bias     NC   12.188V      N/A
    PIMM0 SRAM     on    3.276V  default   125
     PIMM0 CPU     on    1.875V  default   142
    PIMM0 1.5V     NC    1.495V  default     3
PIMM0 3.3V aux     NC    3.320V      N/A
  PIMM0 5V aux     NC    4.914V      N/A
PIMM0 12V bias     NC   12.125V      N/A
    PIMM1 SRAM     <not present>
     PIMM1 CPU     <not present>
    PIMM1 1.5V     <not present>
PIMM1 3.3V aux     <not present>
  PIMM1 5V aux     <not present>
PIMM1 12V bias     <not present>
|
Use power check to view the summary of the current state of the power and margin values for the supplies in a brick. Example B-57 shows sample output from the power check command.
Use power <up|down> to power up or power down all of the supplies in a brick. Example B-58 shows sample output from the power up command.
The reboot_l1 command set reboots the L1 controller. There are two commands in this set:
reboot_l1
reboot_l1 <a|b>
Use the reboot_l1 command to reboot the L1 controller using the newest firmware image (firmware image A or firmware image B). Use reboot_l1 <a|b> to reboot the L1 controller using the specified firmware image (A or B).
Use the reset command to perform a reset of the system. After the system controller receives a reset command, it sets various control and status signals back to their default values, and reboots the operating system. Example B-59 shows sample output from the reset command.
Use the router set of commands to view and set the router type. There are two commands in this set, which is valid only for R–bricks:
router
router <type>
Use the router command to view the current router type. Example B-60 shows sample output from the router command.
Use router <type> to set the current router type. The variable <type> is meta (for a meta-router), repeater (for a repeater router), or ordinary (for a regular router).
| Note: For this command, the mnemonics rep and ord may replace the words repeater and ordinary. |
The select set of commands displays and sets the mode of console I/O. There are four commands in this set, which is valid only for C–bricks:
select
select <exp> <exp>
select <subchannel> <a|b|c|d|console>
select filter <on|off>
Note: For this command, the mnemonics sel, sub, and con may replace the words select, subchannel, and console.
Use the select command to view the current mode of console I/O. Example B-61 shows sample output from the select command.
Example B-61. select Command Output
001c07-L1>select console input: 001c07 console console output: not filtered. |
Use the other select commands as follows:
Use select <exp> <exp> to set the rack and slot for console I/O.
Use select <subchannel> <a|b|c|d|console> to set the mode of console I/O to a specified subchannel a, b, c, d, or console (you can also enter 0 for a, 1 for b, 2 for c, and 3 for d).
Use select filter <on|off> to enable (on) or disable (off) the console output filter.
Use the serial set of commands to view and set the system serial number (SSN) that is stored in each brick. The following are the commands in this set:
serial
serial all
serial dimm
serial verify
serial set <str> <str> <str> <str>
serial security on
Use the serial command to view the system serial number (SSN) settings stored in the NVRAM. Use serial all to show the brick serial number (BSN) and the SSN settings in NVRAM. Use serial dimm to show the dual-inline memory module (DIMM) serial number.
Use serial verify to test the brick's readiness for secure serial numbering. Use serial <str> <str> <str> <str> to reassign the SSN for a brick. The variable <str> <str> <str> <str> is the value of a security key that is provided only to SGI employees.
Use serial security on to enable the SSN security.
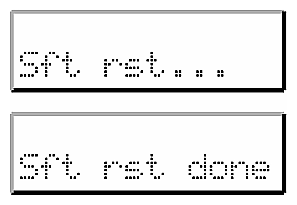
Use the softreset command to issue a software reset in a C-brick. The softreset command is valid only for the C-brick.
After receiving a softreset command, the system controller displays “Sft rst...” on the front panel display and asserts the soft reset signal in I/O expander B_0100001x. If no errors occur while the system controller issues the soft reset, it displays “Sft rst done” on the front panel display (see Example B-62 and Figure B-2). If an error occurs while the system controller issues the soft reset, it displays “Sft rst fail” on the front panel display.
| Note: For this command, you can use the mnemonic softrst instead of the word softreset. |
Use the test set of commands to test various components in the L1 controller. There are seven commands in this set:
test i2c <passes>
test ioexp set <index> <value>
test ioexp get <index>
test ioexp get all
test intr
test display
test exception <value>
For this command, you can use the mnemonic tst and exc in place of the words test and exception.
Use test i2c <passes> to test the I2C bus. The variable <passes> is optional; it represents the number of times to run the test.
Use test ioexp set <index> <value> to set a value for an I/O expander. The variable <index> is an I2C bus address and the variable <value> is the value for the I/O expander.
Use test ioexp get <index> to read a value from an I/O expander. The variable <index> in an I2C bus address. Use test ioexp get all to read the values from all of the I/O expanders.
Use test intr to view the I2C bus interrupt counts. Example B-63 shows sample output from the test intr command.
Example B-63. test intr Command Output
001r19-L1>test intr I2C interrupts, High: 25 Low: 406 DS1780 0, 1: 0 (0x00) 2: 0 (0x00) IOExp 0: 197 IOExp 1: 0 IOExp 2: 0 IOExp 3: 0 IOExp 4: 137 IOExp 5: 0 IOExp 6: 11 IOExp 7: 0 |
Use test exception <value> to test the memory fault handling, stack corruption error handling, software watchdog reset, and fatal_error() call. The variable <value> is mem (for memory fault handling), stack (for stack corruption error handling), wdog (for software watchdog reset), and fatal (for fatal_error() call).
Use the version command to view the version of the firmware that is running in the system controller. Example B-64 shows sample output from the version command.
Example B-64. version Command Output
001r19-L1>version L1 0.7.27 (Image A), Built 04/28/2000 13:06:43 [P1 support] |
The following subsections describe the L2 controller command set. The commands are listed alphabetically and include examples of output where applicable.
The autopower set of commands enables, disables, aborts, and shows the current auto power status. There are four commands in this set:
autopower
autopower on
autopower off
autopower abort
Note: For these commands, the mnemonic apwr may replace the word autopower.
Use the autopower command to view the current auto power up setting. Example B-65 shows the sample output for the autopower command:
Example B-65. autopower Command Output
essc1-001-L2>autopower auto power up appears disabled essc1-001-L2> |
Use autopower on to enable the auto power on. Use autopower off to disable the auto power on. Use autopower abort to abort the auto power on.
The config set of commands displays the L2 controller configuration information. The following are the commands in this set:
config
config summary
config verbose
config l2
config l2 verbose
config rescan
Note: For these commands, the mnemonic cfg may replace the word config. Note: For the summary, verbose, and rescan commands, the mnemonics s, v, and re may replace the words summary, verbose, and rescan.
Use the config command to view the L2 controller configuration information (see Example B-66). In the config command output, the first number is the IP address of the L2 controller (127.0.0.1 in the output below). The number that follows the IP address, after the first colon, is the USB port number (1 in the output below).
Example B-66. config Command output
L2> config 127.0.0.1: 127.0.0.1:0:0 - 001r19 127.0.0.1:1:0 - 001c07 127.0.0.1:1:1 - 001i21 127.0.0.1:2:0 - 001c10 |
The number that follows the USB port number, after the second colon, is the L1 index. Table B-7 lists the values of the L1 index.
L1 Index | Name | Description |
|---|---|---|
0 | Local brick | The C-brick that connects to the L2 through the USB cable. |
1 | Attached I/O brick | An I/O brick that connects to the local brick. |
2 or 3 | Attached C-brick | A C-brick that connects to the local brick. |
3 or 4 | I/O brick attached to the attached C-brick | An I/O brick that connects to a C–brick that connects to the local brick. |
The number that follows the L1 index, after the dash, is the brick identification number (for example, 001c07). The first three digits of the brick identification number indicate the rack in which the brick resides. The fourth digit indicates the type of brick (see Table B-8). The last two digits indicate the slot position in which the brick resides.
Use the other config commands as follows:
Use config summary to see summary configuration information.
Use config verbose to see verbose configuration information.
Use config l2 to see normal L2 controller configuration information.
Use config l2 verbose to see verbose L2 controller configuration information.
Use config rescan to force an L1 controller configuration update.
The destination set of commands displays the brick identification numbers of bricks that are the destinations of L2 commands, and sets the bricks that are the destinations for L2 commands. The following are the commands in this set:
destination
rack <rng> destination
rack <rng> slot <rng> destination
destination reset
partition <exp> <destination>
Note: For these commands, the mnemonic dest may replace the word destination. Also, the mnemonics r and s may replace the words rack and slot. Note: For the <rng> variable, you can enter a single number, numbered items separated by a hyphen to indicate a range, or you can enter numbers separated by a comma to indicate two separate numbered items. For <rng>, you can also enter an asterisk or the word “all” to select all the items available.
Use the destination command to view the brick identification numbers of the bricks that are the destinations of L2 commands. Example B-67 shows sample output from the destination command.
Use rack <rng> destination to set the racks that are the destinations for L2 commands (this command selects all of the bricks in a rack as the destination bricks). The variable <rng> is a rack number, a comma–separated list of rack numbers, or a range of rack numbers indicated by a dash character. Example B-68 shows sample output from this command.
Example B-68. rack <rng> destination Command Output
L2> r 1 destination 4 default destination(s) set L2> destination 001i21 (127.0.0.1:1:1) 001r19 (127.0.0.1:0:0) 001c07 (127.0.0.1:1:0) 001c10 (127.0.0.1:2:0) |
Use rack <rng> slot <rng> destination to set individual bricks that are the destinations for L2 commands. The variable <rng> is a rack number. The variable <rng> is a slot number, a comma–separated list of slot numbers, or a range of slot numbers indicated by a dash character. Example B-69 shows sample output from this command.
Example B-69. rack <rng> slot <rng> destination Command Output
L2> r 1 s 7 destination 1 default destination(s) set L2> destination 001c07 (127.0.0.1:1:0) |
Use destination reset to reset the destination bricks to all racks and all slots. Example B-70 shows sample output from this command.
| Note: For this command, the mnemonic rst may replace the word reset. |
Example B-70. destination reset Command Output
L2> destination reset default destination reset to all bricks and slots |
Use partition <exp> destination to set the partition or partitions that are the destination of the L2 commands. The variable <exp> is a partition number or numbers that are the destination for the L2 commands (if you have more than one partition, separate the partition numbers with a comma). Example B-71 shows a sample output for this command:
Example B-71. partition <exp> destination Command Output
L2> partition 2 destination 1 default destination(s) set L2> destination partition 2 |
The env set of commands provide an environmental status summary. The following are the commands in this set:
env summary
rack <rng> slot <rng> env summary
Note: For this command, r may replace the word reset, and s may replace the word slot and may also replace the word summary. Note: For the <rng> variable, you can enter a single number, numbered items separated by a hyphen to indicate a range, or you can enter numbers separated by a comma to indicate two separate numbered items. For <rng>, you can also enter an asterisk or the word “all” to select all the items available.
Use the env summary command to generate an environmental summary of an entire server system. shows a sample output for the env summary command:
Example B-72. env summary Command Output
essc1-001-L2>env summary all environmental conditions appear normal essc1-001-L2> |
Use the rack <rng> slot <rng> env summary command to display an environmental summary for a particular rack number (or rack numbers) and slot, or slots, in a server system.
The help set of commands provides helpful information on the system controller commands. There are two commands in this set:
help
help <command>
Use the help command to generate a list of all of the system controller commands. Use the help <command> command to display more information on a single command. In this command, the variable <command> is the name of a command.
Use the ip set of commands to set, clear, and show the L2 controller static IP address configuration settings. The following are the commands in this set:
ip
ip <str> <str>
ip <str> <str> <str>
ip clear|reset
Use the ip command to display the L2 controller static IP address settings. Example B-73 shows a sample output for the ip command:
Example B-73. ip Command Output
essc1-001-L2>ip addr: 137.38.88.197 netmask: 255.255.255.0 broadcast addr: 137.38.88.255 essc1-001-L2> |
Use the ip <str> <str> command to set the following L2 static IP configuration parameters: <addr> and <netmask>.
Use the ip <str> <str> <str> command to set the L2 static IP configuration parameters: <addr>, <netmask>, and <broadcast>.
Use the ip clear|reset command to clear the L2 static IP address settings.
The l1 set of commands enters L1 mode or sends an L1 controller command to a specified L1 controller. The following are the commands in this set:
rack <rng> slot <rng> l1
<rack>.<slot> l1
rack <rng> slot <rng> l1 <command>
<rack>.<slot> l1 <command>
:<port>:<l1> l1 <command>
<ip>:<port>:<l1> l1 <command>
Note: For these commands, the mnemonics r and s may replace the words rack and slot. Note: For the <rng> variable, you can enter a single number, numbered items separated by a hyphen to indicate a range, or you can enter numbers separated by a comma to indicate two separate numbered items. For <rng>, you can also enter an asterisk or the word “all” to select all the items available.
Use the rack <rng> slot <rng> l1 command to engage the L1 command processor for the specified rack and slot. In this command, the <rng> variable following rack is a rack number or rack numbers, and the <rng> variable following slot is a slot number or slot numbers. Example B-74 shows sample output from the
rack <rng> slot <rng> l1 command.
Example B-74. rack <rng> slot <rng> l1 Command Output
L2> r 1 s 19 l1 entering L1 mode 001r19, <CTRL-T> to escape to L2 001r19-L1> |
Alternatively, you can use the <rack>.<slot> l1 command to engage the L1 command processor for a specified rack and slot.
Use the rack <rng> slot <rng> l1 <command> command to send a command to a destination brick without changing the default destination value. In this command, the <rng> variable following rack is a rack number or rack numbers, the variable <rng> following slot, is a slot number or slot numbers, and the variable <command> is an L1 controller command such as config. Example B-75 shows sample output from the rack <rng> slot <rng> l1 config command.
Example B-75. rack <rng> slot <rng> l1 config Command Output
L2> r 1 s 7 l1 config :0 - 001c07 :1 - 001i21 L2> |
Alternatively, you can use <rack>.<slot> l1 <command> to send a command to a destination brick without changing the default destination value.
Use the :<port>:<l1> l1 <command> command to send a command to a destination brick that does not yet have a brick identification number assigned to it. In this command, the variable <port> is the port number, the variable <l1> is an L1 controller index number, and the variable <command> is an L1 controller command.
Use the <ip>:<port>:<l1> l1 <command> command to send a command to a destination brick that does not yet have a brick identification number assigned to it. In this command, the variable <ip> is an IP address, the variable <port> is the port number, the variable <l1> is the L1 controller index number, and the variable <command> is an L1 controller command.
Use the l2 command set to engage and lock a specified L2 command processor or to send a command to specified L2 command processor(s). The following are the commands in this set:
l2
rack <rng> slot <rng> l2
rack <rng> slot <rng> l2 <command>
<ip> l2 <command>
Note: For these commands, the mnemonics r and s may replace the word rack and slot. Note: For the <rng> variable, you can enter a single number, numbered items separated by a hyphen to indicate a range, or you can enter numbers separated by a comma to indicate two separate numbered items. For <rng>, you can also enter an asterisk or the word “all” to select all the items available.
Use the l2 command to engage and lock the L2 command processor. Example B-76 shows sample output from the l2 command.
Use the rack <rng> slot <rng> l2 command to engage a specified L2 controller.
Use the rack <rng> slot <rng> l2 <command> command to send a command to a specified L2 controller(s). Use the <ip> l2 <command> command to send a command to an L2 controller specified with its IP address.
Use the multisys set of commands enable, disable, and show the settings for multiple network sharing. The following commands are in this set:
multisys
multisys on
multisys off
Note: For these commands, msys can replace the word multisys.
Use the multisys command to view the current setting for the L2 controller multiple system network sharing. Example B-77 shows the a sample output for the multisys command:
Example B-77. multisys Command Output
L2>multisys L2 multiple system enabled. L2's will only connect to L2s with same system SN. L2> |
Use the multisys on command to enable multiple L2 controller system network sharing. Network sharing enables L2s to talk only to other L2s that have the same serial number. Use the multisys off command to disable multiple L2 controller system network sharing. When L2 controller system network sharing is disabled, L2s talk to all all L2s.
The power set of commands displays the power status of the bricks and powers up and powers down the bricks. The following are the commands in this set:
power
power up
power down
rack <rng> slot <rng> power
rack <rng> slot <rng> power up
rack <rng> slot <rng> power down
power summary
rack <rng> slot <rng> power summary
partition <exp> power up|down|summary
Note: For the power command set, the mnemonics pwr, u, d, and s may replace the words power, up, down, and summary. The mnemonics r and s may replace the words rack and slot. Note: For <rng>, you can enter as a value numbered items separated by a hyphen to indicate a range, or you can enter numbers separated by a comma to indicate two separate numbered items. For <rng>, you can also enter an asterisk or the word “all” to select all the items available.
Use the power command to view the power status of each brick identified by the destination set of commands. Use the power up and power down commands to power up or power down each brick identified by the destination set of commands. Example B-78 shows sample output from the power command.
Example B-78. power Command Output
L2> power 001i21: power appears on 001r19: power appears on 001c07: power appears on 001c10: power appears on |
Use the r <rng> s <rng> power command to view the power status of a specified brick. Use the r <rng> s <rng> power up or r <rng> s <rng> power down command to power up or power down specified bricks. In these commands, the variable <rng> is a rack number and the variable <rng> is a slot number. Example B-79 shows sample output from the r <rng> s <rng> power command.
Use the power summary command to display a power status summary. Use the rack <rng> slot <rng> power summary command to display the power status summary for specified bricks. Example B-80 shows sample output for the power summary command:
Example B-80. power summary Command Output
essc1-001-L2> power summary all 2 bricks appear powered off margin: 1 default, 0 low, 0 normal, 0 high, 0 custom, 0 other essc1-001-L2> |
Use the partition <exp> power up|down|summary command to power up or power down a partition(s), or to display a power summary for the partition(s). Use the <exp> variable to indicate the partition(s) that you want to power up, power down, or for which you want to provide a power summary. Example B-81 shows sample output for the partition <exp> power up|down|summary command:
Example B-81. partition <exp> power up|down|summary Command Output
essc1-001-L2> partition 2 power up partition 2 powered up |
The rackid set of commands are used to display or set the L2 controller rack ID. The following are the rackid commands:
rackid
rackid <decimal exp>
Use the rackid command to display the rack ID of an L2 controller. Example B-82 shows a sample output for the rackid command:
Use the rackid <decimal exp> command to set the rack ID for an L2 controller, where <decimal exp> is the rack ID number to be entered for the L2 controller.
The select set of commands displays and sets the brick ID number and subchannel that receives console input. The following are the commands in this set:
select
select terse
select subchannel console
select subchannel <a|b|c|d>
select subchannel <exp>
select <exp> <exp>
select <rack>.<slot>
select reset
select partition <exp>
select filter on
select filter off
Note: For this command set, the mnemonic sel, t, sub (or s), con, part (or p), res may replace the words select, terse, subchannel, console, partition, and reset.
Use the select command to view the brick ID number and subchannel that receives console input. Example B-83 shows sample output from the select command. In this example, the brick ID is a C–brick in rack 2, slot 1 (002c01) and the subchannel is the console channel.
Example B-83. select Command Output
L2> select console input: 002c01 console console output: not filtered console detection: L2 detected |
Alternatively, you can use the select terse command to provide a terse display of information identifying the brick ID number and the subchannel that receives the console input.
Use the select subchannel console command to select the current console as the as the subchannel of the brick that receives the console input. Use the select subchannel <a|b|c|d> command to select CPU a, b, c, or d of the brick that receives the console input. Alternatively, use the select subchannel <exp> command to select the subchannel CPU of the brick that receives that console input.
Example B-84 shows sample output from the select subchannel <a|b|c|d> command. In this command, the variable <a|b|c|d> is the subchannel letter (a, b, c, or d CPU) of the brick to receive the console input.
Example B-84. select subchannel <a|b|c|d> Command Output
L2> select subchannel c console input: 003c01 CPUc console output: not filtered |
console detection: L2 detected
Use the select <rack>.<slot> command to select the brick (brick ID) that receives console input. Example B-85 shows sample output from the select <rack>.<slot> command. In this command, the variable <rack> is a rack number and the variable <slot> is a slot number. In the example, the brick ID is a C-brick in rack 3, slot 1 (003c01).
Example B-85. select <rack>.<slot> Command Output
L2> select 3.1 console input: 003c01 console console output: not filtered console detection: L2 detected |
Alternatively, use the select <exp> <exp> command to enter the rack and slot of the brick that receives the console input.
Use the select reset command to reset the selection of the brick to receive the console input to the default setting. Use the select partition <exp> command to select the partition and system console to receive the console input.
Use the select filter on command to turn the console output filter on, and the select filter off command to turn the console output filter off. Example B-86 shows sample output from the select filter on command.
Example B-86. select filter on Command Output
L2> select filter on console input: 003c01 console console output: filtered |
console detection: L2 detected
Use the serial set of commands to view and set the L2 controller system serial number. There are two commands in this set:
serial
serial set <str>
Use the serial command to view the L2 controller system serial number. Example B-87 shows sample output from the serial command.
Use the serial set <str> command to set the L2 controller system serial number. In this command, the variable <str> is the L2 system serial number. Example B-88 shows sample output from the serial set <str> command.
Example B-88. serial set <str> Command Output
L2> serial set L0000010 L2 system serial number set to L0000010. L2> serial L2 system serial number: L0000010. |
Use the shell command to escape to the L2 operating system. Example B-89 shows sample output from the shell command.
Example B-89. shell Command Output
L2> shell bash$ rm core bash$ exit exit L2> |
| Note: For this command, you may use the character ! instead of the word shell. |
The smp set of commands displays the status of the system maintenance port (SMP) network connection. These commands are also used to join a specified SMP group or leave a current SMP group. The following are the commands in this set:
smp
smp verbose
smp join <exp>
smp leave
Note: For this command set, the mnemonic v may replace the word verbose.
Use the smp command to view the status of the SMP network connection. Example B-90 shows a sample output for the smp command:
Example B-90. smp Command Output
essc1-001-L2>smp Session Who Group Mode Console ------- ------------- ----- ---- ----------------------- >>> 6 network port 6 L2 038c01 console (default) 1 modem port 1 L2 038c01 console (default) 1 modem port 1 L2 038c01 console (default) essc1-001-L2> |
Use the smp verbose command to display a verbose status of the SMP network connection.
Use the smp join <exp> command to join a specified SMP group identified by the <exp> variable. Use the smp leave command to leave the current SMP group.
Use the sysname set of commands to display or set the system name. The following are the commands in this set:
sysname
sysname <str>
Use the sysname command to display the name of the system. Example B-91 shows a sample output for the sysname command:
Use the sysname <str> command to set a system name where the variable <str> is the system name. Example B-92 shows a sample output for the sysname <str> command:
essc2-001-L2>
Use the version command to view the version of the firmware running in the system controller. Example B-93 shows sample output from the version command.
Example B-93. version Command Output
L2> version L2 version 0.4.0 |
| Note: For this command, the mnemonic ver may replace the word version. |