Users can minimize (stow) your application's window on the Desktop, by clicking the minimize button in the top right corner of the window frame or by selecting “Minimize” from the Window Menu. When a window is minimized, it is replaced by a 100 x 100 pixel representation with an identifying label of 13 characters or less. This is referred to as the minimized or stowed window. (It is also commonly called an icon, but this document uses the term minimized window to prevent confusing it with the Desktop icon.)
This chapter explains how to put the image of your choice on a minimized window. It contains these sections:
“Some Different Sources for Minimized Window Images” discusses different sources from which you can generate a minimize icon picture.
“Creating a Minimized Window Image: The Basic Steps” gives a step-by-step explanation of how to customize your minimize icon.
“Setting the Minimized Window Label” describes how to set the label of your minimized window.
“Changing the Minimized Window Image” mentions some special considerations if you want to change the image in your minimized window while your application is running.
You can make a minimized window image out of any image that you can display on your workstation monitor. This means that you can create a picture using showcase or the drawing/painting tool of your choice, or you can scan in a picture, or you can use the capture tool to capture of some portion of your application. You can even have an artist design your minimized window for you. “Choosing an Image for Your Minimized Window” in Chapter 3 of the IRIX Interactive User Interface Guidelines provides some guidelines for designing minimized window images.
Figure 6-1 shows some different minimized window images that were created in different ways. From left to right: the top row shows a scanned-in photograph, a mediarecorder snapshot of the application itself, a scanned-in photograph that was altered with imp, and scanned-in line art; the bottom row shows a drawing representing the application, scanned-in line art, and two artist-designed images.
It's important for users to be able to easily identify your application's windows when they are minimized, so you should define a specific image and label for each primary and support window in your application. For guidelines on selecting minimize images, see “Choosing an Image for Your Minimized Window” in Chapter 3 of the IRIX Interactive User Interface Guidelines.
To make a minimized window image for your application:
Create an RGB image. If your image is already in RGB format, then all you have to do is resize the image to an appropriate size (look at the setting of the iconImageMaximum resource in 4Dwm to see the maximum size of the stow icon, currently 85x67). See “Resizing the RGB Image Using imgworks” for instructions on resizing the image.
If your image is not in RGB format, you must convert it to RGB. One way to do this is to use the Media Recorder tool to obtain your image. See “Using mediarecorder to Get an RGB Format Image” for instructions.
Scale the image to the correct size. See “Resizing the RGB Image Using imgworks” for instructions.
Name the image file. The filename should consist of two parts:
The application class name (technically, the res_name field of the WM_CLASS property). You can determine the class name by using xprop on your application window and looking at the WM_CLASS property.
The .icon suffix.
This gives you a name of the form res_name.icon. For example, if your application's name is “chocolate,” the name of your image file should be:
chocolate.icon
Put the file in the /usr/lib/images directory.
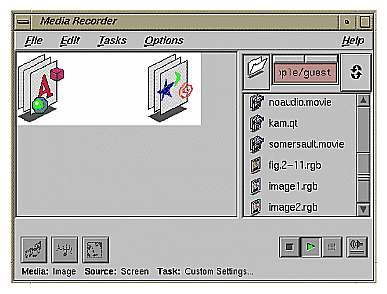
You can use the mediarecorder tool to capture an image on the screen. To invoke mediarecorder, enter:
% mediarecorder |
An example of the mediarecorder tool is shown in Figure 6-2.
You can create a new image file of your minimized window by taking a snapshot of it on the screen.
Display the desired image on the screen.
Click the Image menu button and choose “Still Image from Screen.”
Choose one of the following from the “Still Image from Screen” rollover menu:
Select Area...: Allows you to hold down the left mouse button and drag out a selection outline to mark the area you wish to record.
Window Area...: Allows you to select a particular window on the screen to record. When you choose this menu item, the cursor changes to resemble a camera. To choose a window to record, simply click inside of it.
A dashed outline appears on the screen: the space inside the outline is what will be captured.

Note: To cancel any selection, position the cursor over an edge of the selection outline and click the right mouse button. To bring the selection outline back once it is cancelled, select Edit menu and choose “Show Selection Frame.” Open the Tasks menu, choose Image, and select Screen Snapshot from the Image rollover menu. The snapshot adjusts the capturing file format and frame size so that they are ideally suited for a screen snapshot.

Tip: Once you choose Screen Snapshot, you can view those specific settings by selecting “Show Task Settings” from the Tasks menu. After you select the area, click the Record button.
If you have the Clip Bin open, the image filename appears in the clip bin as soon as the snapshot has been taken.
Your file is given a default name and saved in the directory from which you launched Media Recorder.
To see the image, click the Play button.
If the image looks good, then you're ready to resize it. See “Resizing the RGB Image Using imgworks” for instructions.
See the mediarecorder(1) reference page for more information about using mediarecorder. The mediarecorder is described fully in the Digital Media Tools Guide.
You can use imgworks to resize your RGB image to the appropriate size for a minimized window image. The maximum size is determined by the value of the iconImageMaximum resource in 4Dwm, which is currently 85x67.
To find the imgworks icon, select “File QuickFind” from the Find toolchest. When the QuickFind window appears, type:
imgworks |
into the text field. The imgworks icon appears in the drop pocket. Drag the icon to the Desktop and drop it. Then run imgworks by double-clicking the icon.
To resize your image using imgworks, follow these steps:
Open your image file by selecting “Open” from the File menu and selecting your file from the Image Works: Open Image… window. Your image appears in the main window.
To scale the image, select “Scale…” from the Transformations menu. The Image Works: Scale window appears.
Scale the image by typing in an appropriate scale factor. The dimensions of the new image (in pixels) are listed in the Scale window.
When you're happy with the dimensions listed in the Scale window, click the Apply button. The resized image appears in the main window. Save it by selecting “Save” from the File menu.
Refer to the imgworks(1) reference page for more information on imgworks.
By default, the 4Dwm window manager reuses the title bar label for the minimized window label. To explicitly set the label of the minimized window, change the value of the window's XmNiconName resource. For example, in your application's /usr/lib/X11/app-defaults file, type:
appname*iconName: myApp |
“Labeling a Minimized Window” in Chapter 3 in the IRIX Interactive Desktop User Interface Guidelines lists guidelines for choosing a label.
Your application can also change its minimized window's image while it is running (for example, to indicate application status) by setting the window's XmNiconWindow resource. However, it can be very difficult to handle color images without causing visual and colormap conflicts. If you decide to change the image, the image you install should:
Use the default visual.
Use the existing colormap without creating any new colors (preferably, your image should use only the first 16 colors in the colormap). This potentially implies dithering or color quantization of your image.
Note: The 4Dwm window manager automatically handles your application's initial minimized window image (that is, the image automatically loaded from the /usr/lib/images directory at application start-up). If you don't want to change this image while your application is running, your application doesn't need to do anything to support displaying the image properly.