There is voltage present on the module's midplanes even if the system has been reset or halted.
| Caution: The Onyx2 graphics rack comes with one or more 24-inch SuperWide color monitors. Always use two people to move the monitors. Be sure to practice proper lifting techniques. |
Customer maintenance is limited to the outside of the chassis, where the peripherals and cables attach to the I/O panel. No user-serviceable parts are found within the chassis.
| Note: This product requires the use of external shielded cables in order to maintain compliance with Part 15 of the FCC rules. |
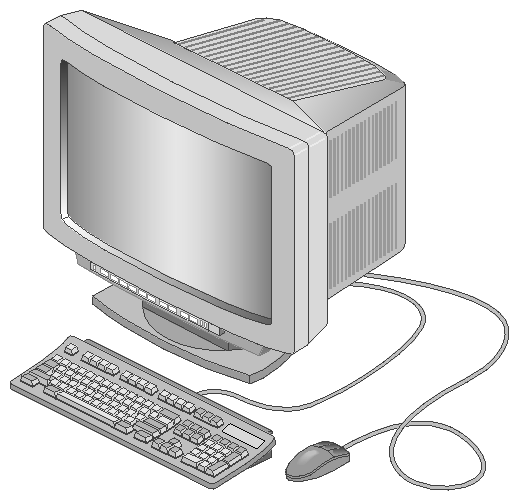
A high-resolution, SuperWide (1920x 1200-pixel) 24-inch monitor ships as the standard monitor for the Onyx2 rackmount systems. This section describes the 24-inch monitor. Connect the monitor by following the steps in the applicable section.
| Caution: Before plugging any monitor into either a 110 VAC or a 220–240 VAC outlet, be sure that the electrical rating on the label is in either the 110 or the 220–240 volt range, whichever applies. |
When using a monitor in locations that do not have either of these outlets, contact your Silicon Graphics system support engineer before plugging in the monitor power cable.
| Note: If you are using a monitor not shipped with your Onyx2 system that has adjustable RGB connectors, make sure they are in the 75-ohm position; otherwise, the monitor displays the wrong colors. |
Use only the cables specified to connect the monitor to the Onyx2 rackmount chassis.
The section “DG5 Board Operation” in Chapter 3 has specific information on cabling options for the Onyx2 graphics rack system.
The InfiniteReality or IR2 graphics system uses a 24-inch, high-resolution monitor. This monitor uses a 13W3-to-13W3 cable. Connect one of the fittings to a 13W3 connector on the DG5 graphics board panel and the other to the back of the monitor. See Figure 4-1 for an example of the 24-inch monitor.
When the system is booted, the monitors operate in their default resolution. To change the default video format, you may use the setmon command. For more information about the setmon command options, see the setmon(1G) man page.
Your system comes with a standard 101-key international keyboard and a mouse. The section “Mouse and Keyboard Ports” in Chapter 3 shows the locations of the two sets of ports on the graphics BaseIO panel.
Each system comes with a 24-foot (7.3 m) “extension” cable that connects to the BaseIO panel. Plug the keyboard and mouse into the end of this cable.
All Onyx2 rackmount systems are configured with one external SCSI channel on the BaseIO (IO6G) board. This standard 68-pin ultra SCSI or SCSI-2 channel is always single-ended.
The difference between single-ended and differential SCSI channels is defined as follows: A single-ended SCSI channel pairs each signal line with a ground line. Differential SCSI channels pair each signal line with a second signal that is the balanced inverse of the first. This configuration makes differential SCSI less susceptible to signal degradation due to noise and more suitable for remote (longer) cabling.
The requirements and limitations of both single-ended and differential SCSI channels are:
The maximum allowable length for single-ended (standard) SCSI cabling is 19.6 feet (6 meters). This maximum length reflects the combined lengths of both the internal and external cables.
The maximum allowable length for differential SCSI is 82 feet (25 meters). As with single-ended SCSI, this length is the sum of both the internal and external cables.

Note: The most common reason for SCSI device failure is insufficient noise margins due to exceeding the maximum cable length, cable impedance mismatches, or a combination of both. If you are having trouble with certain devices, particularly external devices, be sure to verify that you have not exceeded the maximum SCSI cable length.
Always use the shortest cable possible. Route external cables away from potential damage due to foot traffic, cleaning, and so on.
To operate multiple external SCSI devices, you must order optional XIO SCSI boards that plug into the XIO cardcage. An optional PCI module and SCSI boards are also available.
If you have additional questions about SCSI connections and cable lengths, contact your Onyx2 sales or support representative.
The Onyx2 graphics workstation comes with a single standard Ethernet connector. You can order optional XIO boards for additional Ethernet connections. See the section “10/100-Base-T Ethernet Port” in Chapter 3 for information on the location and pin assignments of the standard Ethernet connector.
Power-on the Onyx2 rackmount graphics system as follows:
If the system is completely shut down, verify that the power distribution unit's (PDU's) power switch is turned off and that each graphics module power switch is in the off position.
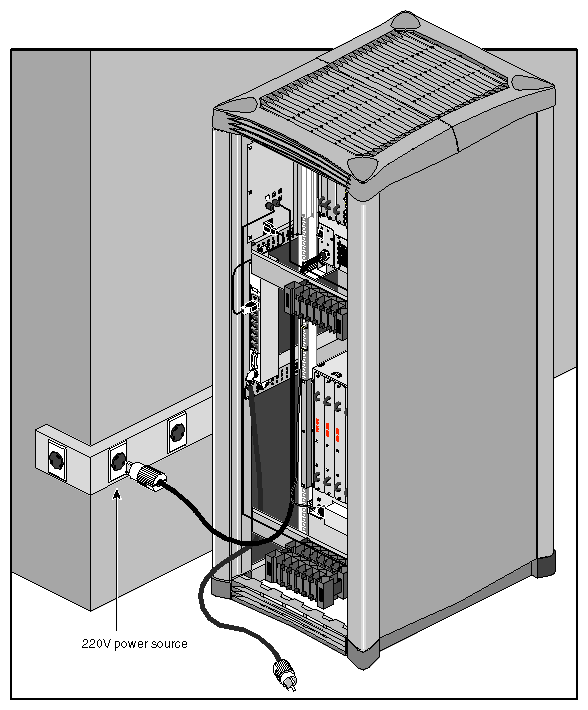
Connect the power cable of each graphics module to a 200-240 VAC wall receptacle (see Figure 4-2).
Power-on all graphics modules by flipping the breaker switch up and into the on position.
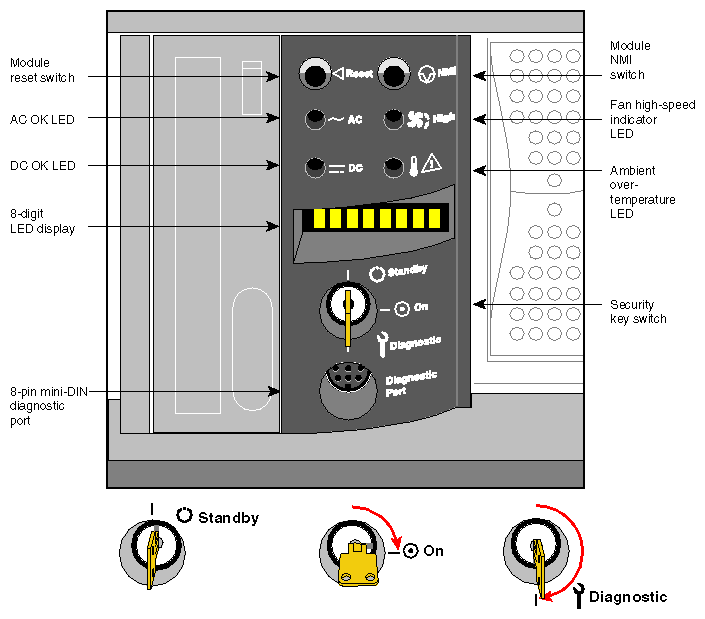
Turn each graphics module System Controller (MSC) keyswitch to the on position (see Figure 4-3).

Warning: The rackmount system operates on 200-240 VAC. Use extreme caution when working around this voltage. Never install or remove power cords without first turning off the equipment.
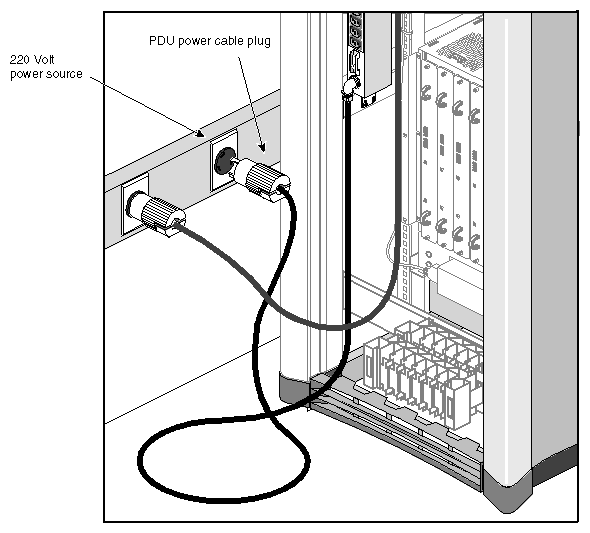
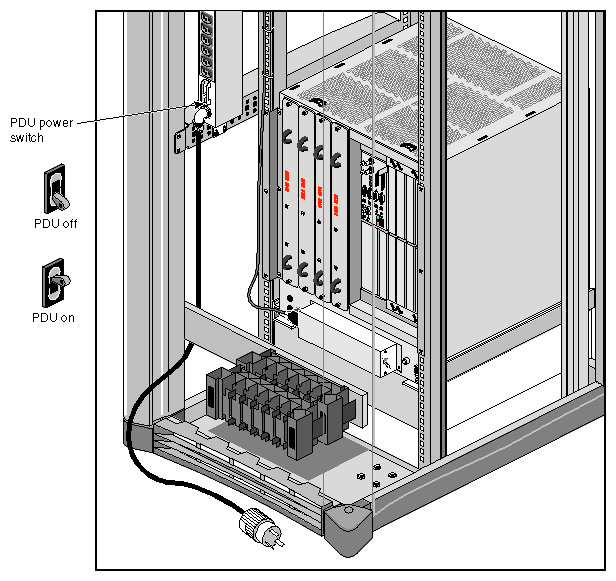
Insert the power distribution unit's (PDU's) power cable into the 220-240 VAC wall receptacle (see Figure 4-4). The power s used for the graphics module and PDU should be sourced and grounded from the same breaker box. For additional information on this topic, see your system's Site Preparation manual.

Caution: Any difference in ground potential greater than 500 millivolts (0.5 V) between two chassis connected together with CrayLink or crosstown cables can cause severe equipment damage.
Connect the power cords of the compute module and the Origin Vault drive expansion box into the PDU.

Caution: If you have a multirack graphics system, the processor compute module must be plugged into the PDU that is supplied with the rack. Do not use a power source outside of the chassis. The CrayLink Interconnect cabling scheme requires that the compute modules share a common AC ground. This helps prevent possible damage to internal hardware components. Connect each multimodule System Controller (MMSC) power cord to the PDU.
Turn the PDU power switch to the on position (see Figure 4-5).

Note: In a multirack graphics system always power-on the MMSC logic unit in the primary rack (the one with the interface panel) last. The primary MMSC pages its network for additional MMSCs only at power on. Therefore, any additional MMSC logic units must already be on line to be recognized. Place the breaker switch on the back of the Origin Vault in the on position.
Push the button on the front of the Origin Vault drive box to fully power it on.
If the monitors and peripherals are equipped with voltage select switches, verify that they are set for the appropriate AC voltage.
Connect the power cords from the monitor(s) and any additional peripherals to the appropriate three-pronged grounded outlets and turn them on.
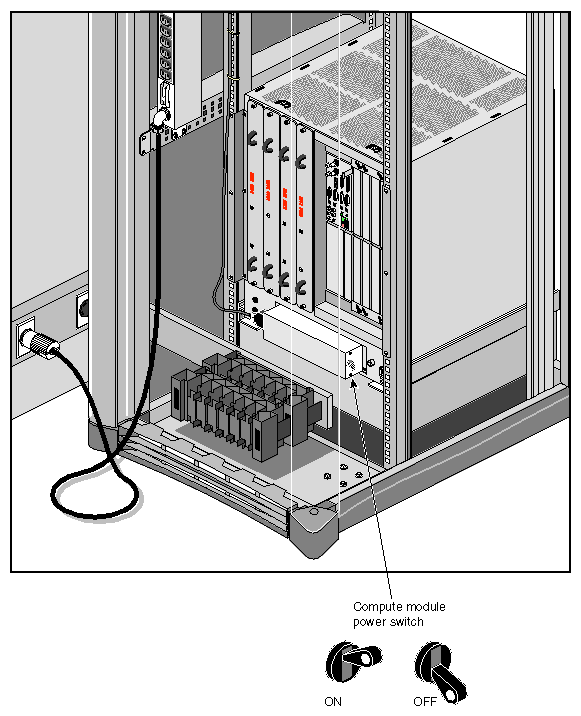
Turn on the processor compute module's main power switch (see Figure 4-6).

Note: All internal storage devices are automatically powered on by the MSC. Turn each compute MSC keyswitch to the on position (as seen in Figure 4-3).
Go to the next section and boot the system.
Boot your system by performing the following steps:
With all system power connections in place and all MSCs turned to on, bring the system fully online using the MMSC front panel.

Note: Do not press any of the front panel buttons on the individual MSCs while the rack is still booting. Pressing the buttons during this process interrupts the boot sequence. Press the Menu/Cancel key so that the front panel's cursor is positioned on the main (top) menu.
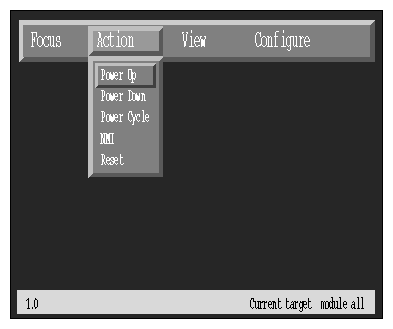
Move the cursor left or right until it covers the Action menu selection.
Press the Enter key if you are ready to power up the rack (or Menu/Cancel to abort).
When all system power-on tests have completed, you see this message on your monitor:
Starting up the system...
To perform System Maintenance instead, press Esc.
To reconfigure your system or to list your system's hardware, press Esc within five seconds.
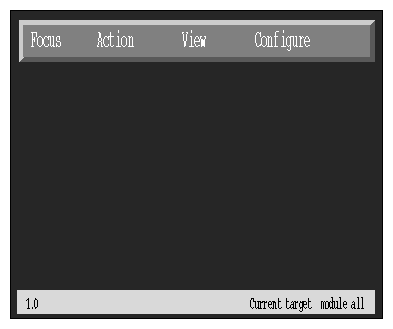
If you do not press Esc within five seconds, the system comes up and displays the desktop. At this time the MMSC interface panel should be displaying the standard processor activity screen, similar to Figure 4-8.
If you need to access the Command Monitor, log in, shut down the system using the System Shutdown command from the System Toolchest, and then restart it when prompted.
When the System Maintenance menu appears, type 5 to select Enter Command Monitor.
When the >> prompt appears, type hinv then press Enter to display the hardware inventory of your system.
See the IRIX Admin: System Configuration and Operation manual for information on reconfiguring your system.
Quit the Command Monitor by typing Exit at the >> prompt.
The System Maintenance menu reappears. Type 1 to select the Start System command. The system comes up and displays the desktop.
The basic IRIX operating system is factory-installed on your system disk. No operating system software installation is required. If additional software is desired, it must be downloaded either locally (using a CD-ROM drive) or downloaded remotely over the network. See the IRIX Admin: Disks and Filesystems manual for additional information about mounting and configuring drives. Refer to the IRIX Admin: Software Installation and Licensing manual for the detailed steps required to download the software.
| Note: A copy of the IRIX operating system is supplied with the system on a compact disc. Place the CD in a secure place in case you ever need to reinstall the operating system. |
The system should be powered off only for routine maintenance or repair. You can power your system off using the following information:
Start the power off by bringing the IRIX operating system down from a shell.
Become superuser by typing /bin/su and press Enter.
Enter your superuser password, if prompted.
When you see the superuser prompt (#), type /etc/halt and press Enter.
The window interface comes down, and a message similar to the following appears on the screen:
Okay to power off the system now.
Press any key to restart.
Turn off the power switches for any external peripherals in the following order:
printer (if installed)
monitors
other external peripherals
Go to the MMSC front panel and press the Menu/Cancel key to bring the cursor to the top menu.
Move the cursor right or left to position it over the Action menu.
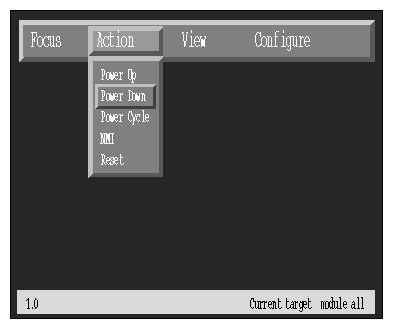
Push the down cursor placement key until it highlights the Power Down option (see Figure 4-9).
Press Enter to power down the rack system (or Menu/Cancel to abort the process).
Turn the MSC keyswitch on each of the system's graphics modules to the standby position.
Push the button to power off any Origin Vault drive boxes that are being used.
Turn the MSC keyswitch on all processor compute modules installed in the system to the standby position.
Place each module's power switch in the off (down) position.
Push the Origin Vault's rear breaker switch to the off position.
Turn the switch at the bottom of the power distribution unit to the off position.

Note: In multirack systems, unplug the PDU power cable from the rack containing the MMSC interface panel last. Unplug the graphic module(s) power cord(s) from the wall socket.
Unplug the PDU power cord(s) from the wall socket.
After completing all these steps, all power to the system is cut off.
